Read these quick tips and tricks that will facilitate your work when sewing, knitting or crocheting.
![Sewing - Tips & Tricks]()
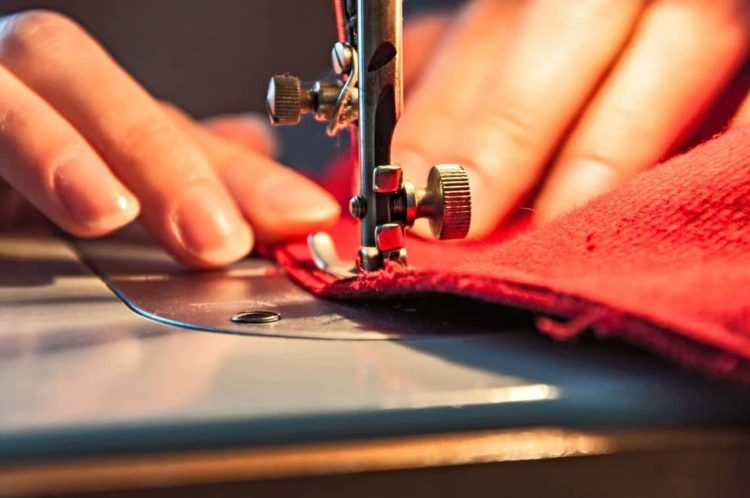
Sewing - Tips & Tricks
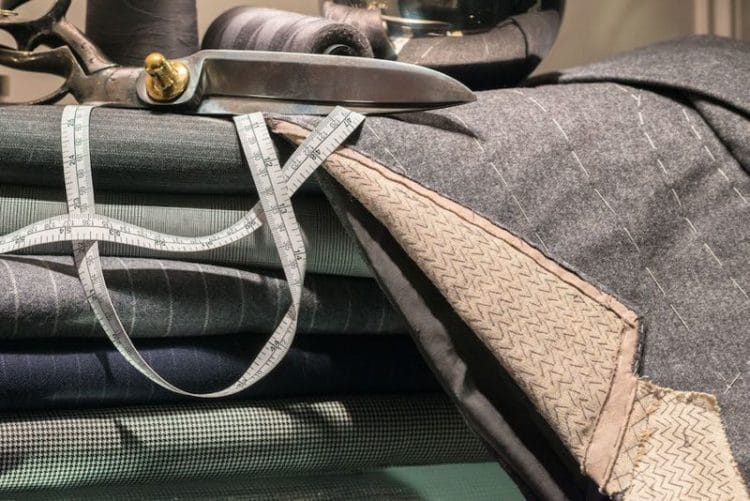
What Not to Forget Before You Start Sewing
![Before you start sewing]()
Before you start sewing
Like me, you certainly experience a lot of euphorias when you bring a new fabric home or when Mr postman delivers it to you. You would preferably straight sit behind the sewing machine and sew and sew… Well, it isn’t as simple. Before the actual sewing or even cutting the fabric, you should first wash it (possibly also dry it up in the dryer) and iron thoroughly. You may be asking
why? For two fundamental reasons:
– The fabric must be CLEAN and shrunk.
– The fabric must not have any creases or folds before cutting.
Maybe you thought that the fabric is new, so it is clean. But the opposite is the truth. Fabrics, especially canvases, are usually coated with a top solid wax layer to prevent their contamination during transport from the production facility to the shop. Have you ever wanted to apply an iron-on transfer on a brand-new fabric and despite proceeding exactly according to the manual, the iron-on transfer peeled off during the first washing? Have you painted or printed on a fabric and even though you fixed your work with an iron, it disappeared during washing? That is precise because you applied the paint, print, iron-on transfer, etc. on the wax layer that was washed away and the application had no way to stick to the fabric.
Another reason for washing the fabric is also the shrinking of materials. Every producer states the percentage of shrinking with a fabric and you should count with that before buying the fabric. So, wash the fabric at the same temperature that you wish to use for washing the whole product in the future. When you bought beautiful knitwear for a T-shirt, wash it according to the manufacturer’s recommendation (it usually is up to 40 °C) precisely at the same temperature that you want to use for washing the ready T-shirt then. In case you also want to dry the T-shirt up in a dryer, dry the fabric in a dryer after washing as well. Thanks to that, the fabric will be sufficiently shrunk and then the ready T-shirt will not shrink or deform.
And after washing and drying, it is also necessary to iron the fabric. If you want to iron something on it, then every fold might cause the iron-on transfer holding poorly. Possibly, unsightly folds would be created due to non-ironed spots. In general, you would find working with a creased fabric difficult.
To sum it up, wash and iron the fabric first before any work with it. The general advice is: Take care of the fabric before the actual sewing in the way you wish to take care of the ready product.
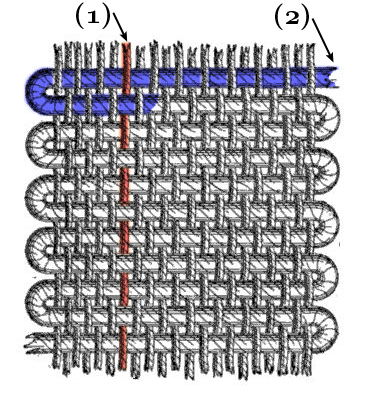
Why Do Some Bought T-shirts Get Twisted?
You bought a beautiful T-shirt. You are looking forward to wearing it tomorrow so you wash it and want to iron it. Suddenly, you wonder what happened to your T-shirt? You haven’t even managed to wear it and it’s already strangely twisted and deformed, one side seam aims towards your belly button, the other towards your back and the sleeves look like corkscrews. Unfortunately, that is not the case with just the cheapest T-shirts (and not only T-shirts but also dresses etc.). Imagine a piece of WOVEN fabric in front of you. It is like a very fine mesh. The fibres go vertically (1) and horizontally (2):
![Fabric]()
Fabric
And we want the T-shirt to neatly hang from the shoulders down to the waist, which means that the vertical fibres must really go vertically. Due to saving time and material and nearly zero care, the fabric for goods in chain stores is occasionally cut slightly askew.
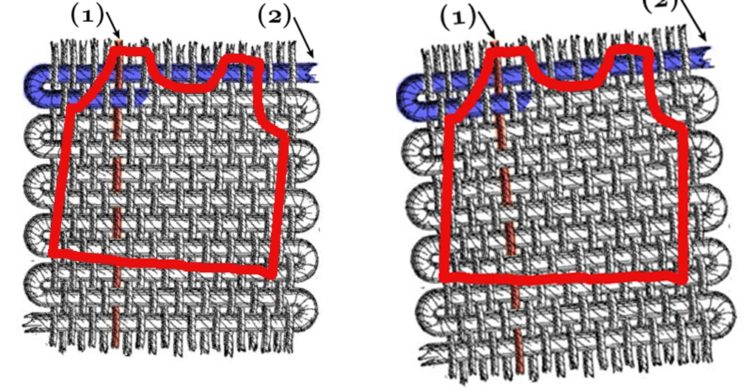
![Fabric, cut askew]()
Fabric cut askew
So, until the material is washed, everything looks OK at first glance. However, after washing, you see that when you try to straighten the T-shirt, the vertical fibres do not go vertically at all and the horizontal fibres do not go horizontally. In the first picture, you can see that the front part of the T-shirt is put askew on the fabric. In the second picture, the fibres on a straight T-shirt do not go the way they should at all.
![Fabric, the T-shirt is twisted]()
Fabric, the T-shirt is twisted
So, when you visit a shop next time, take a look at the bottom hem of the T-shirt whether the fibers that should be horizontal are really parallel to the T-shirt hem or run away from it…
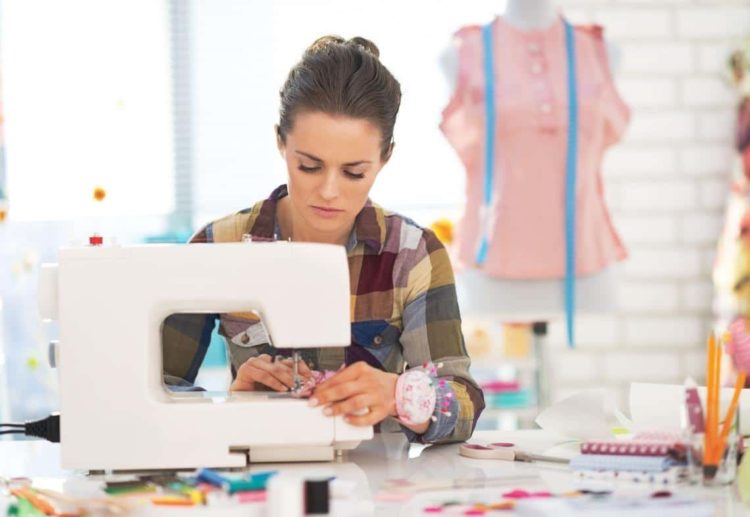
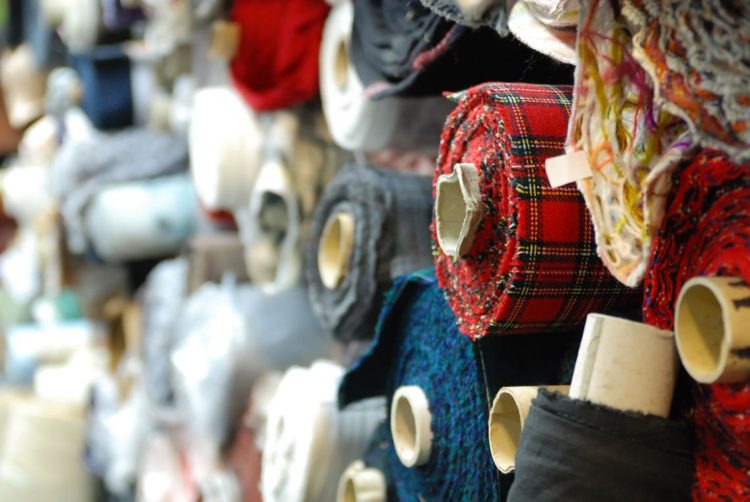
What Fabric to Choose and How Much of It to Buy?
![What fabric to choose]()
What fabric to choose
You have decided to sew a beautiful piece for your wardrobe. You bought a sewing pattern and you are about to visit a fabric store. Before you start looking at all those beautiful fabrics, first look at the pattern, you should also find on the envelope
what type of material the pattern is intended for and how much fabric you need for your size. Believe me that you should not underestimate that information. The pattern is precisely designed for specific materials. So, if you have a sewing pattern for a T-shirt and there is a recommendation for knitwear, stretch materials on the envelope, then definitely do not use fabrics that are not elastic. In the best case, the T-shirt will not fit at all, in the worst case, you will not even pull it over the shoulders because it is a model with a tight silhouette. Likewise, you will not use knitwear for a coat pattern because the coat would hang on you, flow unsightly, and would not keep the shape.
Now you know what material to choose. For example, cotton knitwear. On the envelope, it is stated that you need 1.2 m of fabric for your size. All of a sudden, beautiful knitwear with a striking pattern hits your eye. However, you must be alert in this case. The pattern should align in the seams. The larger the pattern (e.g. large blossoms, the pattern repeats them after several tens of centimeters), the more attention you must pay to the patterning.
In case of large patterns, you must count with larger material consumption because you must respect the repetition of the pattern and you can’t just lay the individual parts of the undershirt on the fabric next to each other. In extreme cases, it will not even be possible to use the fabric (applies to minor creations where the alignment of a large pattern would not be possible at all).
How to calculate fabric consumption
I wrote a detailed article about how to calculate fabric consumption correctly for individual types of clothes, you can read it here:
How to calculate fabric consumption.
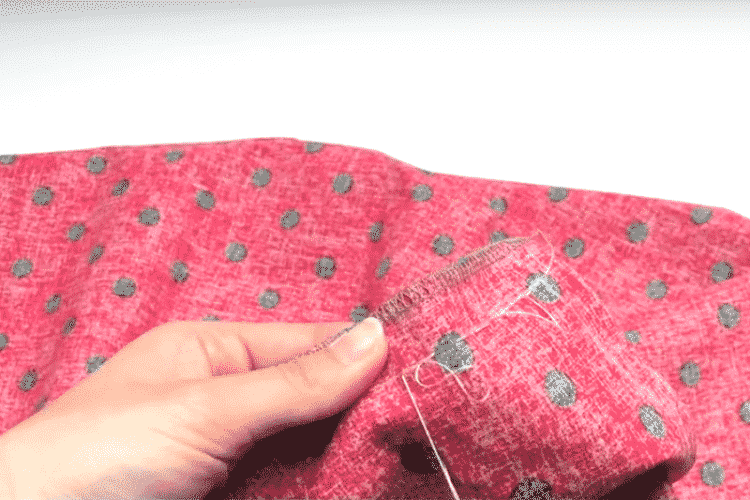
What to Pay Attention to When Choosing a Fabric?
![What to pay attention to when choosing a fabric]()
What to pay attention to when choosing a fabric
When choosing a fabric, you should respect what you want to sew. For a shopping bag, you will certainly not use silk, although the pattern on this fabric would fit very well etc. So, you know what type of material to choose, whether elastic or not. For example, you will sew a children’s T-shirt and look for cotton knitwear. However, no knitwear is the same. A very important property to watch while choosing is
the specific weight. Specific weight is marked in units of g/m². The unit tells you how much does a square of fabric with the size of 1 x 1 m weigh. The weight depends on the density of the fabric and the thickness of individual fibers. So, if you want to sew a T-shirt for the winter, you will seek knitwear with higher specific weight, definitely over 200 g/m². On the contrary, knitwear already around 150 g/m² will be suitable for a summer T-shirt.
On some pattern envelopes, there are arrows along the side, showing how elastic material you should have. Besides the specific weight, you have to pay attention to the
composition of such knitwear. It usually is 95% cotton and 5% elastane. The larger the elastane ratio, the more elastic the fabric will be. Choose according to what you expect from the resulting product, whether it will rather be firmer with a slight play or it will be very flexible (in case of very tight clothes).
Last but not least, you must consider the pattern. With patterned fabric, you need to pay large attention to the pattern being printed on the fabric correctly. You don’t want the ready T-shirt to have the pattern running to one side but to stay really straight. In such a case, lay the pattern part precisely as you wish the pattern to be. However, it may happen that the pattern is printed askew on the fabric. Therefore, the pattern will appear OK on the ready T-shirt but the fabric fibers will be askew, vertical and horizontal fibers will run away and side seams of a T-shirt sewn in this way will twist and will not fit well at the hips.
When choosing a patterned fabric, take a look at its fixed edge and check that the
pattern repeats precisely in this line and does not run upwards or downwards.
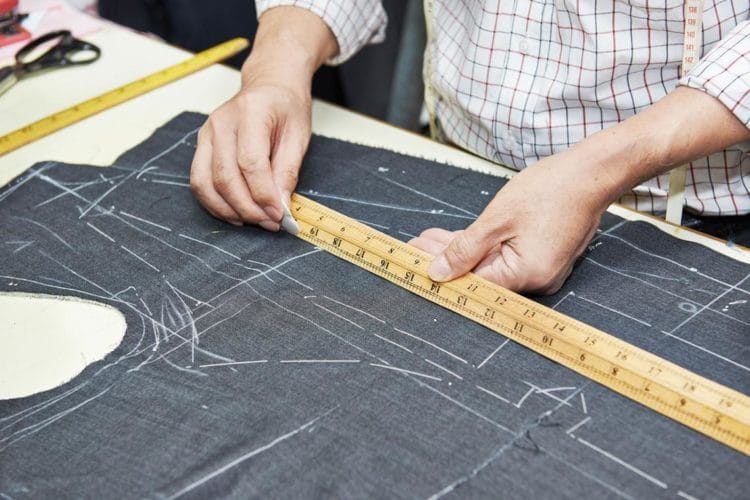
How to Prepare a Pattern
![How to place the pattern on the fabric correctly]()
How to place the pattern on the fabric correctly
Do you also fight with paper sewing pattern? Well, that is over now. A paper pattern usually does not last long, you use it a few times and its edges are creased and rough, often also torn, and those folds in the pattern… So that the paper pattern lasts longer, glue it to hard wrapping paper, so-called grey paper or packing paper. However, before you do it, it is necessary to get rid of all those folds, which is very simple. Iron the paper pattern on a hard pad, do not worry and set the iron to a medium degree and the paper pattern is like new again in a minute. Believe me, it will only take a moment and save you lots of work and you will be able to use your paper patterns for many more years.
How to Assemble a Paper Pattern?
Do you feel like getting mad because of putting individual A4 sheets of paper together and that assembling the pattern together is a nightmare for you? But it does not have to be that way! Take a look at a simple way
how to assemble a paper pattern.
How to Adjust a Sewing Pattern to Fit?
If you sew clothes, then you will not avoid smaller or larger pattern adjustments. Especially if you have a highly unusual physique. I have filmed an entire video on how to prepare a pattern so that the resulting clothes fit well, you can watch it here:
How to adjust a sewing pattern.
How to Transfer Patterns to Fabric?
You have the pattern prepared and hesitate about how to transfer it to the fabric in the most precise and fastest way? Then take a look at a detailed article that I dedicated to this topic:
How to transfer patterns to fabric.
What is Thread Tracing and why use this technique?
![What is thread tracing? Tutorial]()
What is thread tracing? Tutorial
Thread tracing is a classic tailor technique that you can only see rarely today, unfortunately. However, if you sew classic clothes not only from fabrics but also knitwear dresses etc., you should consider starting with thread tracing. The thread tracing is a method thanks to which you can mark the needed marks and lines on parts with millimeter precision. Do you want to have denim pockets on the buttocks exactly the same size and accurately placed? Then view a detailed article with video tutorial
what is thread tracing.
How to Choose a Sewing Machine?
I have written a detailed article on how to choose a sewing machine, what to beware of, what is and isn’t important, you can find it here:
What Needle to Choose for a Sewing Machine?
![What needle to choose for a home sewing machine]()
What needle to choose for a home sewing machine
There are many types of needles for home sewing machines in the market. How to orientate in that quantity and choose the right one? You can find a concise division of the types of needles and their use in an article that is dedicated right to this topic:
How to choose a needle for a home sewing machine.
How to Sew Elastic Fabrics?
Sewing flexible fabrics (e.g. knitwear) without an overlock is not impossible, on the contrary, it may be a child’s play. It is enough to observe 4 simple steps and you will achieve unprecedented results. You can find a detailed article on sewing knitwear here:
4 steps for sewing knitwear.
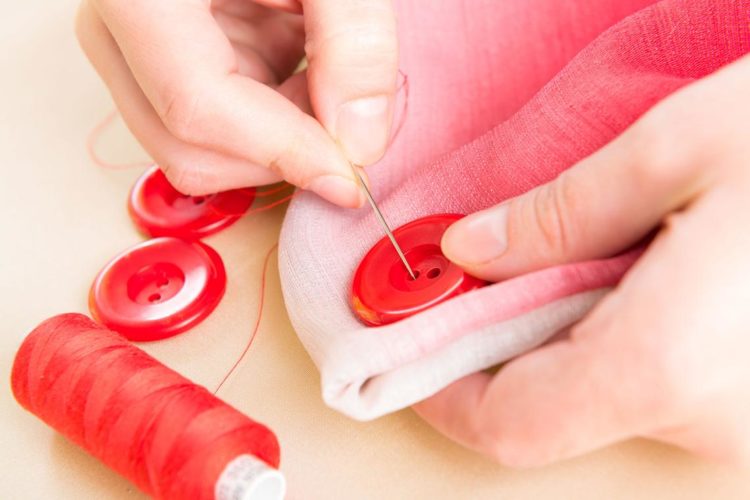
How to Sew a Button Correctly?
![How to sew a button correctly]()
How to sew a button correctly
A banality, you wonder, right? But be careful, a button has to endure a lot and not get detached and it also has to look well. There are tons of kinds of buttons, the basic division are riveting and sewing buttons. The title makes it clear that we will focus on the sewing buttons. We can divide those further according to various parameters such as the material (wooden, plastic, metallic …), fastening type (eye, tunnel, holes), etc. You can find a detailed description of how to sew a button correctly in
this article.
How to Sew a T-Shirt – Everything You Wanted to Know about Sewing a T-Shirt
It may take a few minutes to sew a T-shirt with a little practice. There are many ways how to sew a T-shirt and with time, every sewer will assume a manner that will precisely suit her and her needs. However, a little practice and several practical hints are needed. You can find everything you wanted to know about sewing a T-shirt in this article:
How to sew a T-shirt.


 Sewing - Tips & Tricks
 Before you start sewing
Like me, you certainly experience a lot of euphorias when you bring a new fabric home or when Mr postman delivers it to you. You would preferably straight sit behind the sewing machine and sew and sew… Well, it isn’t as simple. Before the actual sewing or even cutting the fabric, you should first wash it (possibly also dry it up in the dryer) and iron thoroughly. You may be asking why? For two fundamental reasons:
– The fabric must be CLEAN and shrunk.
– The fabric must not have any creases or folds before cutting.
Maybe you thought that the fabric is new, so it is clean. But the opposite is the truth. Fabrics, especially canvases, are usually coated with a top solid wax layer to prevent their contamination during transport from the production facility to the shop. Have you ever wanted to apply an iron-on transfer on a brand-new fabric and despite proceeding exactly according to the manual, the iron-on transfer peeled off during the first washing? Have you painted or printed on a fabric and even though you fixed your work with an iron, it disappeared during washing? That is precise because you applied the paint, print, iron-on transfer, etc. on the wax layer that was washed away and the application had no way to stick to the fabric.
Another reason for washing the fabric is also the shrinking of materials. Every producer states the percentage of shrinking with a fabric and you should count with that before buying the fabric. So, wash the fabric at the same temperature that you wish to use for washing the whole product in the future. When you bought beautiful knitwear for a T-shirt, wash it according to the manufacturer’s recommendation (it usually is up to 40 °C) precisely at the same temperature that you want to use for washing the ready T-shirt then. In case you also want to dry the T-shirt up in a dryer, dry the fabric in a dryer after washing as well. Thanks to that, the fabric will be sufficiently shrunk and then the ready T-shirt will not shrink or deform.
And after washing and drying, it is also necessary to iron the fabric. If you want to iron something on it, then every fold might cause the iron-on transfer holding poorly. Possibly, unsightly folds would be created due to non-ironed spots. In general, you would find working with a creased fabric difficult.
To sum it up, wash and iron the fabric first before any work with it. The general advice is: Take care of the fabric before the actual sewing in the way you wish to take care of the ready product.
Before you start sewing
Like me, you certainly experience a lot of euphorias when you bring a new fabric home or when Mr postman delivers it to you. You would preferably straight sit behind the sewing machine and sew and sew… Well, it isn’t as simple. Before the actual sewing or even cutting the fabric, you should first wash it (possibly also dry it up in the dryer) and iron thoroughly. You may be asking why? For two fundamental reasons:
– The fabric must be CLEAN and shrunk.
– The fabric must not have any creases or folds before cutting.
Maybe you thought that the fabric is new, so it is clean. But the opposite is the truth. Fabrics, especially canvases, are usually coated with a top solid wax layer to prevent their contamination during transport from the production facility to the shop. Have you ever wanted to apply an iron-on transfer on a brand-new fabric and despite proceeding exactly according to the manual, the iron-on transfer peeled off during the first washing? Have you painted or printed on a fabric and even though you fixed your work with an iron, it disappeared during washing? That is precise because you applied the paint, print, iron-on transfer, etc. on the wax layer that was washed away and the application had no way to stick to the fabric.
Another reason for washing the fabric is also the shrinking of materials. Every producer states the percentage of shrinking with a fabric and you should count with that before buying the fabric. So, wash the fabric at the same temperature that you wish to use for washing the whole product in the future. When you bought beautiful knitwear for a T-shirt, wash it according to the manufacturer’s recommendation (it usually is up to 40 °C) precisely at the same temperature that you want to use for washing the ready T-shirt then. In case you also want to dry the T-shirt up in a dryer, dry the fabric in a dryer after washing as well. Thanks to that, the fabric will be sufficiently shrunk and then the ready T-shirt will not shrink or deform.
And after washing and drying, it is also necessary to iron the fabric. If you want to iron something on it, then every fold might cause the iron-on transfer holding poorly. Possibly, unsightly folds would be created due to non-ironed spots. In general, you would find working with a creased fabric difficult.
To sum it up, wash and iron the fabric first before any work with it. The general advice is: Take care of the fabric before the actual sewing in the way you wish to take care of the ready product.
 Fabric
And we want the T-shirt to neatly hang from the shoulders down to the waist, which means that the vertical fibres must really go vertically. Due to saving time and material and nearly zero care, the fabric for goods in chain stores is occasionally cut slightly askew.
Fabric
And we want the T-shirt to neatly hang from the shoulders down to the waist, which means that the vertical fibres must really go vertically. Due to saving time and material and nearly zero care, the fabric for goods in chain stores is occasionally cut slightly askew.
 Fabric cut askew
So, until the material is washed, everything looks OK at first glance. However, after washing, you see that when you try to straighten the T-shirt, the vertical fibres do not go vertically at all and the horizontal fibres do not go horizontally. In the first picture, you can see that the front part of the T-shirt is put askew on the fabric. In the second picture, the fibres on a straight T-shirt do not go the way they should at all.
Fabric cut askew
So, until the material is washed, everything looks OK at first glance. However, after washing, you see that when you try to straighten the T-shirt, the vertical fibres do not go vertically at all and the horizontal fibres do not go horizontally. In the first picture, you can see that the front part of the T-shirt is put askew on the fabric. In the second picture, the fibres on a straight T-shirt do not go the way they should at all.
 Fabric, the T-shirt is twisted
So, when you visit a shop next time, take a look at the bottom hem of the T-shirt whether the fibers that should be horizontal are really parallel to the T-shirt hem or run away from it…
Fabric, the T-shirt is twisted
So, when you visit a shop next time, take a look at the bottom hem of the T-shirt whether the fibers that should be horizontal are really parallel to the T-shirt hem or run away from it…
 What fabric to choose
You have decided to sew a beautiful piece for your wardrobe. You bought a sewing pattern and you are about to visit a fabric store. Before you start looking at all those beautiful fabrics, first look at the pattern, you should also find on the envelope what type of material the pattern is intended for and how much fabric you need for your size. Believe me that you should not underestimate that information. The pattern is precisely designed for specific materials. So, if you have a sewing pattern for a T-shirt and there is a recommendation for knitwear, stretch materials on the envelope, then definitely do not use fabrics that are not elastic. In the best case, the T-shirt will not fit at all, in the worst case, you will not even pull it over the shoulders because it is a model with a tight silhouette. Likewise, you will not use knitwear for a coat pattern because the coat would hang on you, flow unsightly, and would not keep the shape.
Now you know what material to choose. For example, cotton knitwear. On the envelope, it is stated that you need 1.2 m of fabric for your size. All of a sudden, beautiful knitwear with a striking pattern hits your eye. However, you must be alert in this case. The pattern should align in the seams. The larger the pattern (e.g. large blossoms, the pattern repeats them after several tens of centimeters), the more attention you must pay to the patterning. In case of large patterns, you must count with larger material consumption because you must respect the repetition of the pattern and you can’t just lay the individual parts of the undershirt on the fabric next to each other. In extreme cases, it will not even be possible to use the fabric (applies to minor creations where the alignment of a large pattern would not be possible at all).
What fabric to choose
You have decided to sew a beautiful piece for your wardrobe. You bought a sewing pattern and you are about to visit a fabric store. Before you start looking at all those beautiful fabrics, first look at the pattern, you should also find on the envelope what type of material the pattern is intended for and how much fabric you need for your size. Believe me that you should not underestimate that information. The pattern is precisely designed for specific materials. So, if you have a sewing pattern for a T-shirt and there is a recommendation for knitwear, stretch materials on the envelope, then definitely do not use fabrics that are not elastic. In the best case, the T-shirt will not fit at all, in the worst case, you will not even pull it over the shoulders because it is a model with a tight silhouette. Likewise, you will not use knitwear for a coat pattern because the coat would hang on you, flow unsightly, and would not keep the shape.
Now you know what material to choose. For example, cotton knitwear. On the envelope, it is stated that you need 1.2 m of fabric for your size. All of a sudden, beautiful knitwear with a striking pattern hits your eye. However, you must be alert in this case. The pattern should align in the seams. The larger the pattern (e.g. large blossoms, the pattern repeats them after several tens of centimeters), the more attention you must pay to the patterning. In case of large patterns, you must count with larger material consumption because you must respect the repetition of the pattern and you can’t just lay the individual parts of the undershirt on the fabric next to each other. In extreme cases, it will not even be possible to use the fabric (applies to minor creations where the alignment of a large pattern would not be possible at all).
 What to pay attention to when choosing a fabric
When choosing a fabric, you should respect what you want to sew. For a shopping bag, you will certainly not use silk, although the pattern on this fabric would fit very well etc. So, you know what type of material to choose, whether elastic or not. For example, you will sew a children’s T-shirt and look for cotton knitwear. However, no knitwear is the same. A very important property to watch while choosing is the specific weight. Specific weight is marked in units of g/m². The unit tells you how much does a square of fabric with the size of 1 x 1 m weigh. The weight depends on the density of the fabric and the thickness of individual fibers. So, if you want to sew a T-shirt for the winter, you will seek knitwear with higher specific weight, definitely over 200 g/m². On the contrary, knitwear already around 150 g/m² will be suitable for a summer T-shirt.
On some pattern envelopes, there are arrows along the side, showing how elastic material you should have. Besides the specific weight, you have to pay attention to the composition of such knitwear. It usually is 95% cotton and 5% elastane. The larger the elastane ratio, the more elastic the fabric will be. Choose according to what you expect from the resulting product, whether it will rather be firmer with a slight play or it will be very flexible (in case of very tight clothes).
Last but not least, you must consider the pattern. With patterned fabric, you need to pay large attention to the pattern being printed on the fabric correctly. You don’t want the ready T-shirt to have the pattern running to one side but to stay really straight. In such a case, lay the pattern part precisely as you wish the pattern to be. However, it may happen that the pattern is printed askew on the fabric. Therefore, the pattern will appear OK on the ready T-shirt but the fabric fibers will be askew, vertical and horizontal fibers will run away and side seams of a T-shirt sewn in this way will twist and will not fit well at the hips.
When choosing a patterned fabric, take a look at its fixed edge and check that the pattern repeats precisely in this line and does not run upwards or downwards.
What to pay attention to when choosing a fabric
When choosing a fabric, you should respect what you want to sew. For a shopping bag, you will certainly not use silk, although the pattern on this fabric would fit very well etc. So, you know what type of material to choose, whether elastic or not. For example, you will sew a children’s T-shirt and look for cotton knitwear. However, no knitwear is the same. A very important property to watch while choosing is the specific weight. Specific weight is marked in units of g/m². The unit tells you how much does a square of fabric with the size of 1 x 1 m weigh. The weight depends on the density of the fabric and the thickness of individual fibers. So, if you want to sew a T-shirt for the winter, you will seek knitwear with higher specific weight, definitely over 200 g/m². On the contrary, knitwear already around 150 g/m² will be suitable for a summer T-shirt.
On some pattern envelopes, there are arrows along the side, showing how elastic material you should have. Besides the specific weight, you have to pay attention to the composition of such knitwear. It usually is 95% cotton and 5% elastane. The larger the elastane ratio, the more elastic the fabric will be. Choose according to what you expect from the resulting product, whether it will rather be firmer with a slight play or it will be very flexible (in case of very tight clothes).
Last but not least, you must consider the pattern. With patterned fabric, you need to pay large attention to the pattern being printed on the fabric correctly. You don’t want the ready T-shirt to have the pattern running to one side but to stay really straight. In such a case, lay the pattern part precisely as you wish the pattern to be. However, it may happen that the pattern is printed askew on the fabric. Therefore, the pattern will appear OK on the ready T-shirt but the fabric fibers will be askew, vertical and horizontal fibers will run away and side seams of a T-shirt sewn in this way will twist and will not fit well at the hips.
When choosing a patterned fabric, take a look at its fixed edge and check that the pattern repeats precisely in this line and does not run upwards or downwards.
 How to place the pattern on the fabric correctly
Do you also fight with paper sewing pattern? Well, that is over now. A paper pattern usually does not last long, you use it a few times and its edges are creased and rough, often also torn, and those folds in the pattern… So that the paper pattern lasts longer, glue it to hard wrapping paper, so-called grey paper or packing paper. However, before you do it, it is necessary to get rid of all those folds, which is very simple. Iron the paper pattern on a hard pad, do not worry and set the iron to a medium degree and the paper pattern is like new again in a minute. Believe me, it will only take a moment and save you lots of work and you will be able to use your paper patterns for many more years.
How to place the pattern on the fabric correctly
Do you also fight with paper sewing pattern? Well, that is over now. A paper pattern usually does not last long, you use it a few times and its edges are creased and rough, often also torn, and those folds in the pattern… So that the paper pattern lasts longer, glue it to hard wrapping paper, so-called grey paper or packing paper. However, before you do it, it is necessary to get rid of all those folds, which is very simple. Iron the paper pattern on a hard pad, do not worry and set the iron to a medium degree and the paper pattern is like new again in a minute. Believe me, it will only take a moment and save you lots of work and you will be able to use your paper patterns for many more years.
 What is thread tracing? Tutorial
Thread tracing is a classic tailor technique that you can only see rarely today, unfortunately. However, if you sew classic clothes not only from fabrics but also knitwear dresses etc., you should consider starting with thread tracing. The thread tracing is a method thanks to which you can mark the needed marks and lines on parts with millimeter precision. Do you want to have denim pockets on the buttocks exactly the same size and accurately placed? Then view a detailed article with video tutorial what is thread tracing.
What is thread tracing? Tutorial
Thread tracing is a classic tailor technique that you can only see rarely today, unfortunately. However, if you sew classic clothes not only from fabrics but also knitwear dresses etc., you should consider starting with thread tracing. The thread tracing is a method thanks to which you can mark the needed marks and lines on parts with millimeter precision. Do you want to have denim pockets on the buttocks exactly the same size and accurately placed? Then view a detailed article with video tutorial what is thread tracing.
 What needle to choose for a home sewing machine
There are many types of needles for home sewing machines in the market. How to orientate in that quantity and choose the right one? You can find a concise division of the types of needles and their use in an article that is dedicated right to this topic: How to choose a needle for a home sewing machine.
What needle to choose for a home sewing machine
There are many types of needles for home sewing machines in the market. How to orientate in that quantity and choose the right one? You can find a concise division of the types of needles and their use in an article that is dedicated right to this topic: How to choose a needle for a home sewing machine.
 How to sew a button correctly
A banality, you wonder, right? But be careful, a button has to endure a lot and not get detached and it also has to look well. There are tons of kinds of buttons, the basic division are riveting and sewing buttons. The title makes it clear that we will focus on the sewing buttons. We can divide those further according to various parameters such as the material (wooden, plastic, metallic …), fastening type (eye, tunnel, holes), etc. You can find a detailed description of how to sew a button correctly in this article.
How to sew a button correctly
A banality, you wonder, right? But be careful, a button has to endure a lot and not get detached and it also has to look well. There are tons of kinds of buttons, the basic division are riveting and sewing buttons. The title makes it clear that we will focus on the sewing buttons. We can divide those further according to various parameters such as the material (wooden, plastic, metallic …), fastening type (eye, tunnel, holes), etc. You can find a detailed description of how to sew a button correctly in this article.