


If you follow me on social media (Instagram or Facebook), then you may know that I have spent last week writing today's article about trial/test garments - muslins. We will not get into a pattern design, nor will we focus on specific modifications - “what to do ifs” … But we will take a look at how to make a muslin step by step. I will briefly describe some specific and frequently used modifications here. If you want to learn more, I recommend you watch the video. Some things are easy to see in the video and not at all in the photos and vice versa.
What’s a clothing pattern and how is it designed?
I answered the question “What is a clothing pattern?” in my previous article:
Therefore, we can go straight to the “How is it designed?” part of the question.
Clothing pattern is a 2D form that the designer tries to shape so that it fits a 3D body. There are two basic types of clothing patterns, we distinguish them based on their origin. These are either drafted patterns, which are based on the measured body dimensions. You can create this type with the help of a program for clothing pattern development or draw it by hand. The second type are those created by draping and they are called draped patterns. These patterns are modeled directly on mannequins with the same body proportions as the customer. This method is still used today in the shops of traditional luxury tailors - you can see it in practice in renowned fashion houses in major European cities and around the world. The most commonly used clothing patterns, which you can buy in my e-shop, for example, are of the first type - drafted patterns, so we will focus on them.
In order to create a well-fitting pattern, it is necessary to measure yourself or the customer thoroughly. Usually a lot of body dimensions are measured, here are just a few:
- Neck circumference
- Bust
- Back width
- Over bust
- Under bust
- Waist
- Lower waist
- Hips
- Shoulder seam
- Neck to above knee
- Neck to heel
The designer then does his “magic” with curves and lines, resulting in a fitting pattern.
The amount and types of body dimensions that the designer takes are determined by the “construction school” he or she follows. The most important body measurements taken are the same for all approaches.
I noticed that Czech designers and tailors use the German school most often. This style is also used by the world-famous Burda. Vogue, Butterick or McCall patterns are based on an Anglo-Saxon school. There are many small differences between these styles. In any case, if you find a company or manufacturer of clothing whose patterns fit you well, chances are that this will also be the case with the rest of their portfolio. Conversely, you may find that patterns from another brand do not fit you at all. This is probably due to various construction schools used by different manufacturers. It does not mean that the patterns of the particular manufacturer are bad, not at all, they just aren’t great match for your body type...
Now we know what a clothing pattern is and how is it made, so let's move on to the finished pattern.
Why make a muslin
If you read my last article (what is a clothing pattern), then it should be clear to you that sewing a perfect garment without some pattern adjustments is almost impossible. The pattern is only a tool that allows you to sew a piece, but because it is based on averages, it cannot fit all body types without modification. In order to be able to find out what changes a particular pattern needs, you need to make a muslin (sew a test piece). In other words, when you buy a new pattern, the first thing you should do before cutting your precious fabric is to simply look carefully at the pattern to see if there are any pieces that might clash with your body type. For example, if you are particularly tall/small, you can make some length adjustments right away (if you know how) and make a partially modified muslin.
What material to use for a muslin
For sewing test pieces (sometimes referred to as “calico”, “muslin” or “toile”) you should use a fabric that is similar to the fabric from which you want to sew the final product. If you are going to make a blouse, simply use a cotton canvas, but if you are going to use some kind of knit for your final product, you should use a knit with a similar elasticity to make a muslin.
Below is a list of specific materials that I use for my test pieces. You often ask what a calico fabric is and where to get it. Calico is a group of fabrics of a plain weave made from a cheap yarn (usually carded cotton). It's essentially a canvas. Cotton fibers are simply carded into yarns and the yarns are then used to make a fabric of a plain weave. Even simpler way to put it - calico is a low-quality cotton fabric. When a tailor says "calico", he/she usually means a natural cotton canvas (cheap, lower quality, raw) of gray or natural color (undyed = cheaper). You can sew your test pieces from any canvas (or knit) that you will not be particularly sorry to cut up or throw away. I recommend using light monochromatic materials (ideally gray or natural). The colors and prints won't distract you and you will be able to concentrate on making the pattern fit. I recommend buying a cheap monochromatic knit for making muslins of a knitwear garments. So, if you come across some monochromatic material at a great price, consider buying a larger stock that you can use to make a muslins...
I use the following materials for my muslins:
1) Cotton Muslin
It is a rigid, heavy canvas. I use it to sew test pieces of jackets and coats - garments from thicker fabrics. This is a very similar product: Cotton canvas (natural)
2) Natural cotton - softened
Pleasant to touch and more flowing than the previous product. I use it to sew samples of pants and shirts - garments from medium fabrics.
3) Organdy
Thin and flowing material. I use it to make muslins of blouses, light dresses, and clothing for which I plan to use thin flowing fabrics (blouse fabrics, viscose fabric, etc.)
4) Beige knit (single-faced / double-faced knit)
I use it to test patterns calling for various knits, French Terry, etc. Plain double-faced knit is great for test pieces of garments made from tracksuit fabric and other thick and elastic materials.
So, if you sew a lot, it is good idea to have a few different and cheap woven fabrics and at least one knit at hand, so you can make muslins of various garments. The more the sample material resembles the fabric of the final product, the better.
How to test the elasticity of your material
There is not much talk about the elasticity of fabrics, although this is a very important property. Elasticity is a number that tells us how much (by how many percent) can you stretch a particular fabric. The elasticity of the material is relatively easy to determine. Put a measuring tape in front of you and place your fabric just below it (so that it stretches parallel to the tape). Use the thumb and forefinger of your left hand to hold the fabric (at least 3 cm from its firm edge) in the place where the measuring tape begins (at 0 cm). Grab the fabric at the 10 cm mark with the fingers of your right hand and pull on the fabric. Don’t pull too hard - this is about finding the maximum “reasonable” stretch - imagine yourself wearing this stretched fabric. For example, when you reach the 13 cm mark with your right hand, it means that it’s possible to stretch 10 centimeters of your fabric by 3 centimeters, the elasticity of the material is therefore 30%. See the article below for detailed instructions on how to determine the elasticity of a fabric and useful scale.
How to test the elasticity of your material
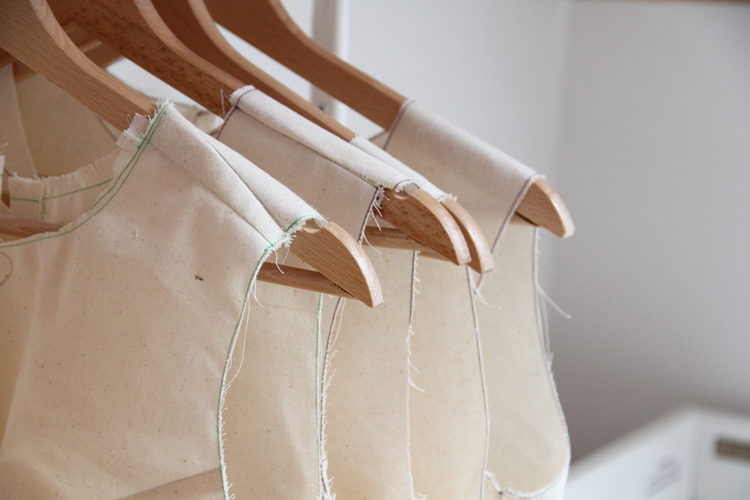
Try to choose light fabrics for your muslins. Calico usually has a natural color - creamy. You can also choose white; in any case the fabric should be monochromatic and light. Light is great, because it allows you to clearly see any shadows and therefore folds that should not be on the garment.
Accept that you will destroy your muslin fabric beforehand. This is very important, because you just can't be afraid to cut into your muslin, draw on it, cut it and throw it away…
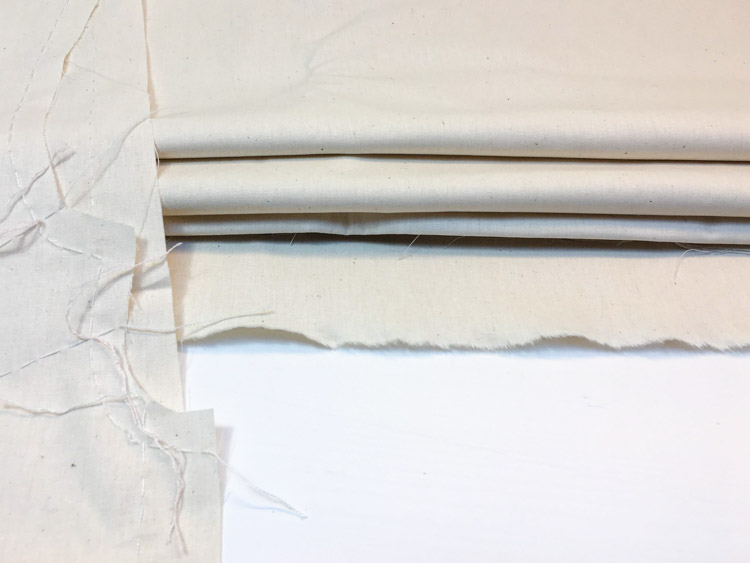
Before you start positioning the pattern pieces on the fabric, it is necessary to “tear the fabric along the weft”, so that it is truly straight and that the warp threads do not twist around. Do not wash/pre-shrink the fabric before making a muslin - it is only for a test sample and you aren’t going to wash it in the future.
How to make a muslin
Today, I will focus on an upper body garment. I will sew according to the upcoming pattern for the blouse (which should be available next week), but the procedure is very for all upper body garments.
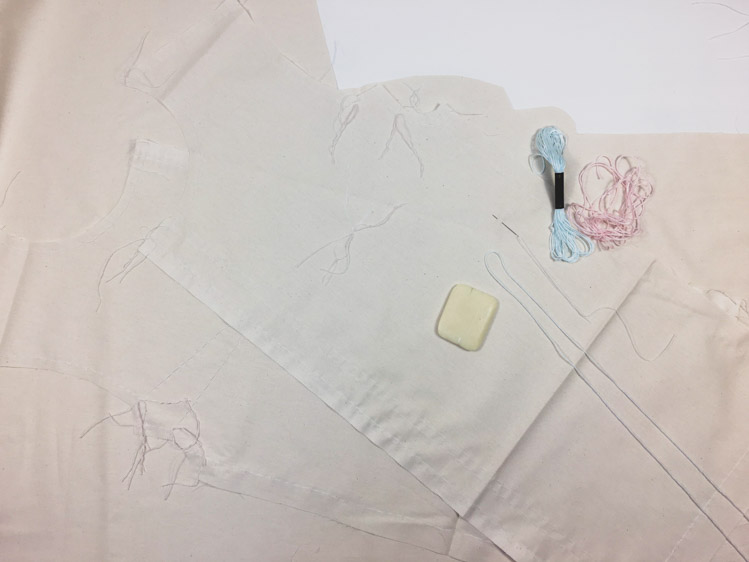
Transfer the pattern pieces to your muslin fabric and don’t forget to add seam allowances:
- side seams (front/back piece) - 2 cm
- sleeve seams - 2 cm
- near button placket (front piece) - 2 cm
- bottom hems (front/back piece) - 2 - 3 cm
- everywhere else - 1 cm
Also, carefully transfer all marks from the pattern. The calico is perfectly marked with an ordinary pencil. The graphite pencil is perfect for drawing on my material (calico).
I often use the word "sew" in the following part of the article and by that, I mean "stitch by hand". I usually do not use the sewing machine to sew the test sample. I will definitely have to make some adjustments and it would take a lot of time to rip the seams. I only use my machine to sew muslins created according to the tailor-made pattern - there is not much room for modifications anyway.
But if you want to know how to sew a test sample on a machine, check out this article:
A muslin made using a sewing machine
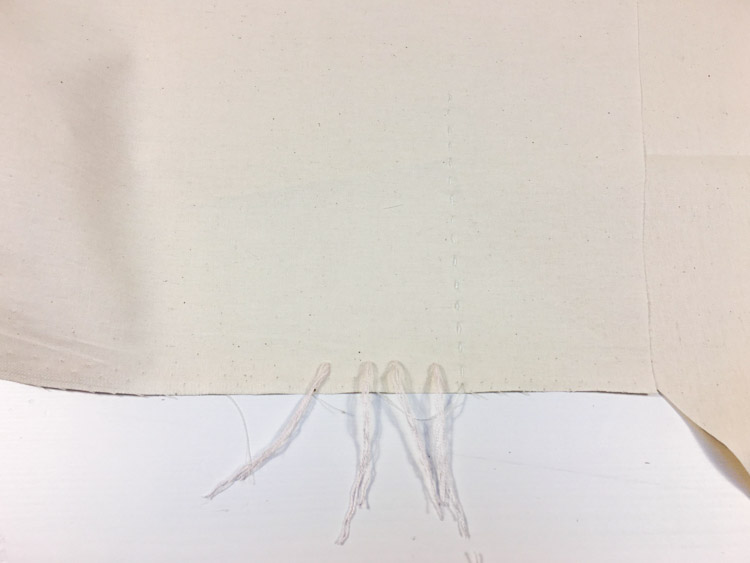
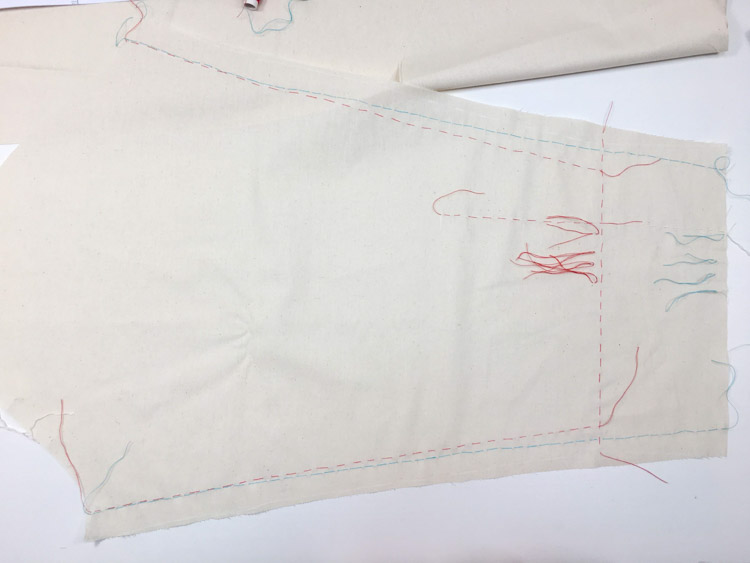
Mark the breast darts, if there are any in your pattern. As you can see, my breast darts are “fatter” near the tops. It's just a matter of taste, I like breast darts shaped like this, but you can make them straight, that's entirely up to you. Moreover, shape of the darts can be modified later - that’s what a muslin is for.
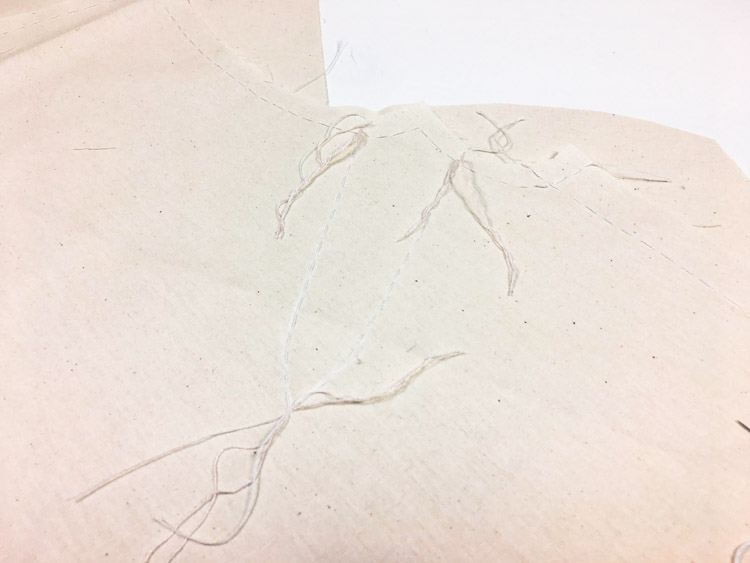
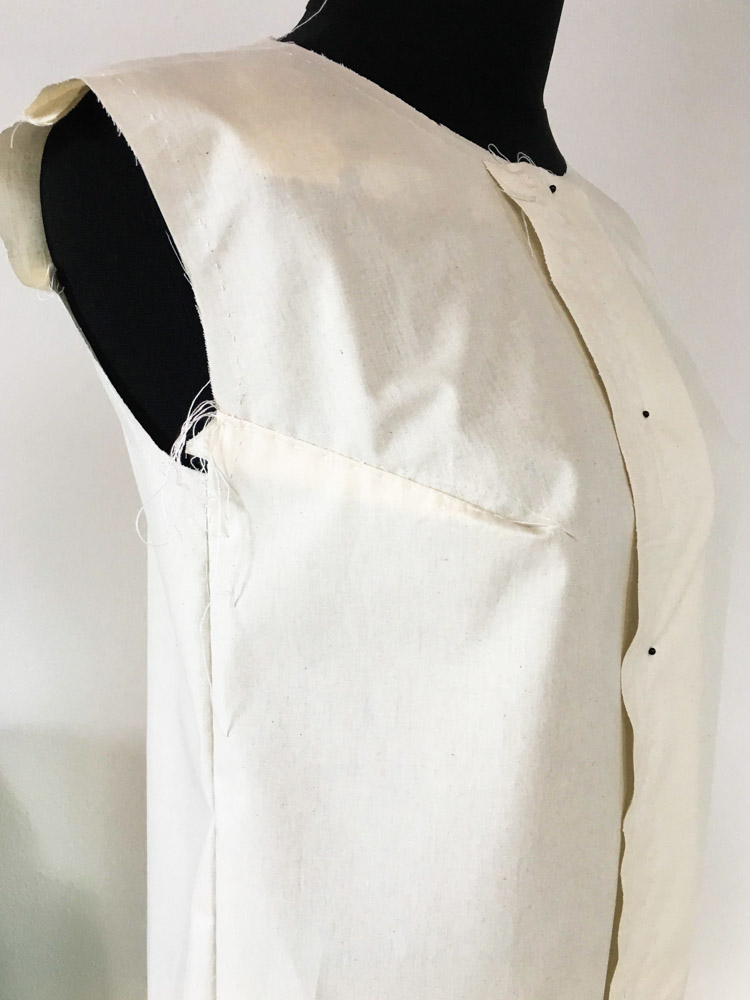
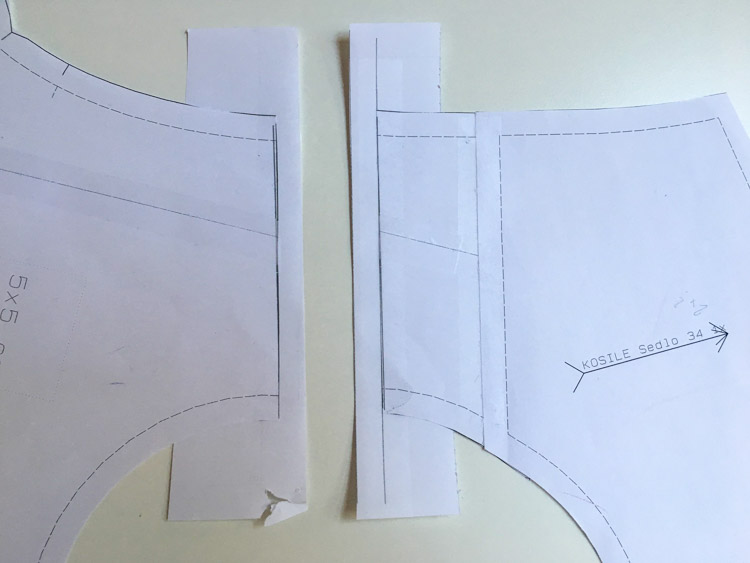
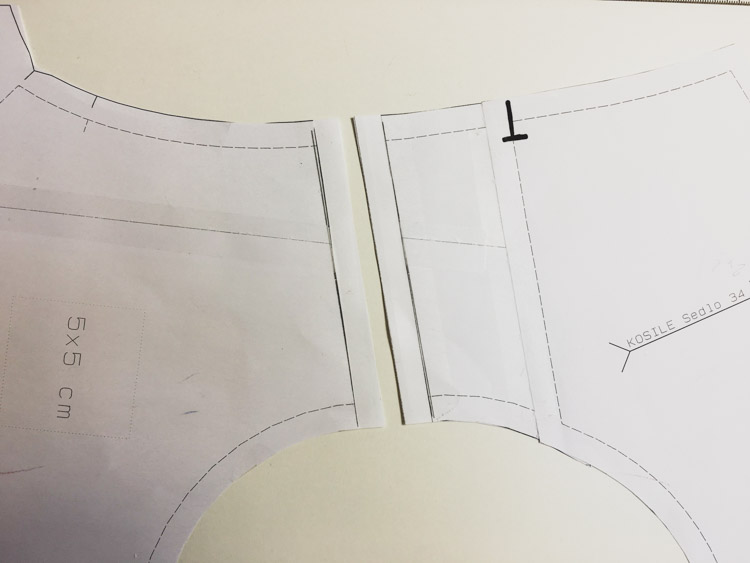
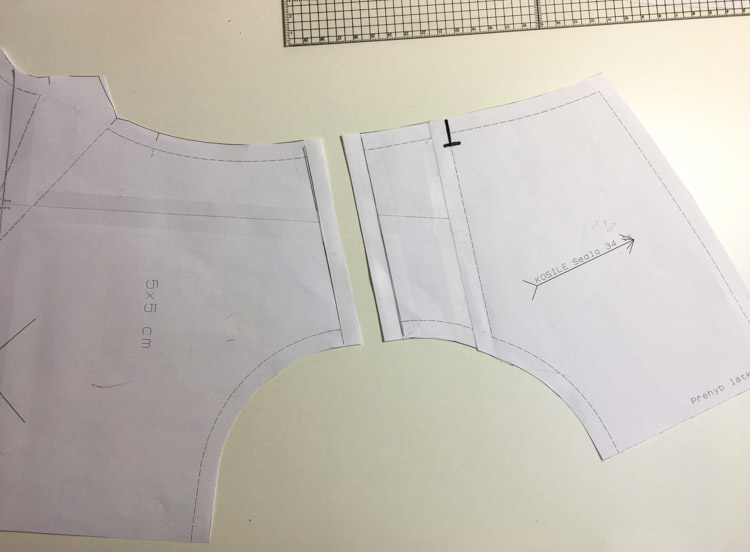
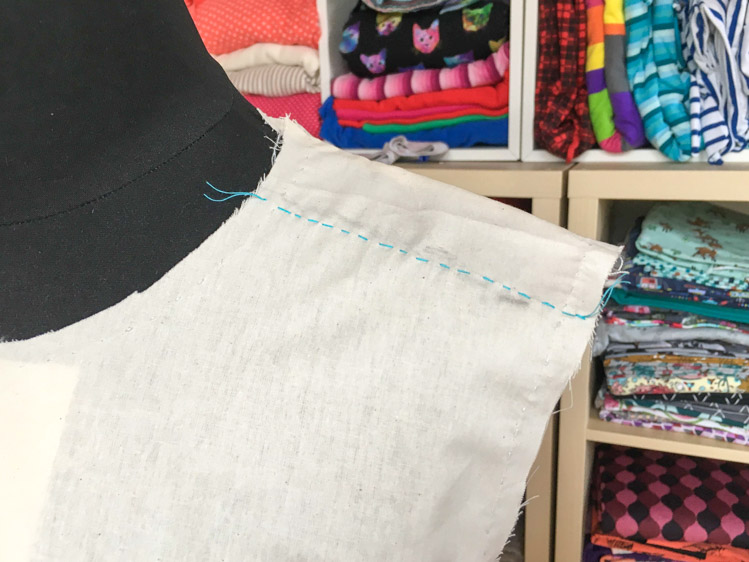
It is also very important to mark the button placket, its fold line and tis centerline. Let’s take it from the left side - there is a 2 cm wide seam allowance, then there is a seam allowance fold line, 2 cm to the right is a button placket fold line and the rightmost mark is the center line (there will be buttons and buttonholes on this line). when you overlay two front pieces, as if you wanted to button up the shirt (the centerlines lie on top of each other), there should be a 2 cm wide overlap.
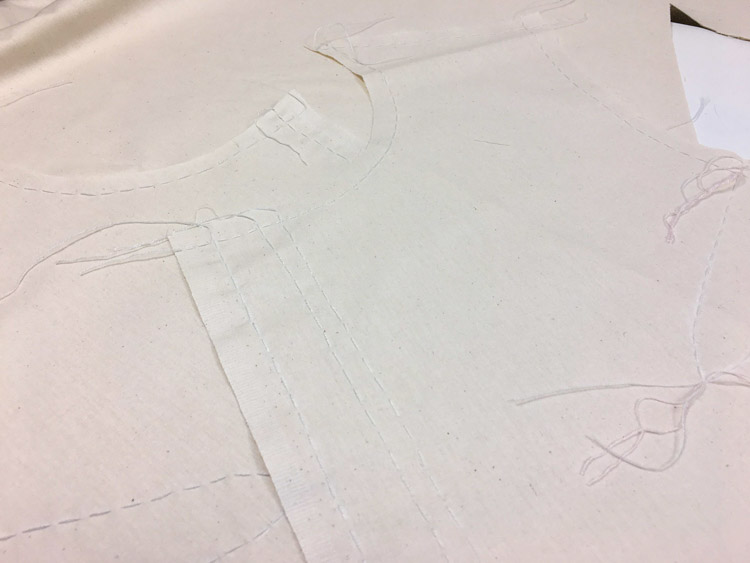
You can mark all lines with pencil or thread, that’s up to you. I recommend using a thread. You can simply pull it out when you need to make some changes so your muslin won't be full of confusing lines. Measure and check your lines as you go to avoid unnecessary mistakes.
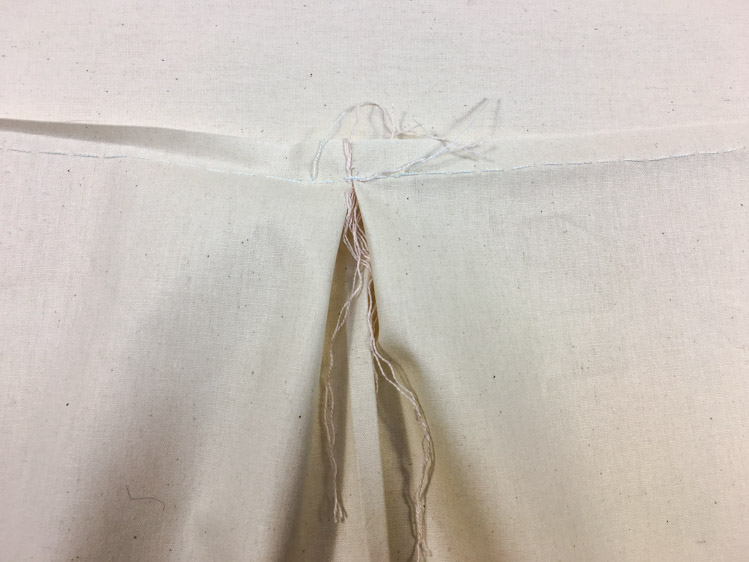
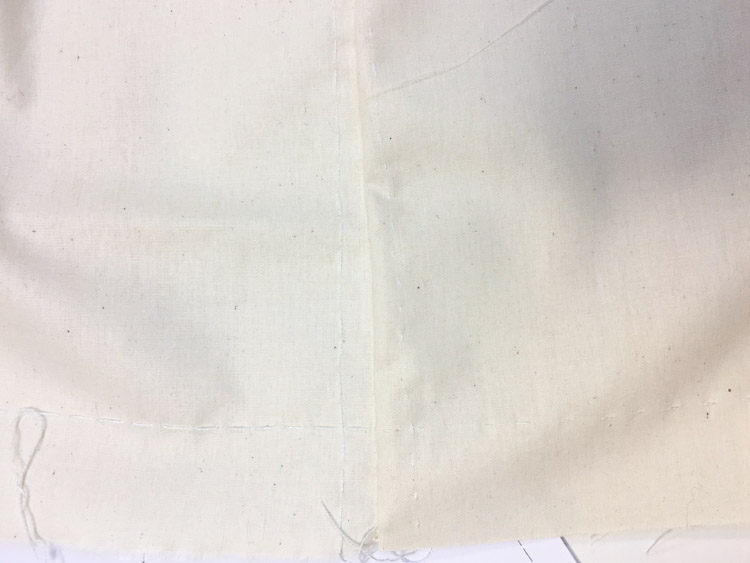
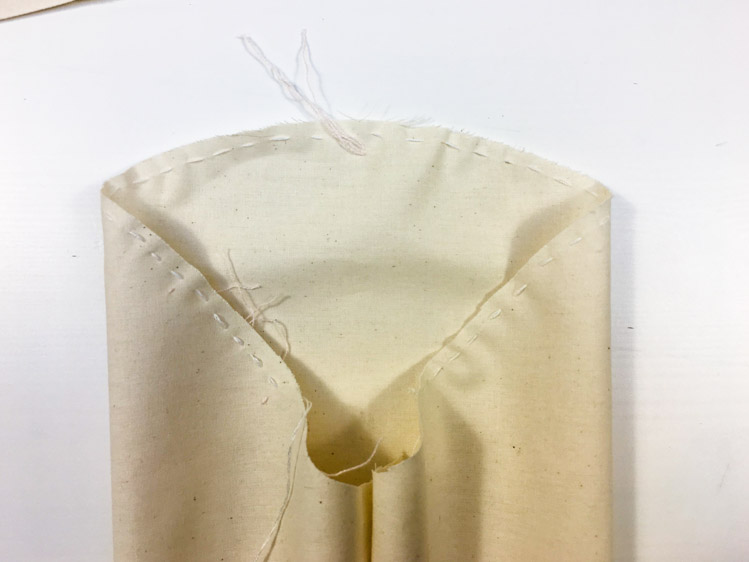
If you have a back piece with a center box pleat, sew it first. The photo below shows a center box pleat that is common on men's and women's shirts - seen from the face side.
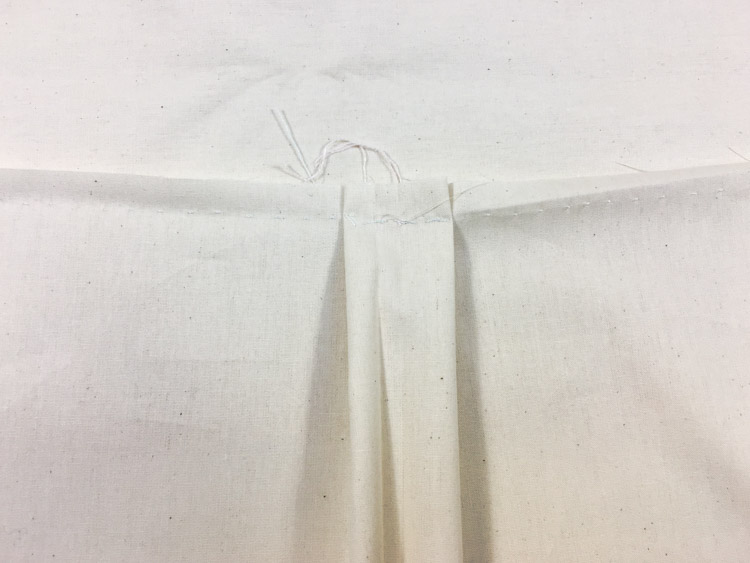
This is how it looks from the reverse side. But I often use it like this on the face side of casual clothes - like light suits, jackets and coats. It looks more feminine and playful. So, this will be the face side of my blouse. Then stitch the yoke to the back piece.
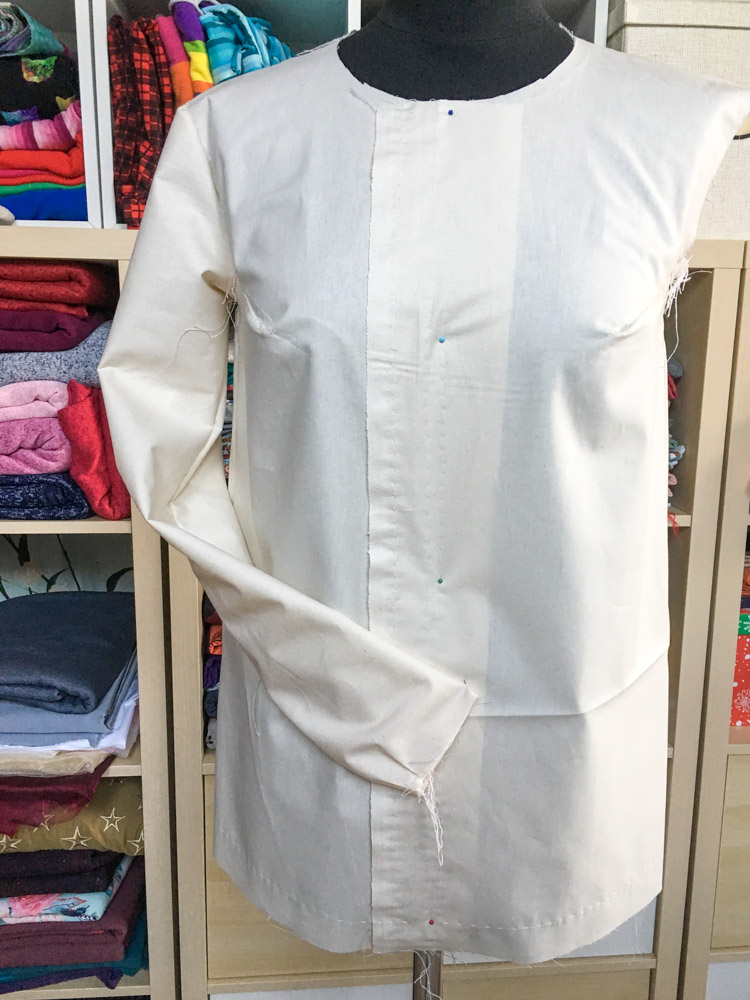
Next sew the bust darts. Pin the side seams (reverse side to reverse side). This is so that you can easily see if and where the side seams need to be adjusted.
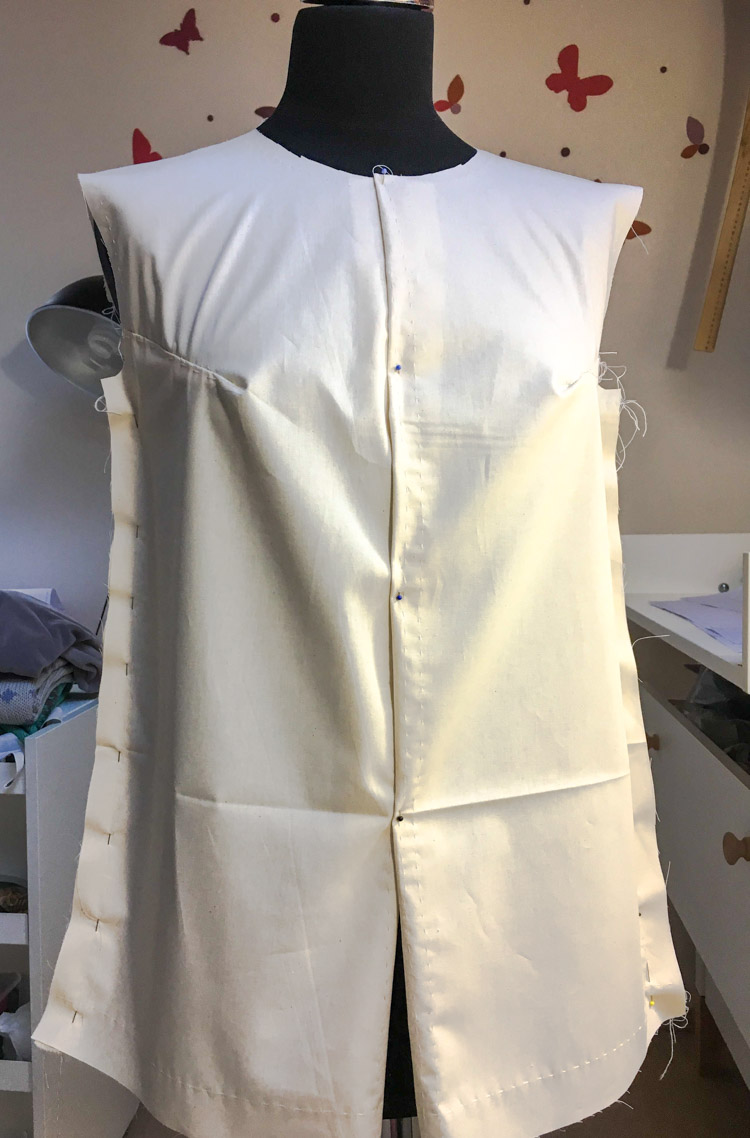
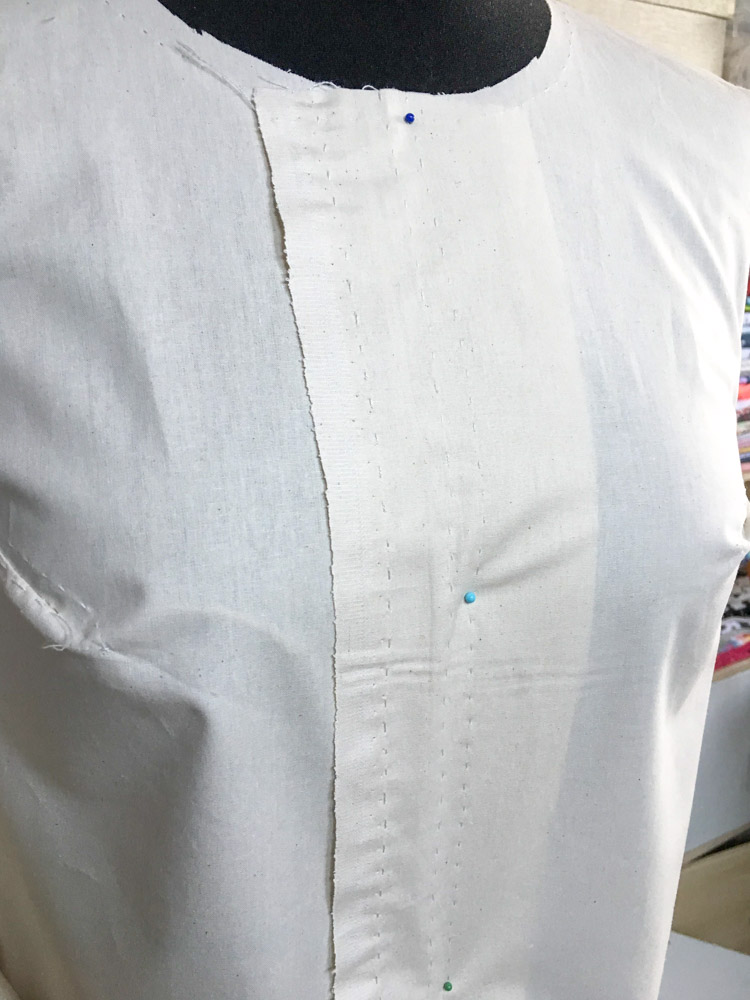
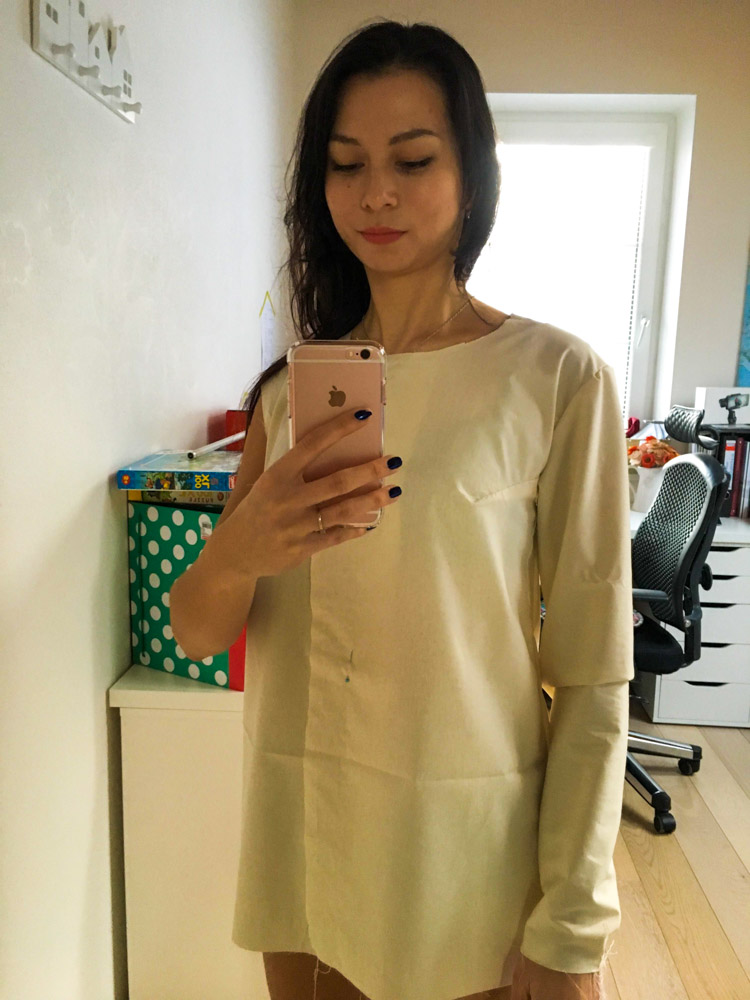
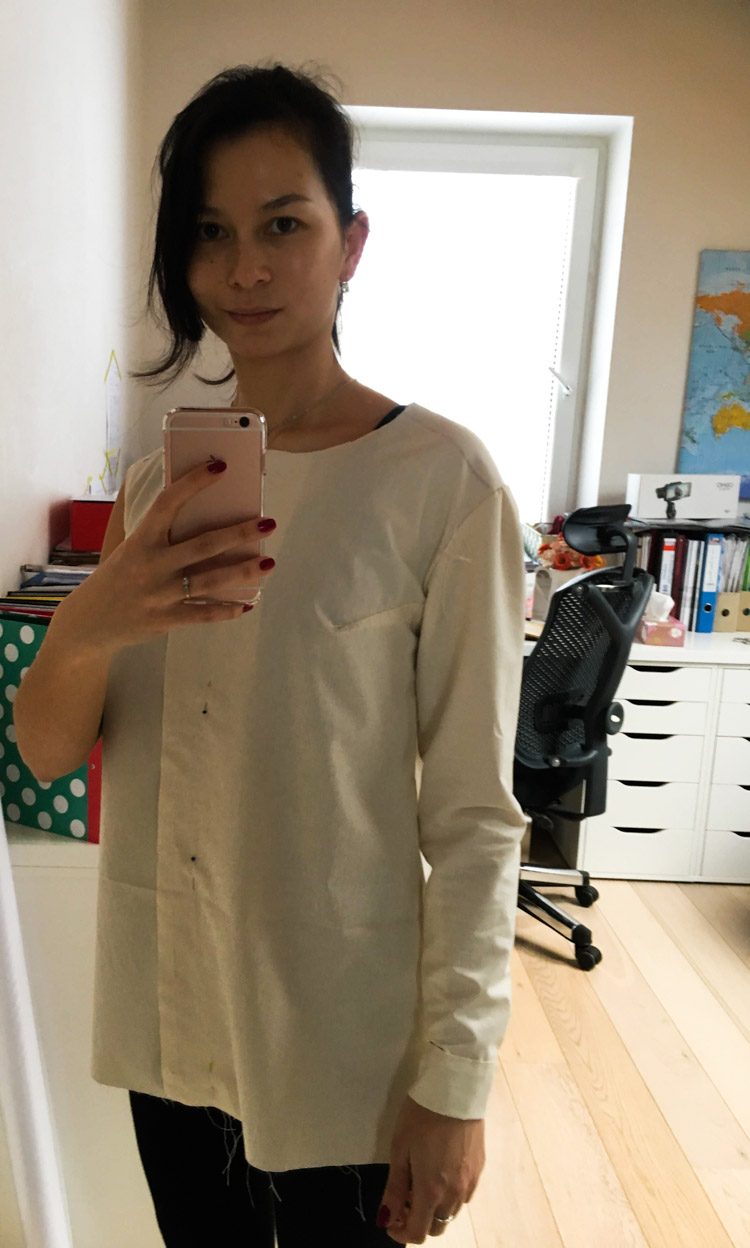
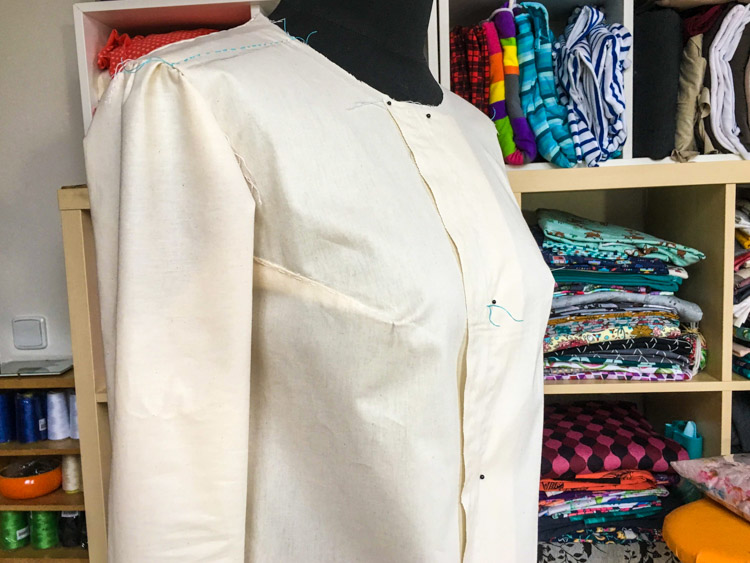
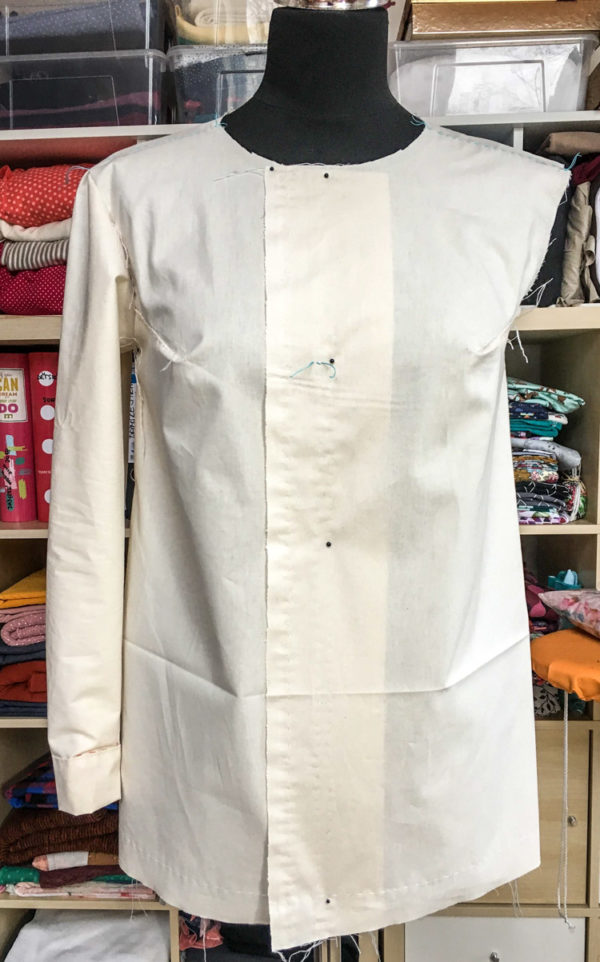
Stitch front and back pieces together in the shoulder seams. Try the garment on yourself/customer/mannequin. Pin the front as if you wanted to button up your blouse. In my case it is obvious that the blouse doesn’t fit at all in the chest area, so it is clear that there is a need for adjustment of the breast darts. So, I will start with that. (Although I think it will also be necessary to adjust the side seam from the waist down).
Always make one adjustment at the time. Even if you see several flaws, always adjust them one by one and retry the muslin after each adjustment. That is because some adjustments may cause problems in other areas. Moreover, when you make multiple adjustments at the same time, you don't even know whether each one of them resolved the problem that it was supposed to solve.
So, I'll start with those breast darts. You can adjust only one and leave the other as is to see the difference, or you can adjust both at the same time, it is up to you.

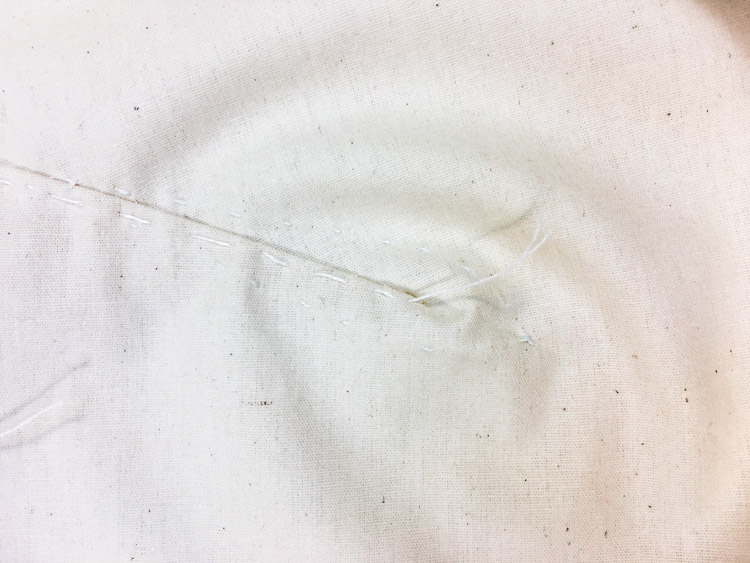
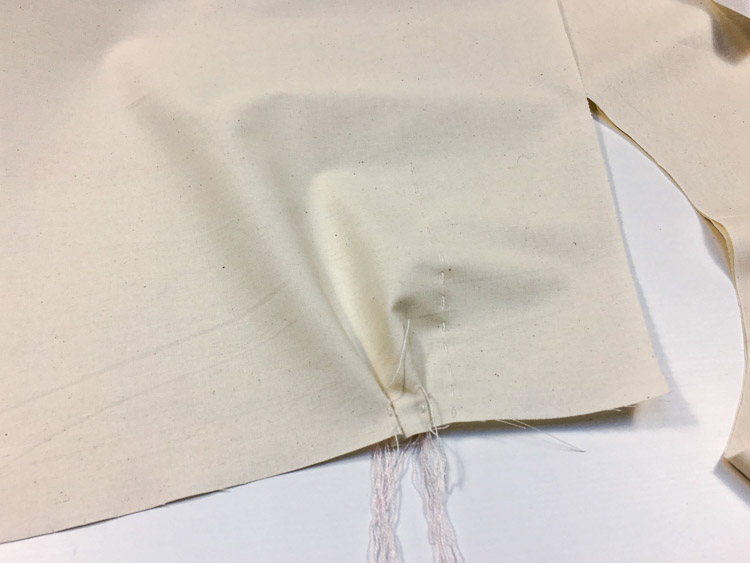
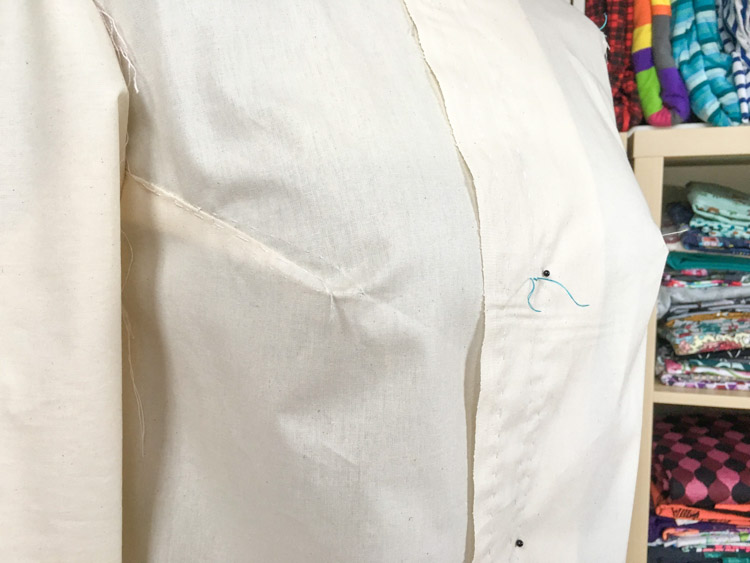
I shortened my breast dart by 1.5 cm. I also stitched through the dart from the face side to stabilize its fold. In the beginning I do not iron my muslin because I know I will be making changes to it. If I had already ironed the dart, and now I would adjust and re-iron it, I would have created hard folds, which often cannot be flattened completely. I only iron when I’m satisfied with the look of my piece. Sometimes it may be difficult for a beginner to guess if some small problem needs further correction, or if it will be solved by ironing. You have to figure out what works best for you. If you feel that you are not able to guess if there is still something to be adjusted or not, then feel free to iron your muslin. It’s your choice.
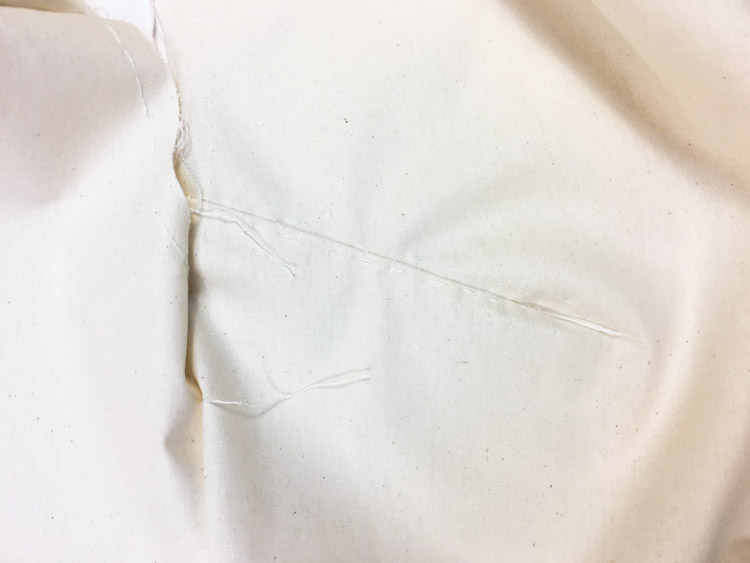
This is how the modified bust dart looks. I have to say that my mannequin is very similar to my silhouette, but it is not identical, so even if it looks like the darts would use some further adjustment, but when I put the muslin on it was okay.
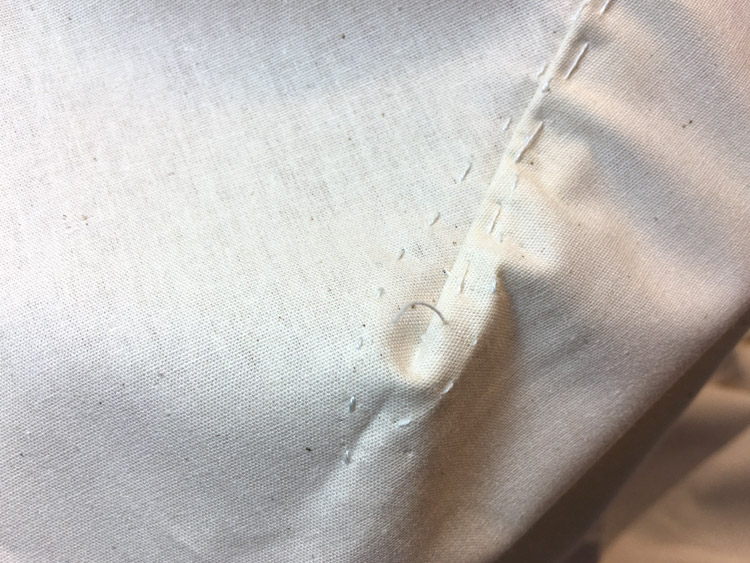
After adjusting the darts, I stitched the side seams (face side to face side).
When trying on the muslin, always make sure that the front pieces overlap so that the centerlines on both front pieces lie exactly on top of each other.
I was happy with the breasts so I could move to the next area - the side seam. From the waist down, I shifted the side seam by approximately 1 centimeter.
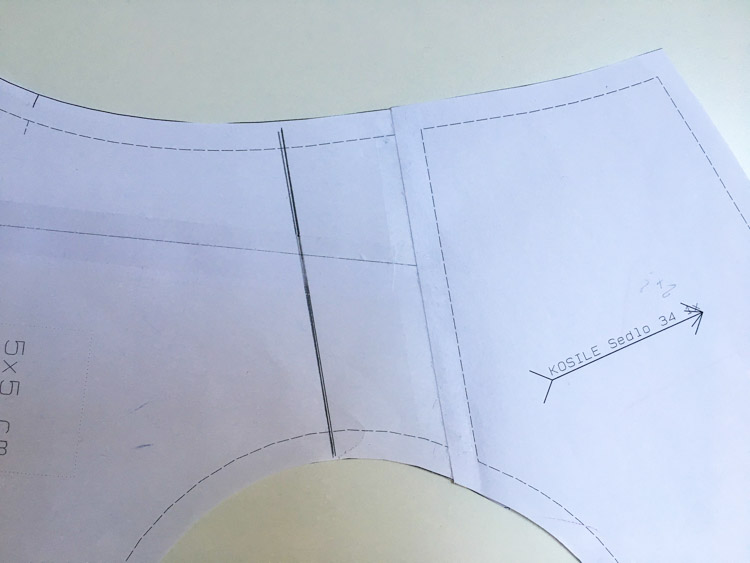
When you are satisfied with the torso area, you can move to the sleeves. To make the sleeves just right, it is essential to have all the necessary marks transferred from the paper pattern to the fabric.
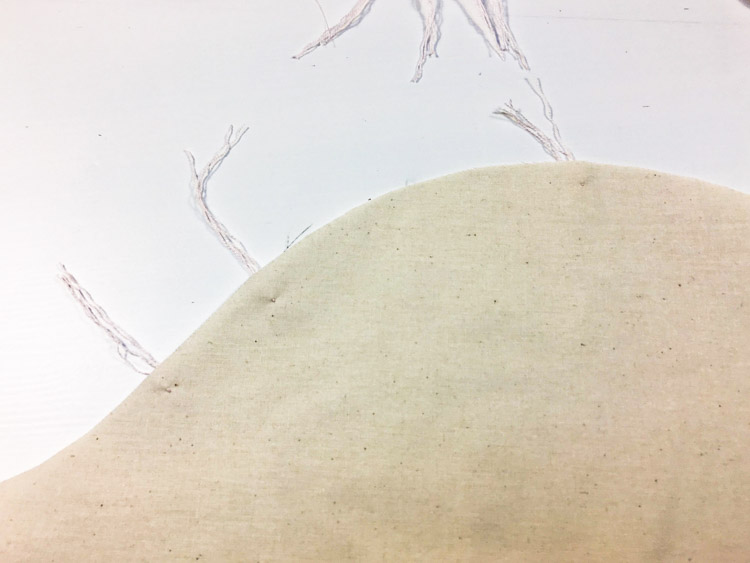
This is how the bottom hem of the sleeve with marks for the cuff looks like.
Sew the folds on the bottom hem of the sleeve and do not cut the slit for the button placket yet.
Now stitch the sleeve seam. Note that the seam allowances must always be the same size at the point where the sleeve meets the front/back piece in the side seam. This means that if you have a 2 cm wide seam allowance in the chest area, the other seam allowance (of the sleeve) must also be 2 cm wide. For example, if you shifted the side seam by 1 cm, to have a looser chest area, then you now have 1 cm wide seam allowance in the side seam. In this case, the sleeve seam must also be moved by 1 cm so that the seam allowance of the sleeve seam is only 1 cm wide too. The sleeve itself can then be narrowed or expanded freely from the armpit downwards and you can also adjust the side seam as you see fit, just keep an eye on the point where the side seam meets the sleeve.
Stitch the sleeve seam and then use double-threaded needle to easestitch the sleeve cap. Ease stitching should be used only on the upper part of the sleeve cap curve (start/finish about 7 cm away from the sleeve seam).
Pin the sleeve to the armscye on the mannequin to shape it naturally and see if there are any problems. If you have followed the rule about the same width of seam allowances (see above), then there should be no major problem.
However, if you haven’t followed this rule, you may have increased the size of the armscye, so the sleeve cap is now too small for it (and vice versa). If you don’t see any major problems after pinning the sleeve to the armscye, you can sew it in.
Now is the time for another fitting test. Concentrate on the form of the sleeve. If you have a slightly rounded back, you may need to ease the back part of the sleeve more (and leave out the ease stitching in the front part, for example). Front part of the sleeve may be warped If you have a forward-facing shoulders. In this case, slightly trim the front part of the sleeve cap. Evaluate the appearance (how the garment fits), but also the functionality of your piece. Clothing without allowances for freedom of movement fits best because it is like a second skin, but that’s far from perfect because you won't be able to move in it. So, if you feel that you may make the piece too tight with all the adjustments and trimming, ask the person you are sewing for (or do it yourself if you are sewing for yourself) to:
- walk around the room to see if, for example, you haven't tightened the hips too much (bottom hem of the blouse would be moving towards the waist)
- stretch their arms forward - see if the blouse isn’t too tight around the upper back
- stretch their arms out - concentrate on sleeves and side seam in the chest area
- bend elbow - this tests the sleeve length (The most common problem of the sleeves with cuffs is that they are too short. They seem long if you have arms down by your sides, but if you determine the length of the sleeves based on this pose, you won’t be able to bend your elbow with the cuff buttoned up.)
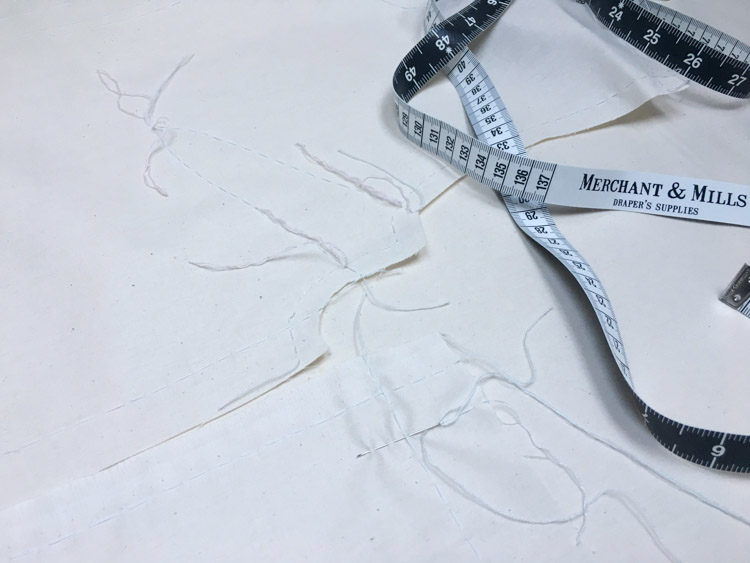
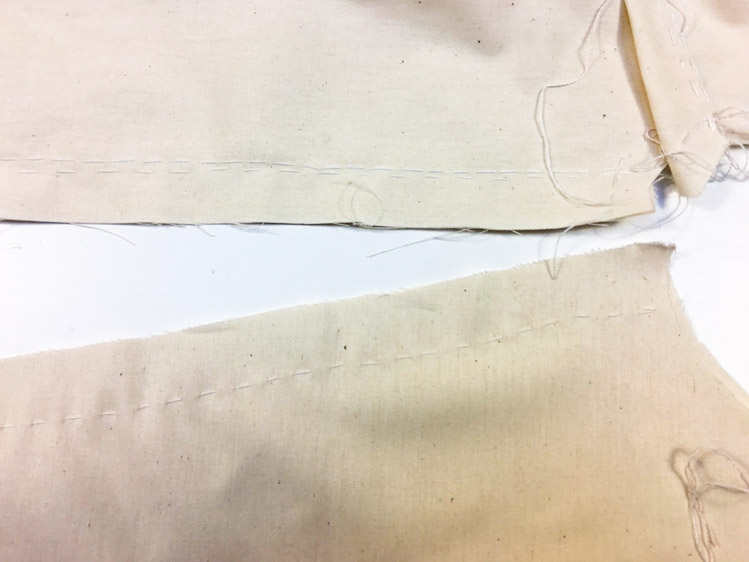
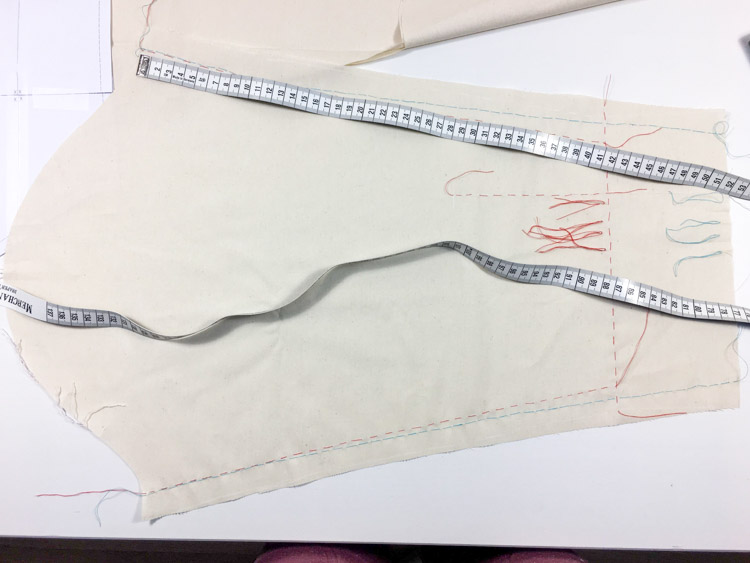
Sleeves of my blouse were very long (by themselves, let alone with a 5 cm cuff…). So, I shortened them. Blue lines - original length, red lines - adjusted length. I will soon edit and upload a video with detailed instructions for simple sleeve length adjustments.
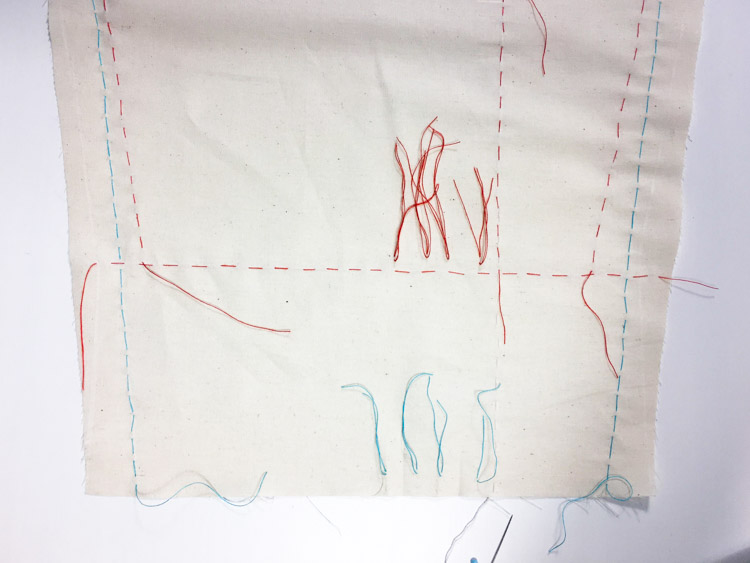
When modifying the sleeve, always make sure that the sleeve seam is equally long on both sides of the sleeve piece.
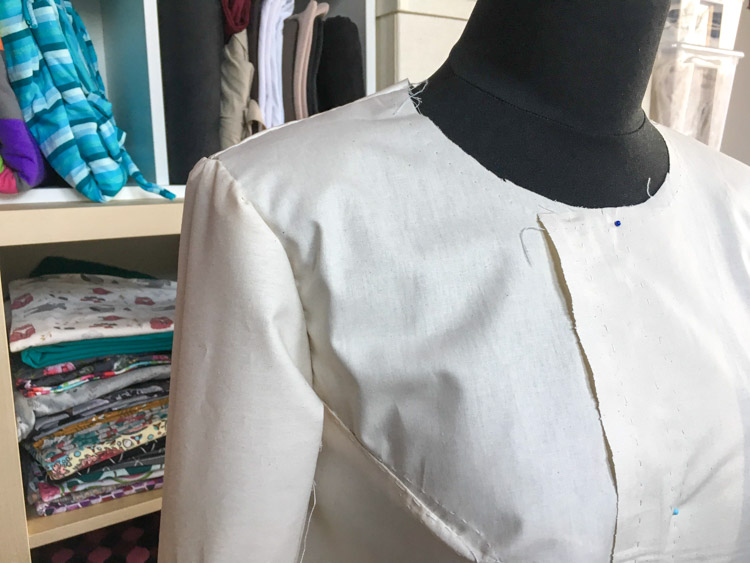
And this is how the shortened sleeve with the cuff looks like. You may notice that I marked the shift of the shoulder seam with a pencil - it was too far back for me.
And this is what the adjusted shoulder seam looks like. (I will publish a video with instructions for this adjustment soon.)
I marked the adjustment in blue.
Then I found a point exactly between the breast peaks on the centerline (both on mannequin and myself). This point is important because it is necessary to place a button here later so that the blouse stays closed.
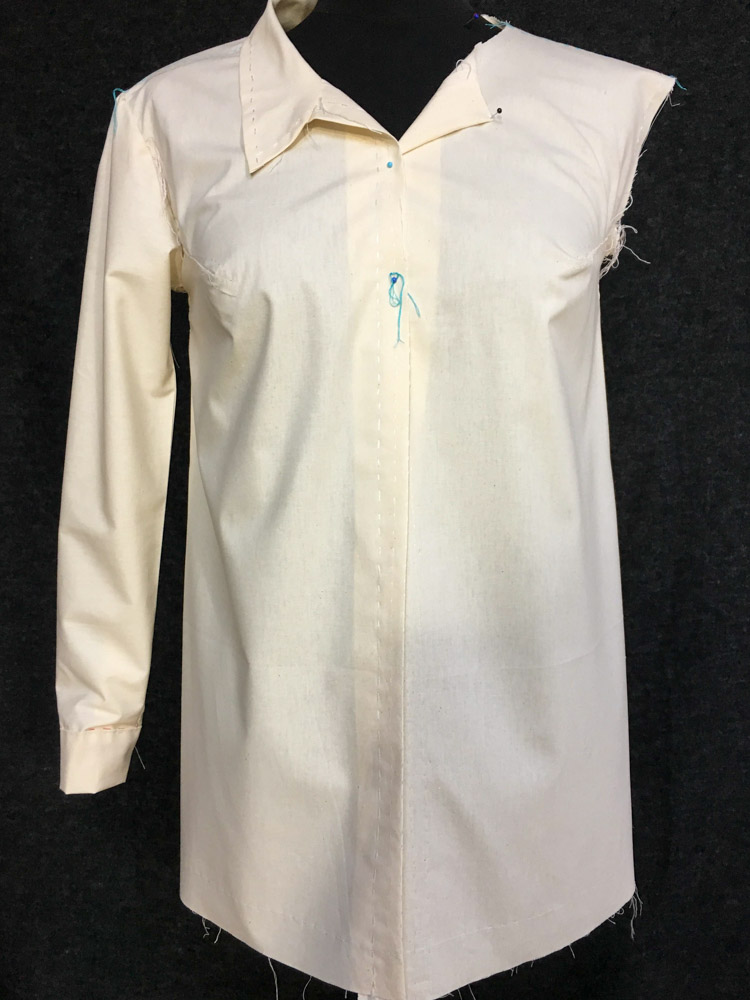
When you are satisfied with the torso and sleeves, you can move to the collar. Sew the collar to the reverse side of the blouse. In my video you can see me cutting the seam allowances in order to sew the collar in correctly.
I hope you now know at least a bit how (and why) to make a muslin.
My material (cotton canvas) is from Dumlatek.cz (here: Cotton canvas - natural)
If you want to know more about muslins and see some specific adjustments, check out this article:
How to make a muslin on a sewing machine
- Here are other articles about pattern adjustments: Pattern adjustments – Tutorials, Tips, Inspiration
- You can also explore articles with instructions and inspiration for creative sewing: Creative Sewing
- All articles with sewing instructions can be found here: Sewing instructions
Have a nice day, Peťa