


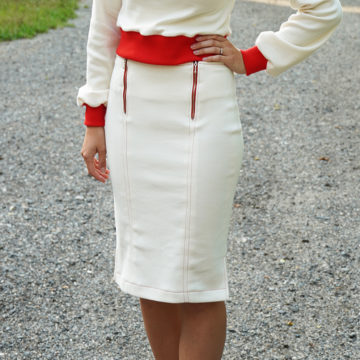
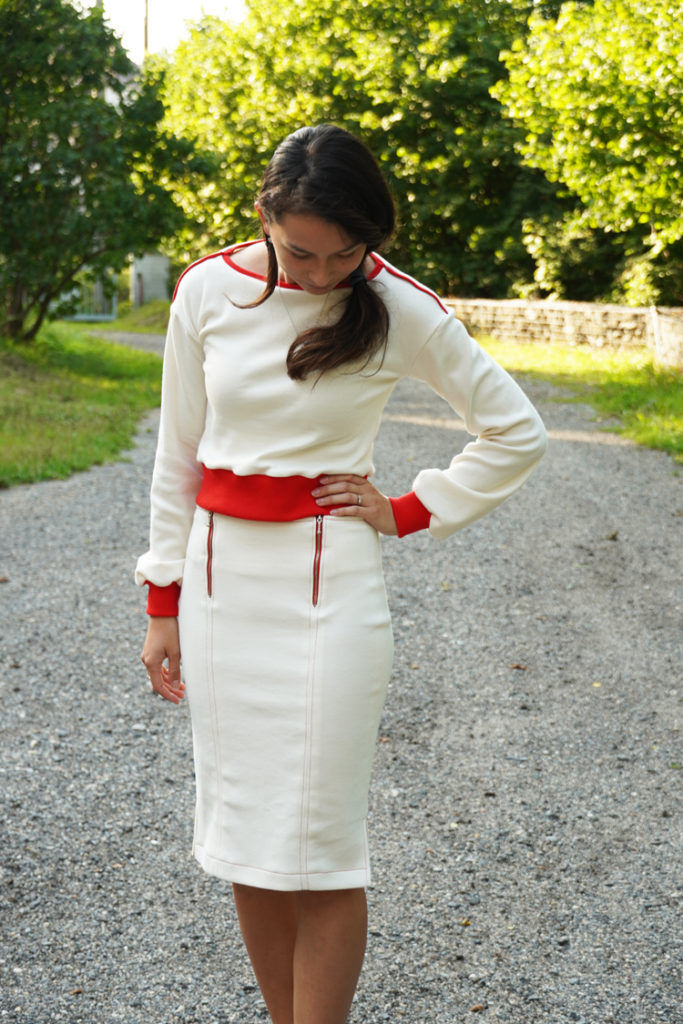
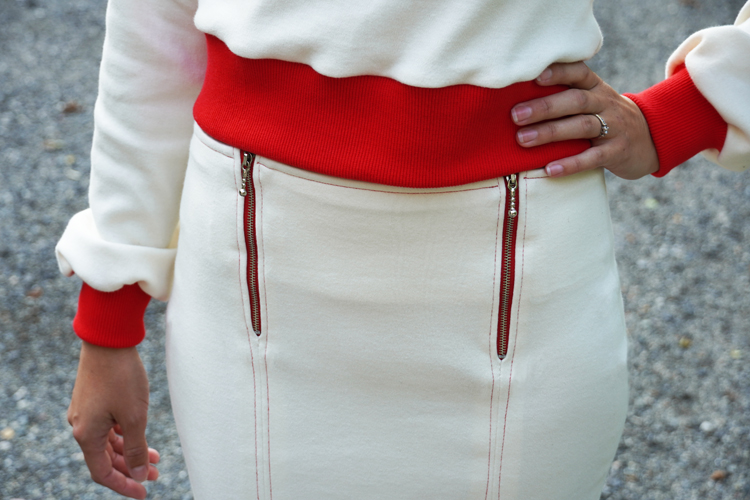
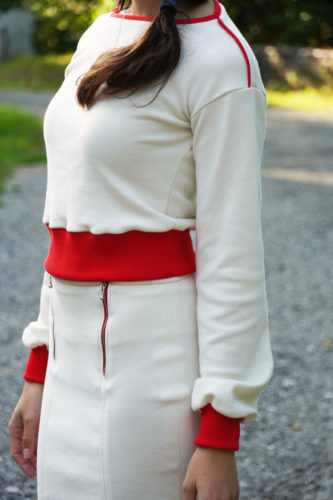
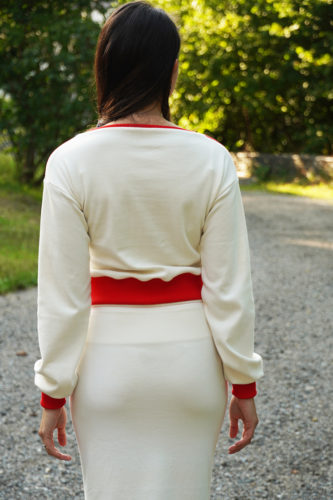
The pattern set TO THE CITY also includes one more pattern besides women’s T-shirt/Sweatshirt - it’s a pattern for a narrow skirt or pencil skirt. And because I think that the most important thing when it comes to clothing is comfort, I decided to design this pattern for a classic skirt so that it can be sewn from a comfortable elastic fabric. If you choose some muted color, you can make a very fashionable and comfortable skirt that will meet the office dress code. You can combine this pattern with the pattern for T-shirt/Sweatshirt TO THE CITY and enjoy the stylish set. This pattern set will allow you to sew the most elegant “tracksuit” in the world.

The pattern for a comfortable skirt
You can also get the whole pattern set TO THE CITY (skirt + T-shirt/Sweatshirt):

Recommended material
You can use many different kinds of material to sew this skirt. But the fabric must be at least somewhat elastic. If you don’t plan to modify the pattern, use fabrics that are suitable for pants and skirts. These are fabrics with elastane and other elastic fibers. You can also sew very comfortable version of this skirt from thicker knit or elastic laid-in knit. In any case, you are going to need thicker knit or woven fabric of medium thickness. The fabric must contain some kind of elastic fiber (elastane, spandex, lycra, etc.) You can get suitable materials at Dumlatek.cz, for example.
Classic version
(look for materials containing elastic fibers)
Suit fabrics - for example:
- Trouser fabrics (elastic, cotton-based)
- Denim (make sure it is elastic)
- Corduroy (pick the stretchy type)
- Piqué
- Velvet - velour (look for elastic kinds)
- Fabrics for formal wear (laces, lamé, satin...)
- Elastic viscose
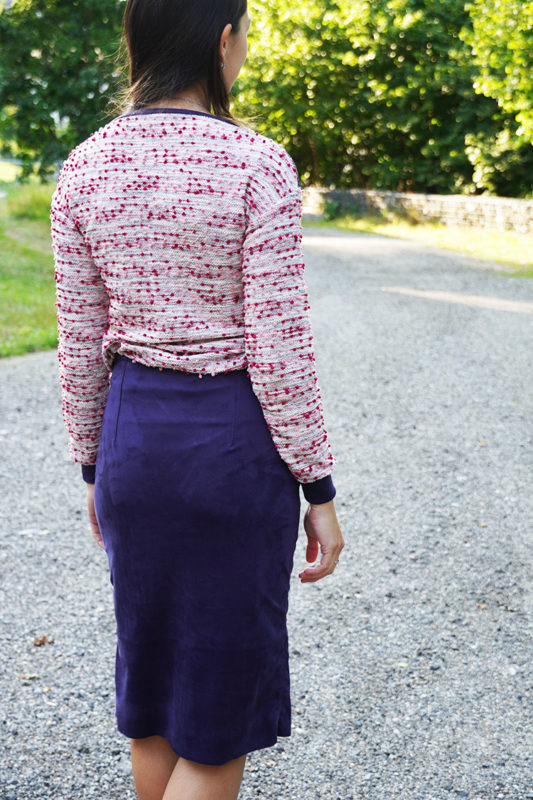
- Elastic suede (Used for the skirt on the left)
Comfortable version
(look for fabrics of at least 240g/m2)
Knits - for example:
My tip:
Elastic denim is great for this type of skirt:
- Denim (make sure it is elastic)
If you do not dare to use classic denim, you can try denim imitation (knit). It’s easy to work with and comfortable:
The required amount of material
(for 140 cm wide fabric)
- Sizes 32 - 46: 1 m
- Sizes 48 - 60: 1.8 m
Other materials
- One-sided fusible interfacing of medium thickness (to reinforce facings and seams around zippers). I recommend reinforcing all seams when working with knits.
- Two zippers of the same length. Metal ones look nice… Zippers should be 16 - 20 cm long, but it depends on the size of the skirt.
How to sew a pencil skirt from knit or laid-in knit:
Possible pattern modifications
This pattern was designed for (somewhat) elastic woven fabrics - classic “suit” fabrics or fabrics suitable for pants. If you want to use it to sew a skirt from a more elastic and comfortable material (knit or elastic tracksuit fabric/laid-in kit), then you are going to need to adjust it a little.
I recommend removing the waist darts of the back piece. Here's how to do that:
✂Suggestion: I definitely recommend basting (temporary stitching) important seams. You want the skirt to be hugging your hips and bottom closely, so it’s important that it truly fits you well. Do this even if you decide to use some type of knit. It is very likely that you will want to tighten the skirt a little in the side seams because of the elasticity of the material.
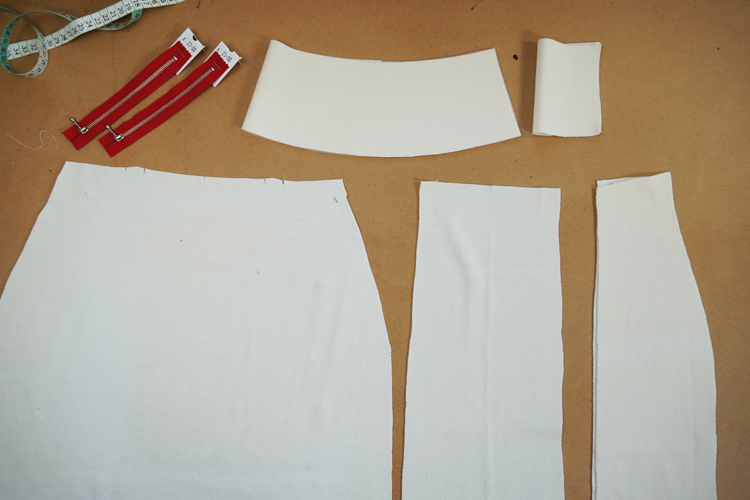
Pattern layout
According to the paper pattern prepare:
- 1x back piece (cut on fold)
- 1x front piece (cut on fold)
- 2x side piece
- 1x back piece facing (cut on fold)
- 1x front piece facing (cut on fold)
Interfacing
Use one-sided fusible interfacing to reinforce both facings.
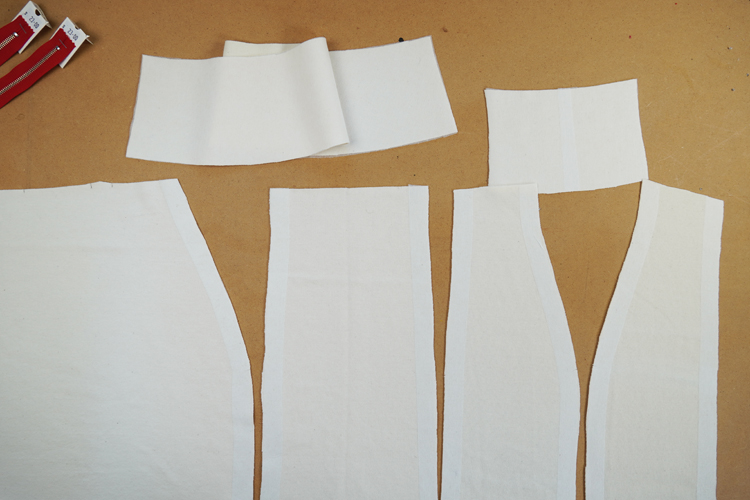
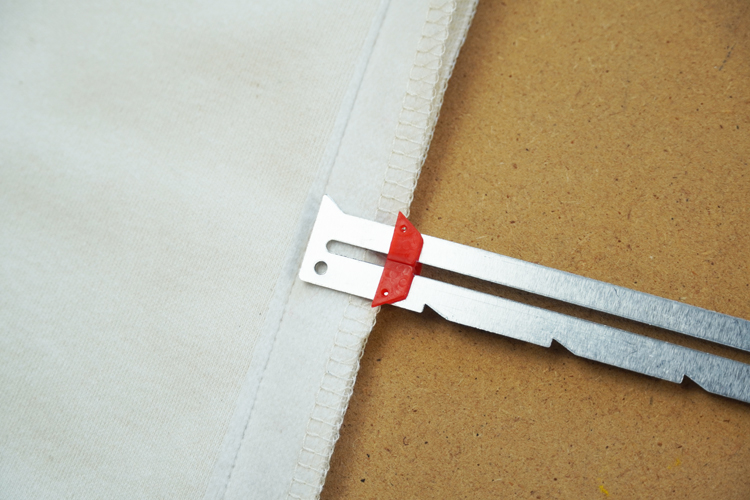
It is also necessary to reinforce all seams so that they do not twist and stretch during the sewing process. Cut 2.5 cm wide strips (seam allowances + 0.5 cm) of the fusible interfacing and use them to reinforce seams. You can skip this step If you are using stiffer woven fabric.
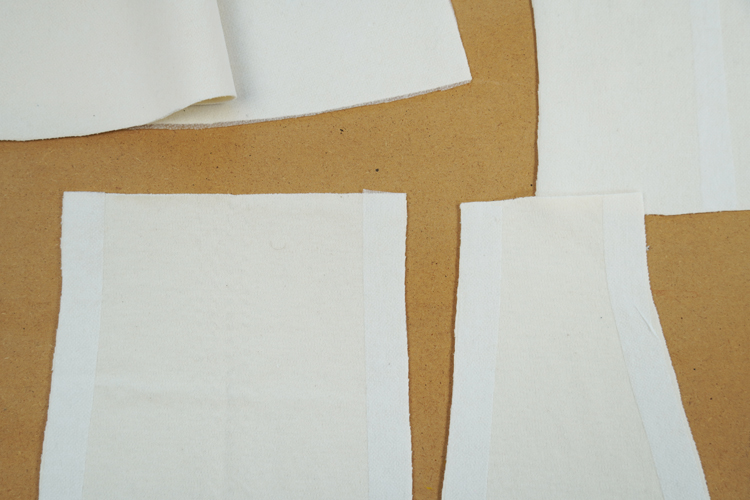
You can also reinforce the bottom edges of the skirt pieces. I used 3 cm wide strips of the interfacing for this. Reinforced 3 cm wide part will be later folded to the inside of the skirt to form the bottom hem.
Sewing instructions
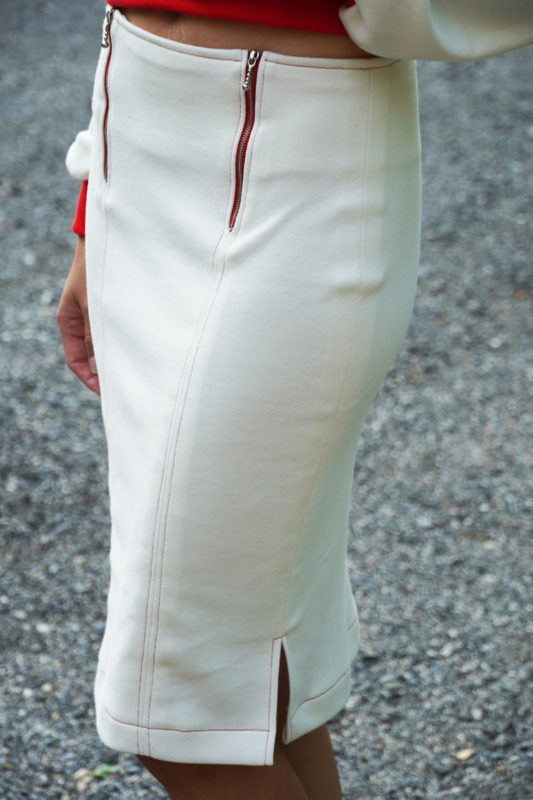
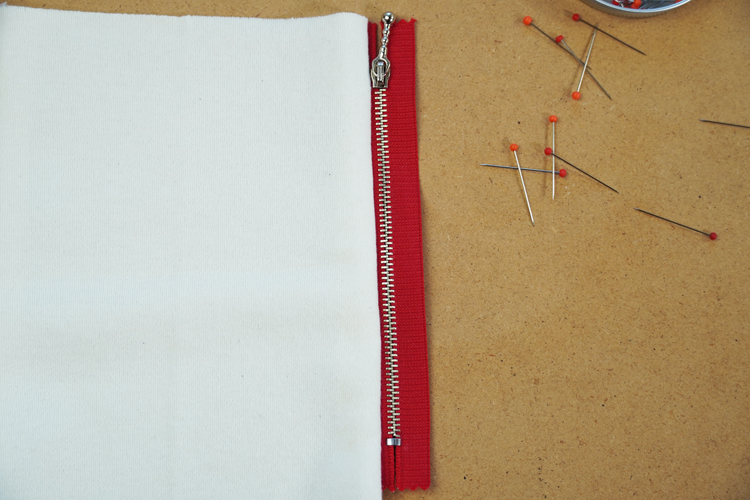
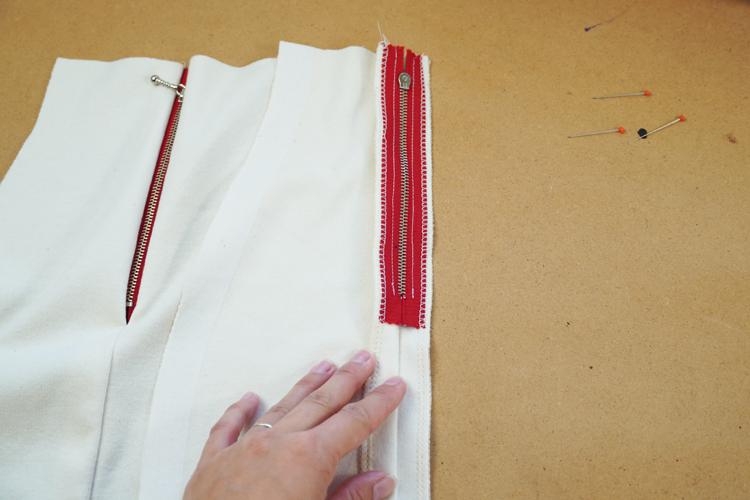
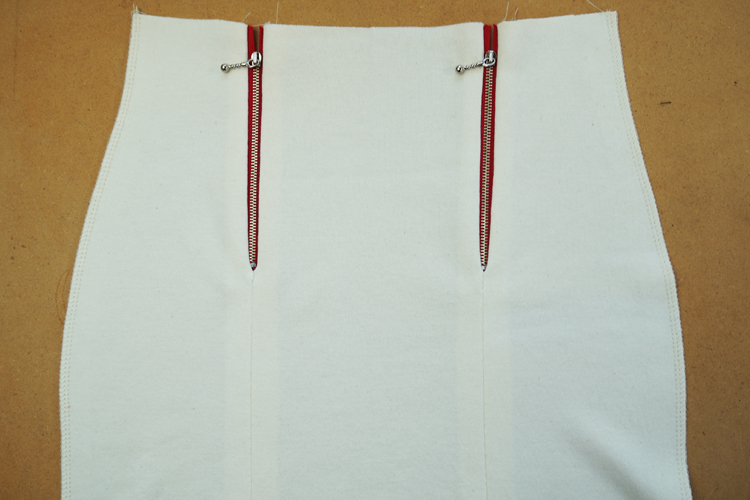
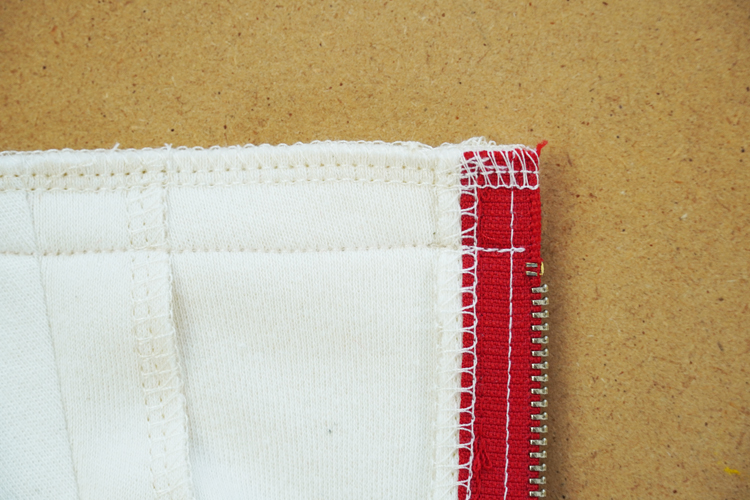
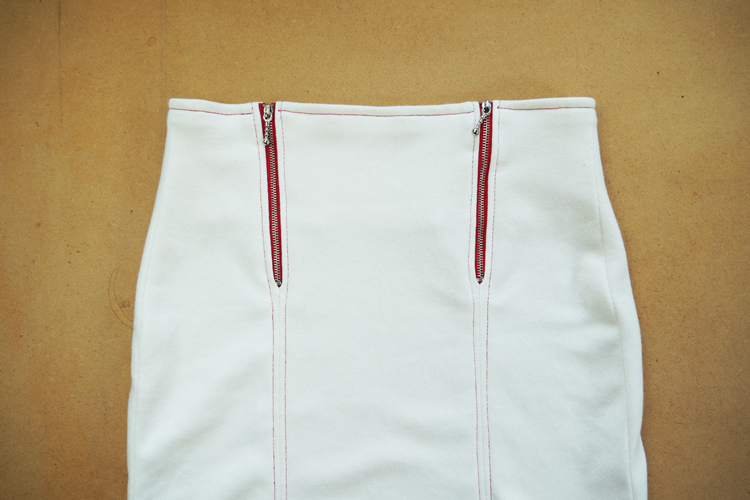
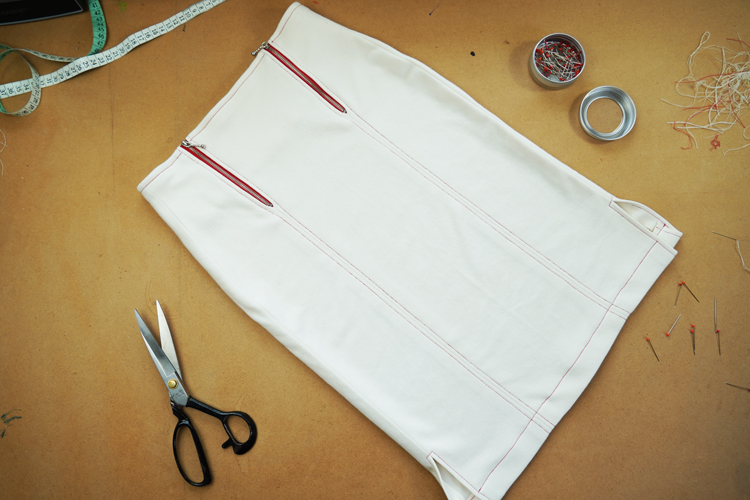
Pieces are ready, let’s sew. Put the zippers on the front piece (face side to face side). Sew pinned/basted zippers to the piece.
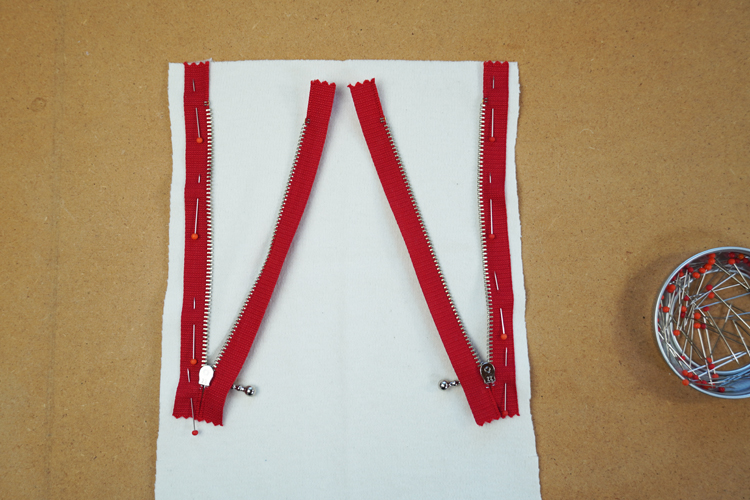
It is important to have the teeth of the zipper (center of the zipper) one “seam allowance width” from the cutting edge (in my case 2 cm).
Seams are about 5 mm from the teeth of the zippers (not right next to them). This will make the contrasting zippers visible from the face side of the skirt.
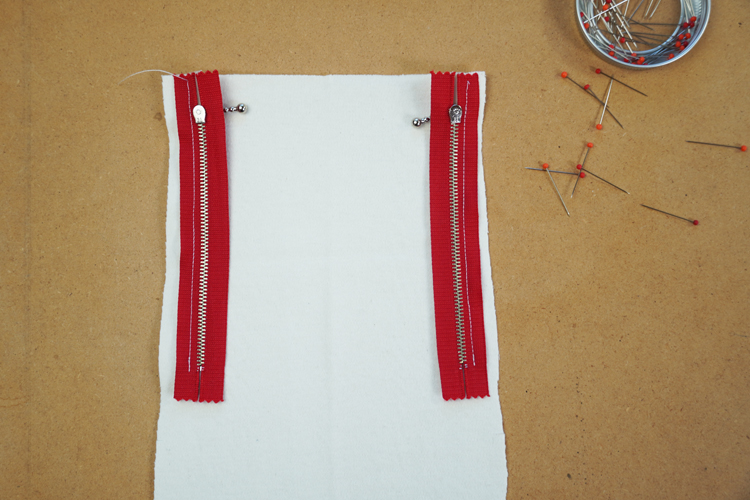
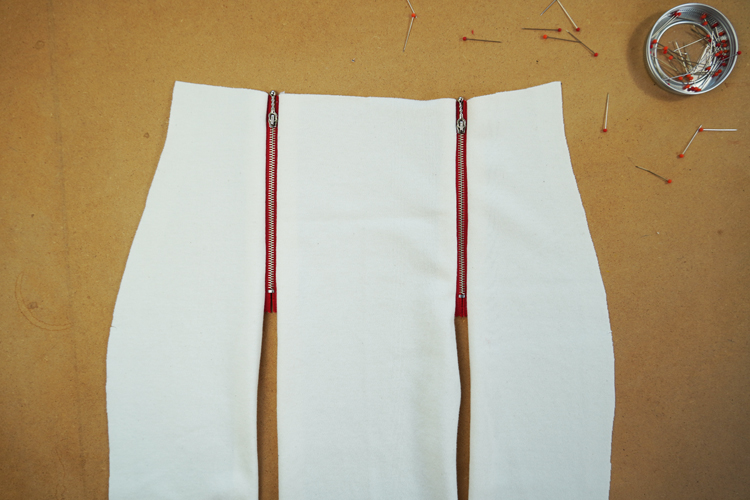
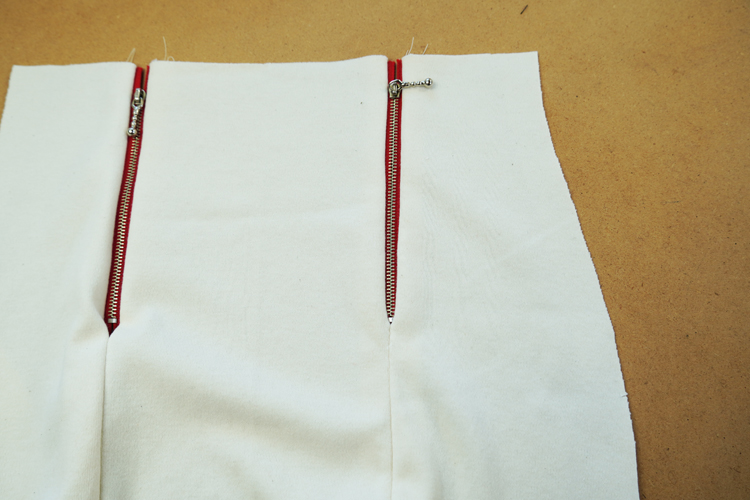
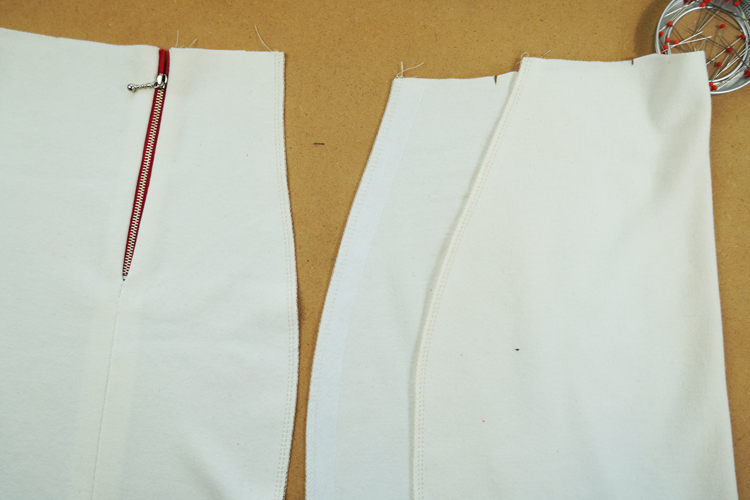
Now is the time to connect the front piece with the side pieces.

Spread the side pieces on the table (face sides up) and lay the front piece with zippers on top (face side down). Pin the side pieces to the zippers.

Sew the side pieces to the zippers.

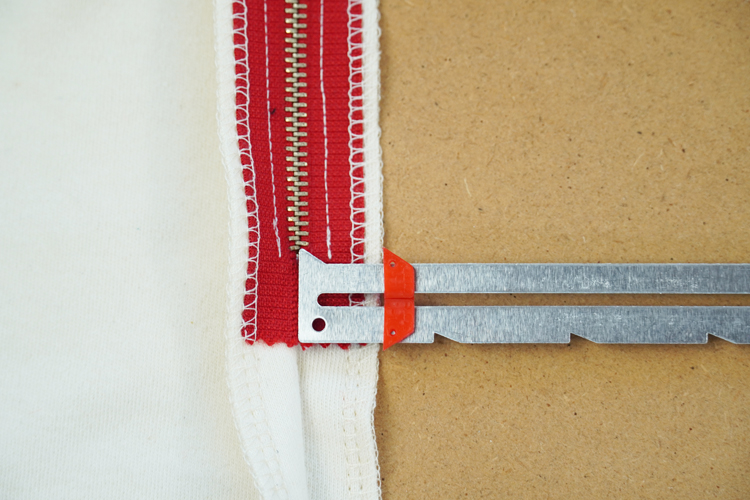
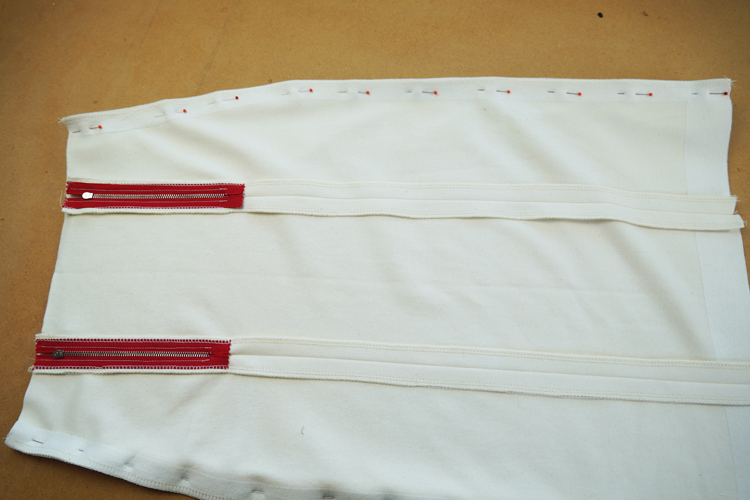
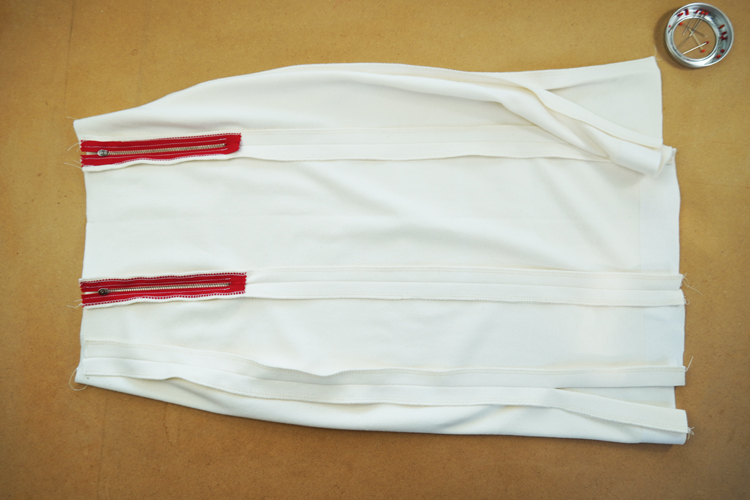
Now clean all cutting edges of the three pieces (use your overlock or overcast ‘pinking’ seam if you are using a regular sewing machine). A good time to do this is after sewing the zippers because it allows you to clean their edges along with the edges of the skirt pieces. This will help you to keep the edges of the zippers nice and flat.
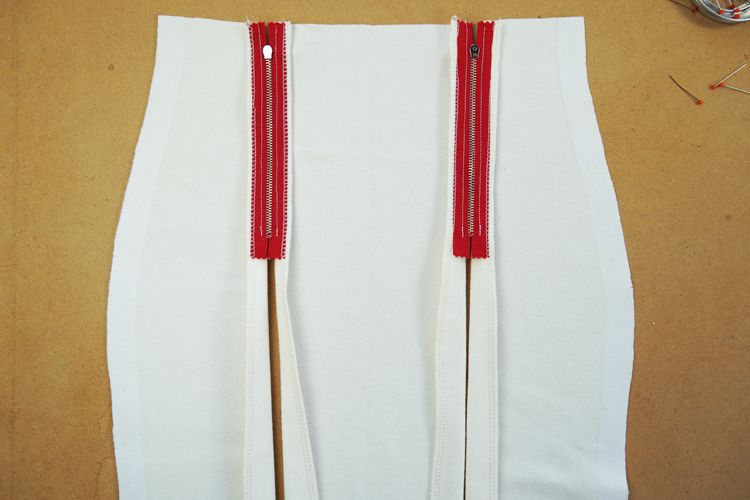
Now you can pin the connecting seams and sew from the zippers downwards.
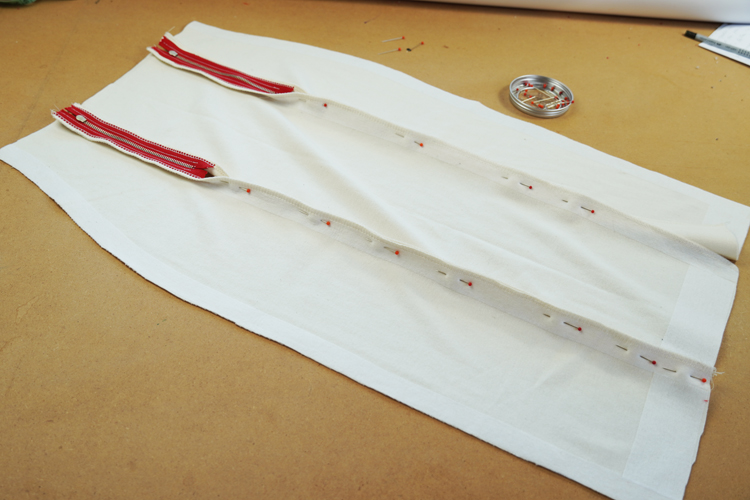
It is important to keep the same seam allowance width along the entire seam so that the zippers fit in nicely.
You can easily compare the size of the seam allowances by leaving the front piece on the table (face side up) and folding the side piece over it. Then “open” the seam allowances on the side and determine exactly where the connecting seam needs to be aligned with the axis of the zipper.
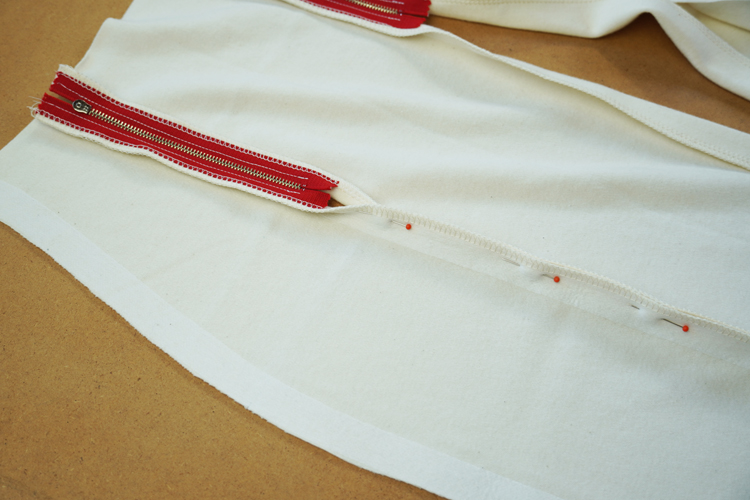
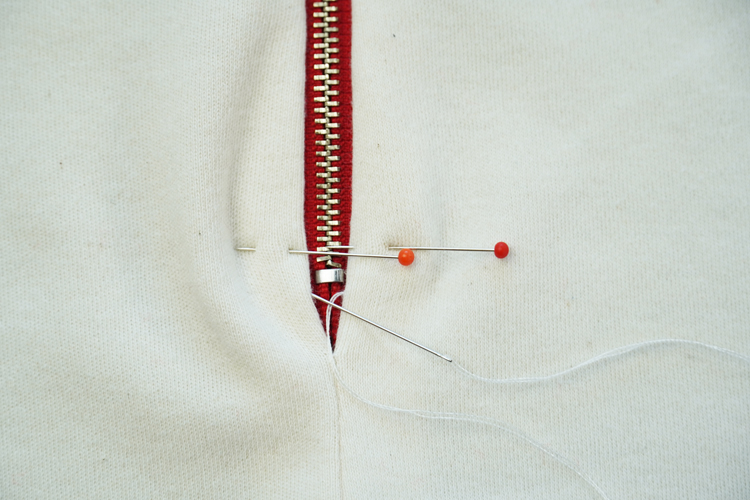
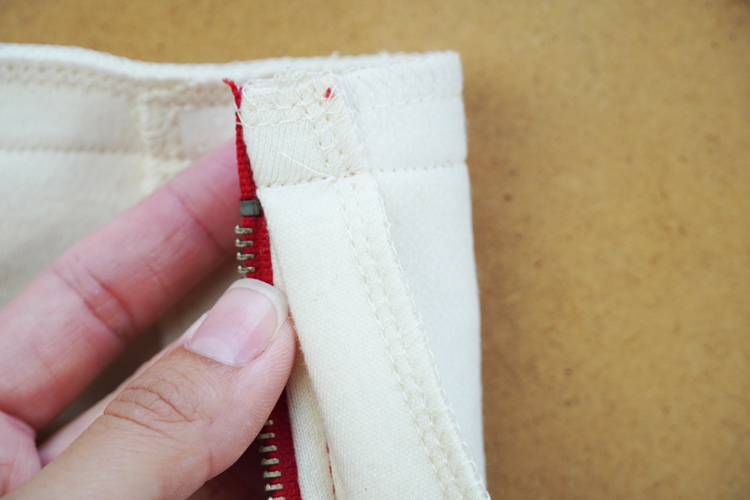
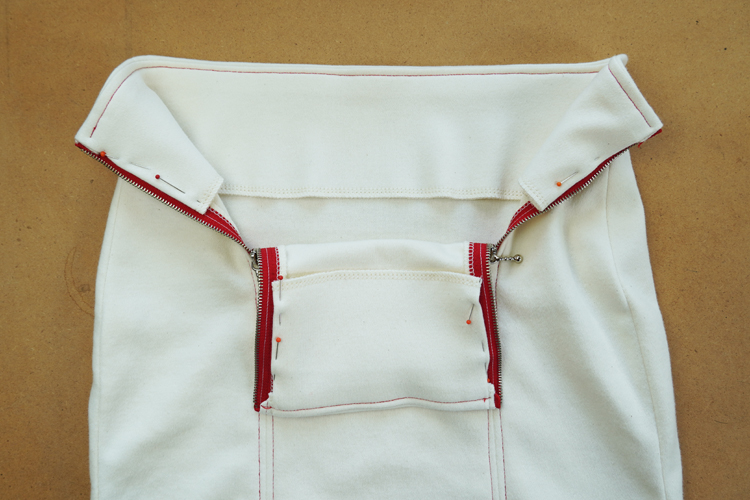
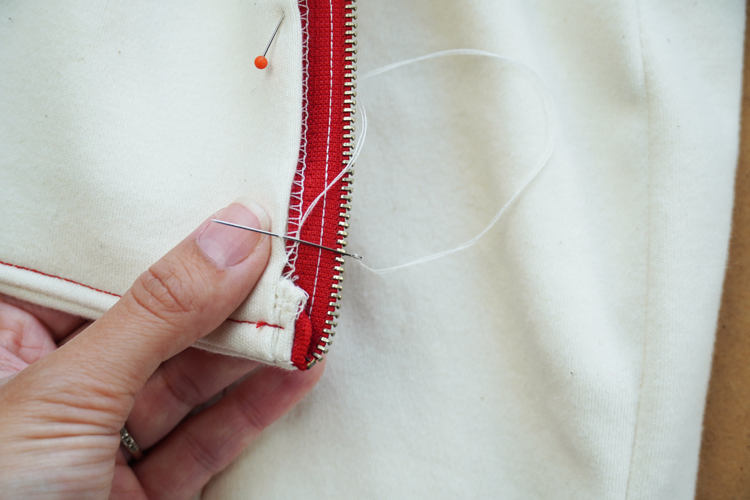
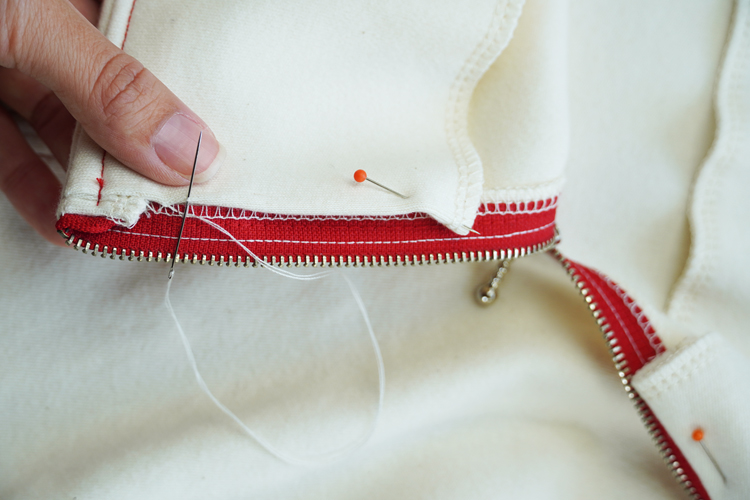
Most likely, you won’t be able to start the seam exactly where the zipper ends. In this case, fix the end of the zipper in place with pins.
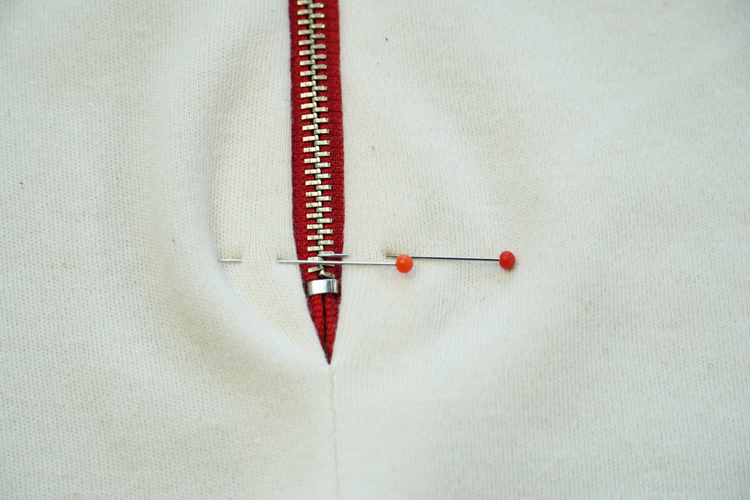
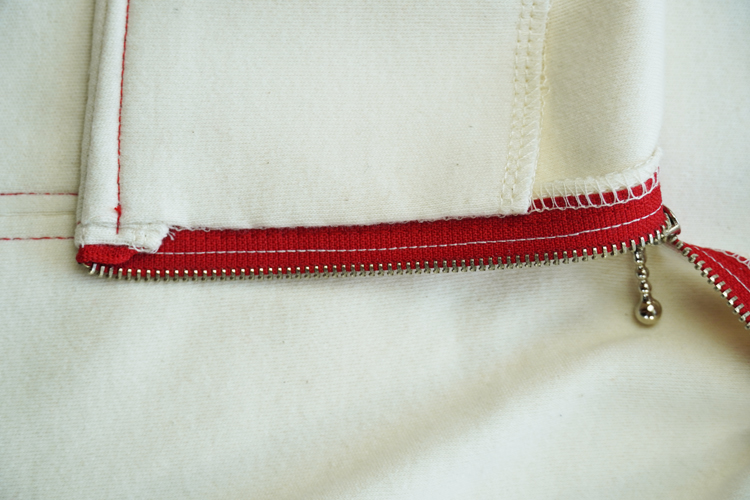
Now you can close the gap between the end of the zipper and the beginning of the seam with a few little stitches.
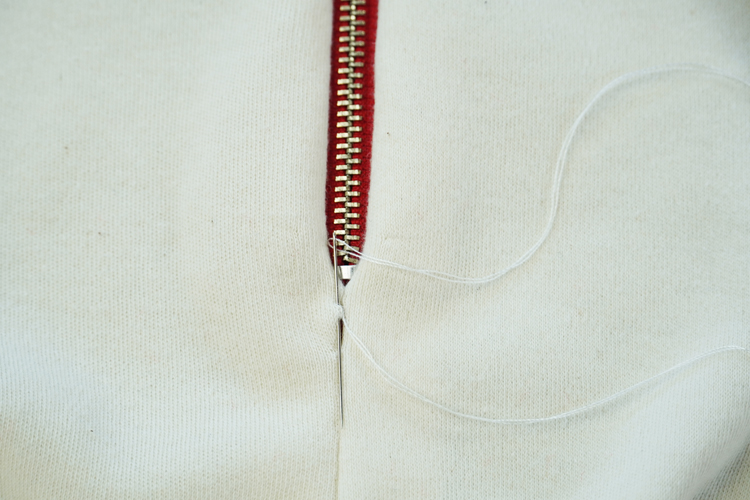
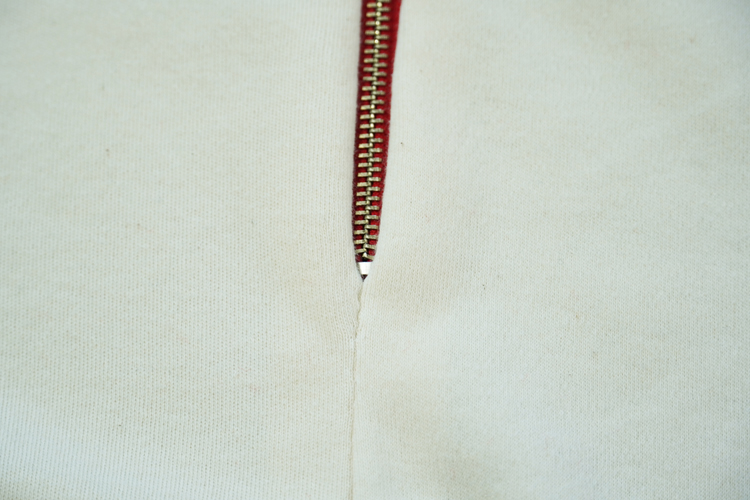
Do the other zipper in the same way.

Press all seam allowances open and iron them thoroughly. If you want to decorate the seams with topstitching, then this is the right moment to do it, because you haven’t connected the front and back piece of the skirt yet.
I did it later because I wasn't sure if I wanted to decorate my skirt in this way. But if you want to do it, do it now... Topstitched seams look like this:
Now clean the cutting edges of the front seams if you haven't done this already.

Also, clean the edges of the back piece.
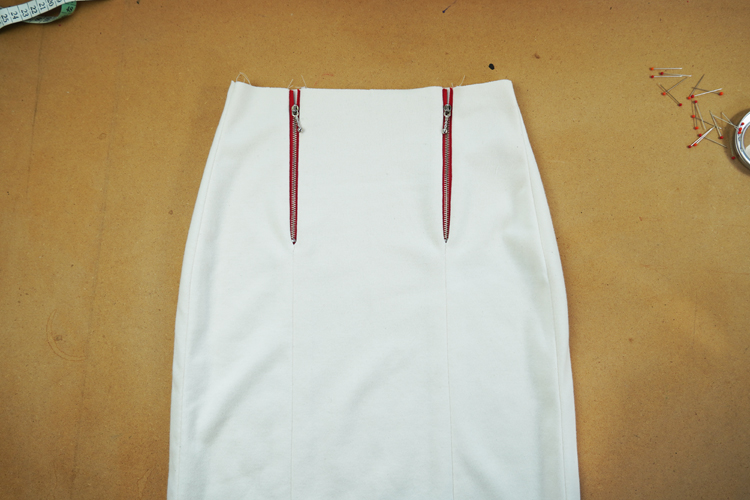
Then lay the front piece over the back piece (face side to face side), and pin the side seams. This is the time to baste (temporarily stitch) the side seams and try the skirt on.
Fitting test
Baste the seams exactly 2 cm from the cutting edge (size of the seam allowances) and try the skirt on. See if you need to tighten/loosen the skirt a little.
If you are going to modify the side seams, keep in mind that you have to make the same changes on both sides of the skirt to maintain its symmetry. Think about your adjustments in advance. For example, if you decide to tighten the front piece by 1 cm on one side, you will also need to make this adjustment on the other side of the front piece, and on both sides of the back piece. So this adjustment will reduce the overall circumference of the skirt by 4 cm!
Keep in mind that you don't have to adjust the entire side seam at once. You can, for example, adjust the side seams only above the hips to create a smoother curve there and leave the rest of the skirt the same, etc. You can, for example, adjust the side seams only above the hips to create a smoother curve and leave the rest of the skirt the same, etc.
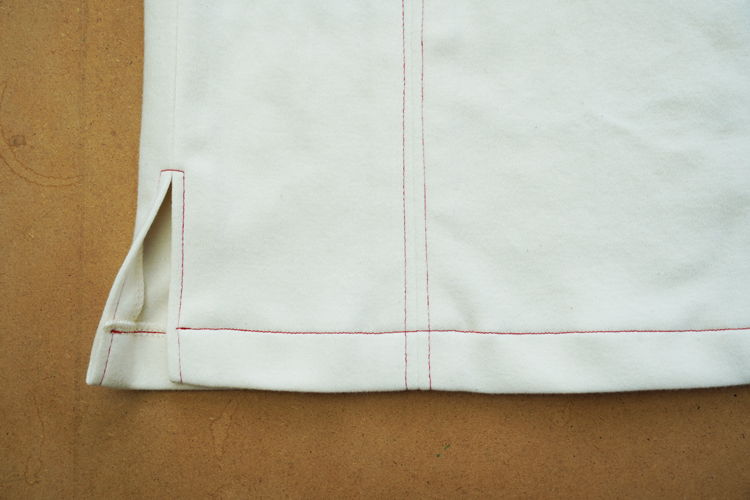
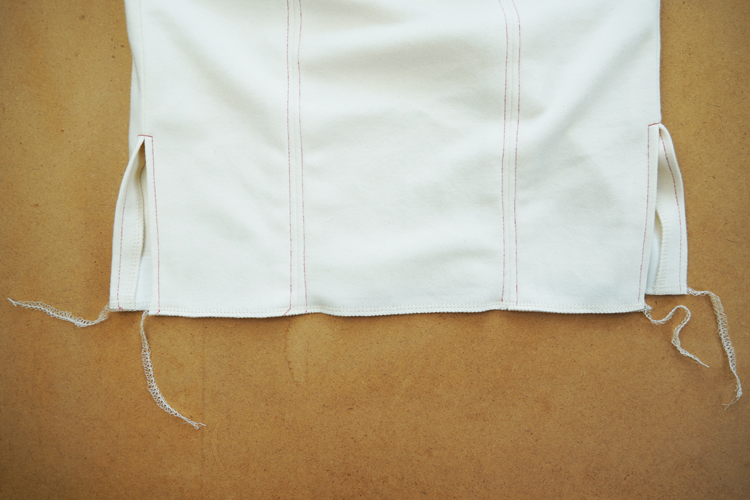
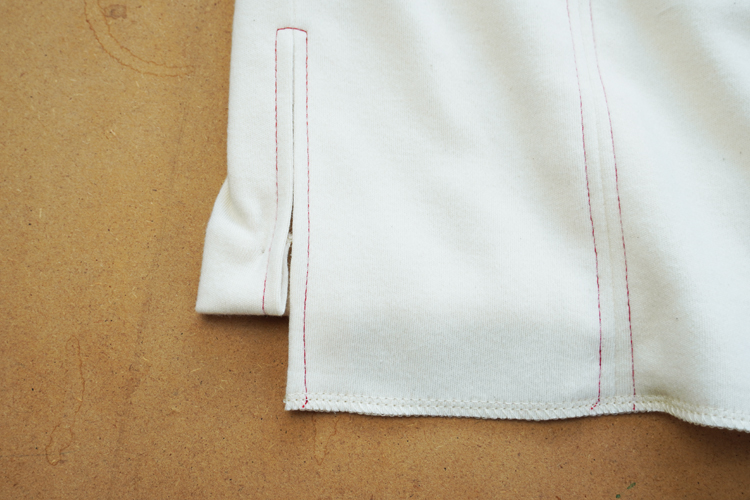
Also, try to walk in your skirt. Since the skirt is relatively narrow, I recommend leaving small slits at the bottom of the side seams. However, it is quite possible that you won’t need them (that is if your material is elastic enough), and that you will want to maintain the sleek silhouette of the skirt. If you can walk without problems, go for it!
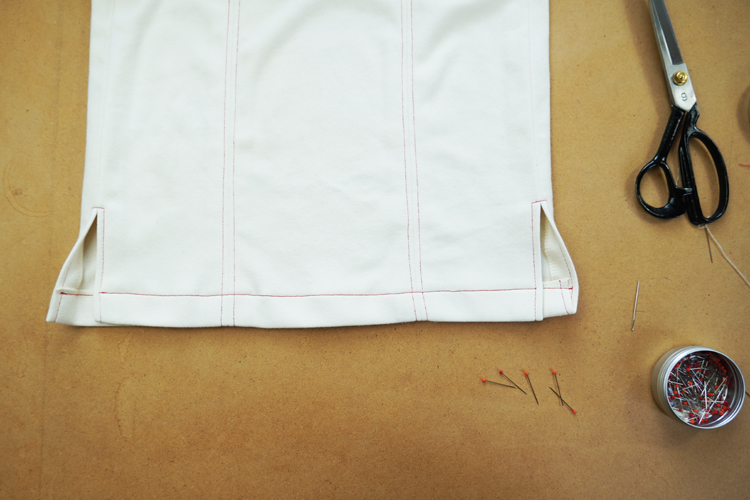
Adjust the side seams (if necessary) and sew them. I left slits on both sides of my skirt.
I wanted them to be 10 cm long, which meant leaving out the last 13 centimeters of the seam (10 cm for the slit + 3 cm bottom seam allowances for the hem). Thoroughly press the side seam allowances open.

You can try the skirt on again if you want to be sure. For example, if you made some significant adjustments after the first test. You are now going to sew in the facings and once the facings are in place, it’s very difficult to make any adjustments. Usually, it means a lot of seam ripping, which is annoying. :)
In the photo below you can see that this is the moment when I finally decided to topstitch the seams. It happened when I saw the skirt in all its beauty…

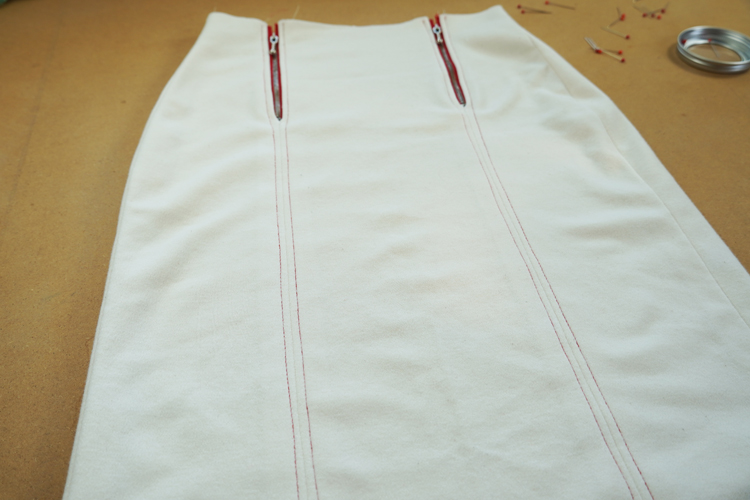
I also topstitched both slits to complete the overall impression.

Facings
Reinforce the facings if you haven’t already. This step is often neglected, but facings give the garment its shape, they maintain its silhouette, etc. That’s why you need to pay proper attention to them. Clean the edges of the facings. For some reason (please don't ask me why, I probably spaced out a little), I cleaned their short sides too, but that's not necessary at all. On the contrary, this adds a little bit of unwanted volume to the area. It is important to clean the bottom edges of the facings - those that will be left free.

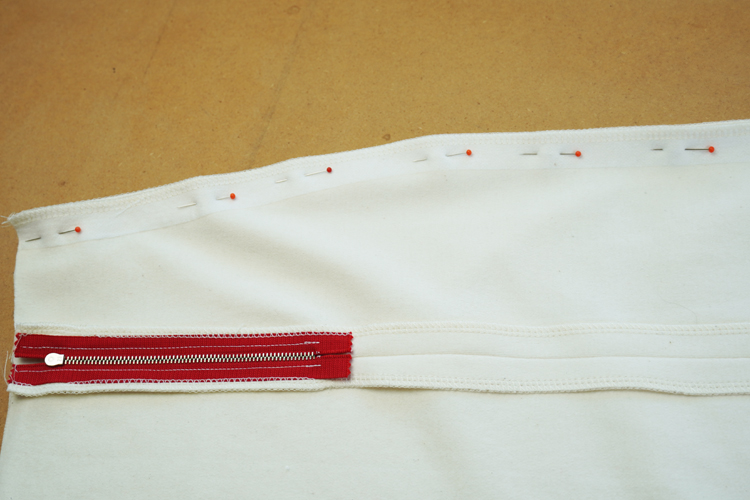
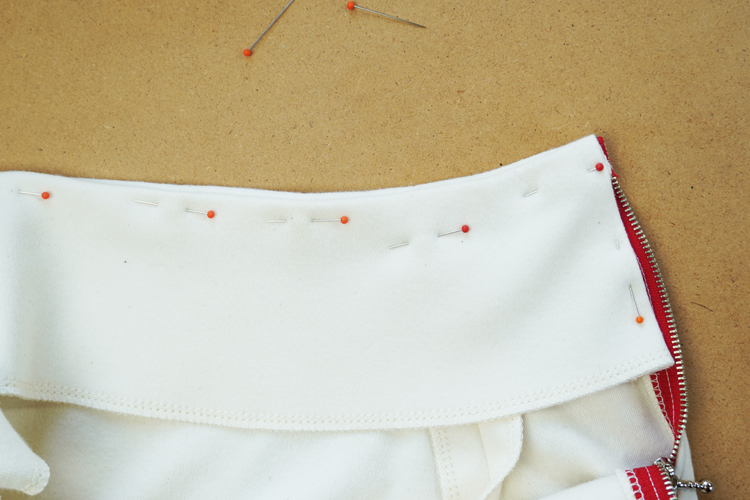
Pin the front facing to the front piece (face side to face side).
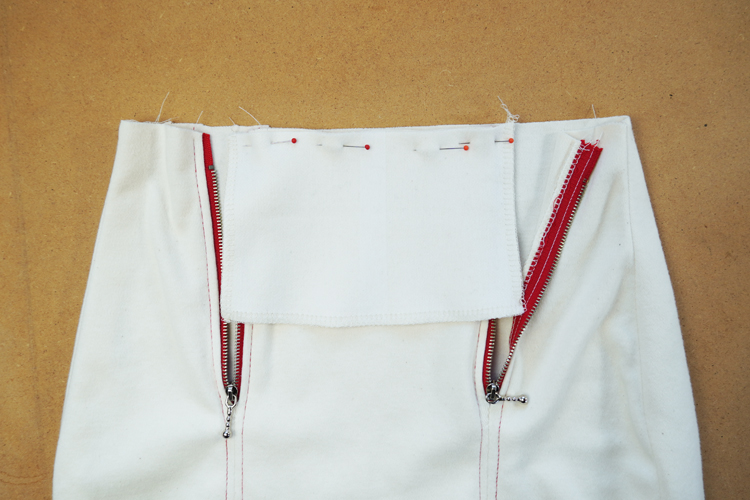
Then pin the back facing to the rest of the waistline.
Sew the facings to the skirt. In the photo below you can see that I spaced out again and cleaned the connecting seam on the overlock. Not only is it unnecessary, because this area will not be visible (not even from the inside of the skirt) and knits do not fray, but I have unnecessarily added some volume to the waist…

Simply sew the facings to the skirt with an ordinary straight stitch.
While sewing, you can fold the edges of the facings towards the reverse side, they will be easier to work with later, but it’s not necessary.
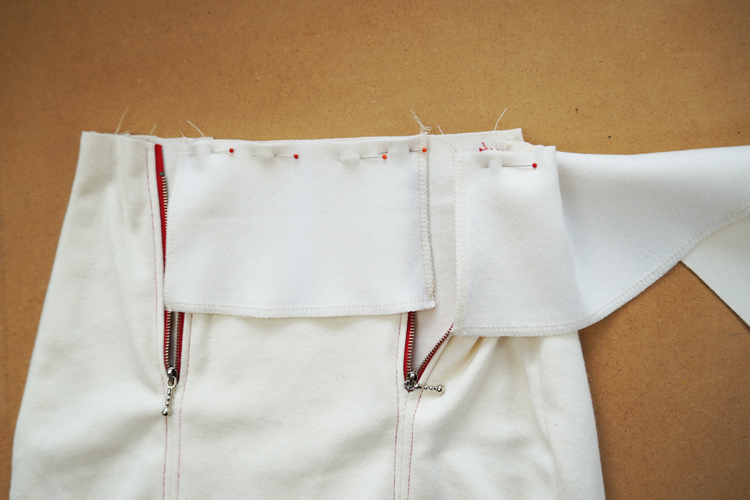
Now you can fold the facings to the inside of the skirt.

Pin the facing to the inside of the skirt. Make sure that it’s not peeking out over the waistline.
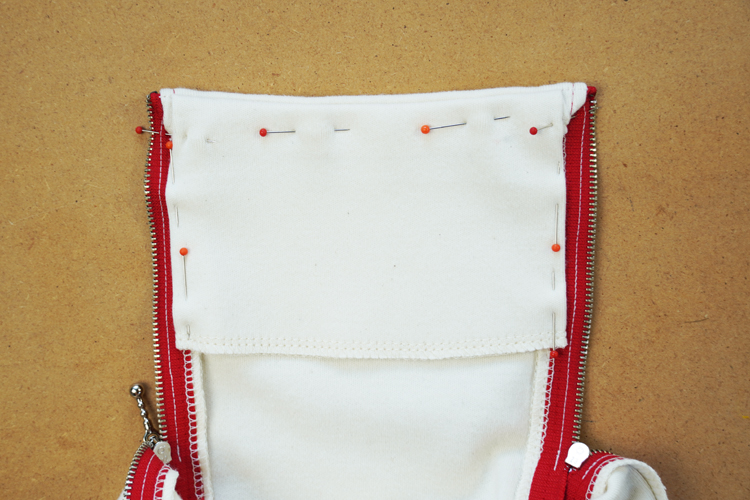
I recommend positioning the facing so that it’s a little (about 2 mm) below the “true” waistline edge.
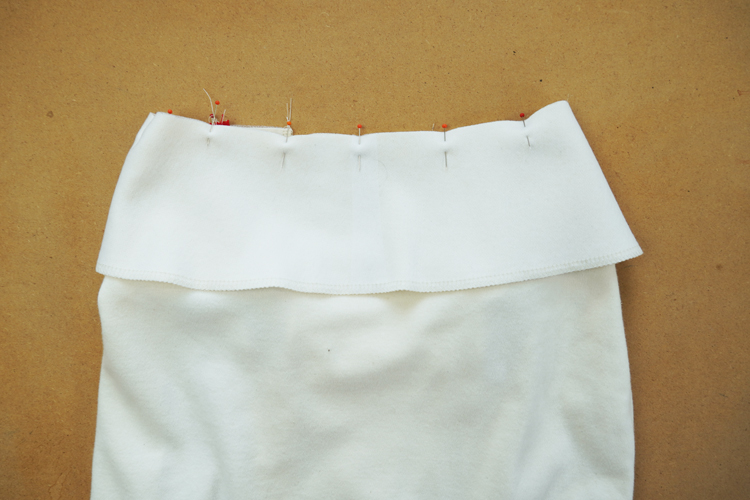
Topstitch around the waistline (sew through the skirt and facings).
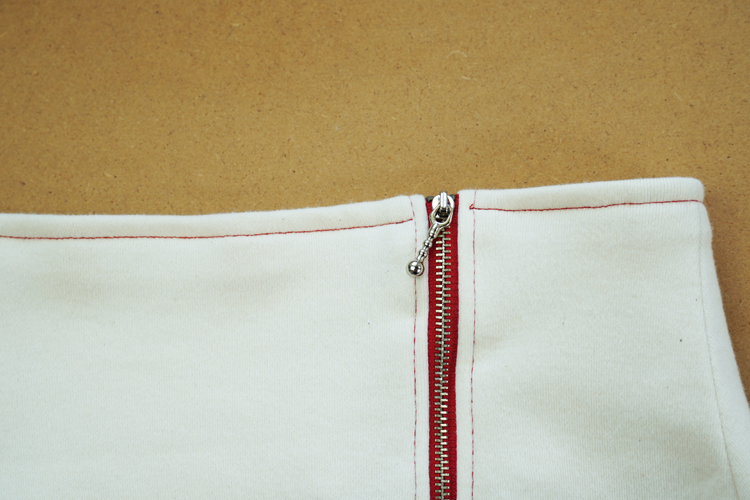
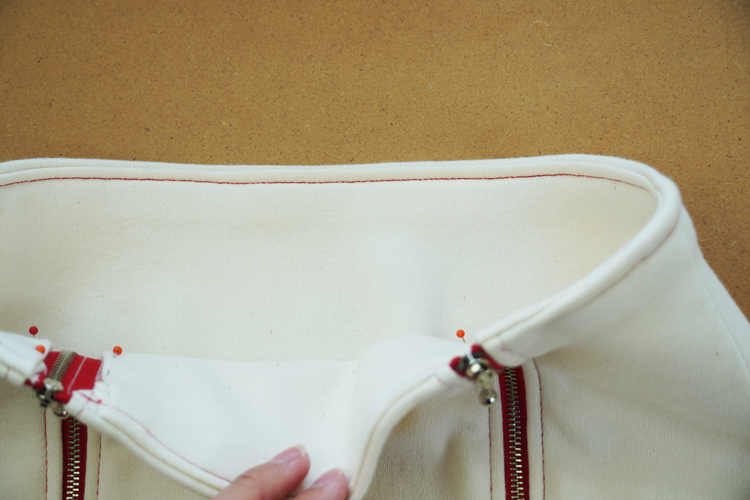
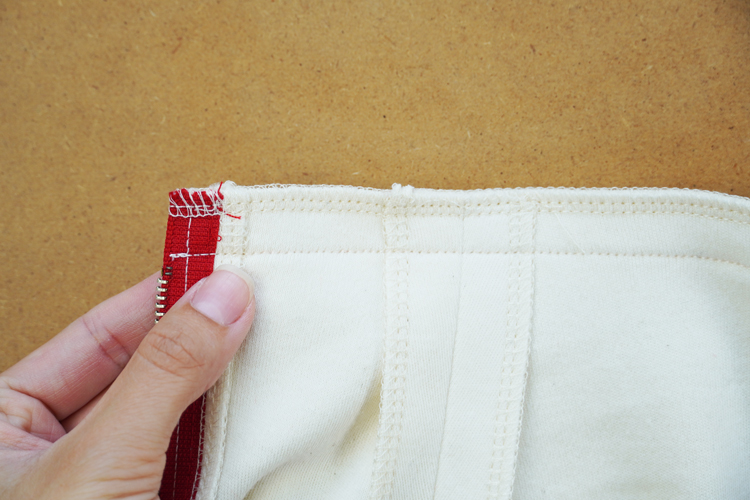
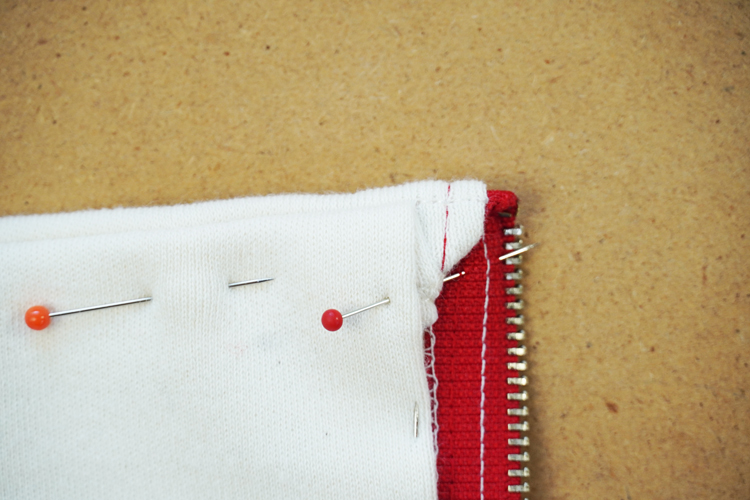
Attach the short sides of the facings to the zippers with a few small stitches. This helps to keep the facings in place.

Now you just need to sew the bottom hem of the skirt. Clean the bottom cutting edge.
Pull free ends of the thread chain under the loops when sewing on an overlock.

Then fold the edge to the inside of the skirt. I folded 3 centimeters of it (width of the bottom seam allowance).
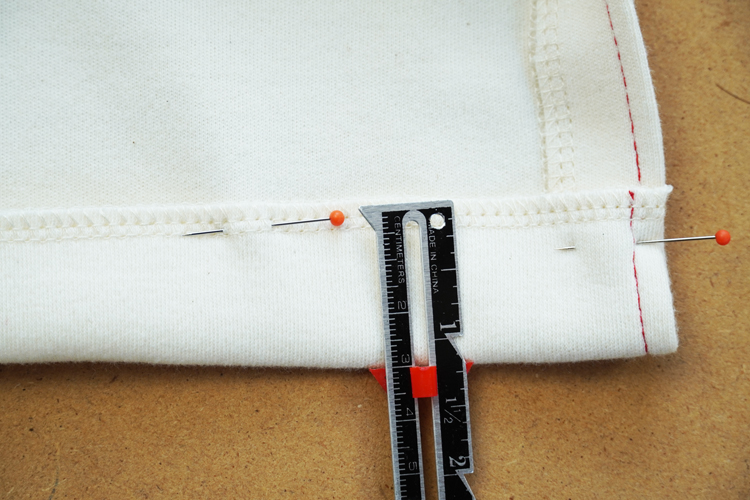
The individual parts must have the same length. This will allow you to sew a smooth bottom hem. Keep this in mind even if you have slits on your skirt.

Finally, simply sew the bottom hem with a straight stitch and the skirt will be finished…


You can get the skirt pattern itself here:
You can also buy whole pattern set TO THE CITY (skirt + T-shirt/Sweatshirt) here:
You can also get the new T-shirt pattern separately:

Did you like today's instructions and pattern? If so, share it with your friends and write me a comment below. Have a nice day, Petra
Did you know that there are FREE PATTERNS available on my blog?