


In this article, I will show you how to sew a simple soft bra without an underwire (bralette).
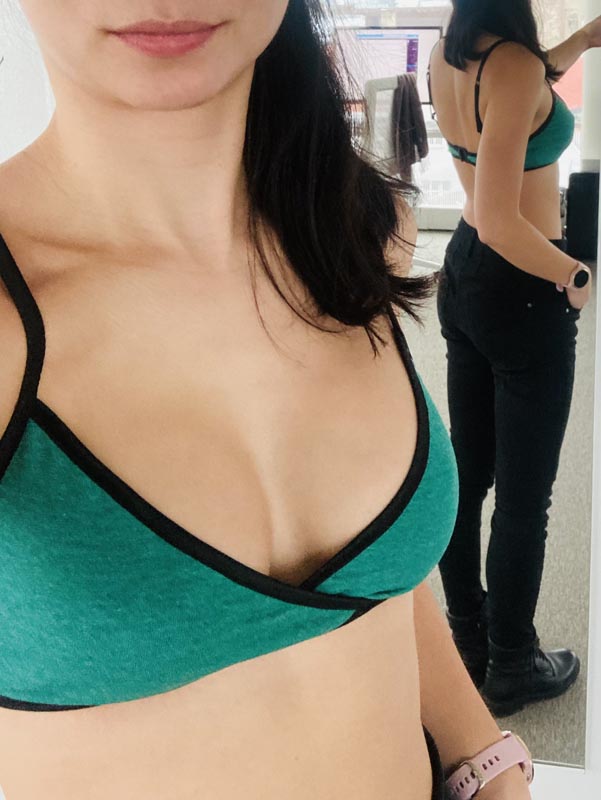
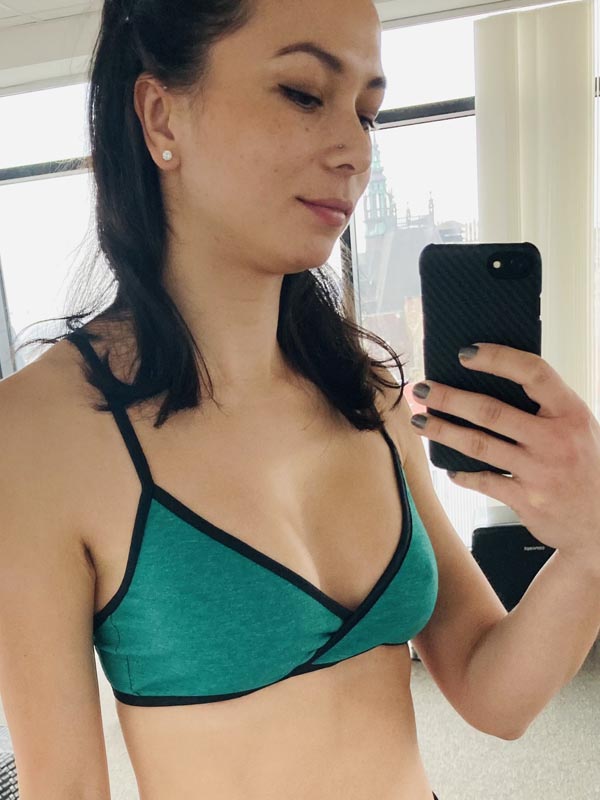
The pattern for women’s bralette (wireless bra) LOVELY is constructed in a professional program for clothing pattern development and it is available in 13 sizes (underbust 60–130 cm / 23 5/8”–51 1/8”, cup size B/C). The bra is low support.
The pattern
Recommended material
This pattern is designed for light and medium knits, such as cotton knits with elastane, sports knits, etc.
The required amount of material
- Fabric (140 cm / 55” wide):
- 30 cm / 12” for all sizes (you can also use various scraps)
- Hemming elastic band (2 cm / 3/4” wide):
- Sizes 60–90: 2.5 m (100”)
- Sizes 100-130: 3.5 m (140”)
- Shoulder straps (band, 1 cm / 0.4” wide):
- Sizes 60-90: 60 cm (23 5/8”)
- Sizes 100-130: 80 cm (31 1/2”)
- Strap ring - 2 pieces
- Shortener/Slider - 2 pieces
- Hook & eye clasp for bras
Sewing instructions
The photos in this article are embedded using mini-galleries. Simply click on the photo to enlarge it and get a better view of the details.
The whole bra is sewn on a regular sewing machine using elastic stitch. I used a three-step straight stitch, which is firm but slightly stretchy. I used an overlocker for the side seams to speed things up, but it's not necessary. You can find more tips about sewing elastic fabrics on a regular sewing machine in this article:
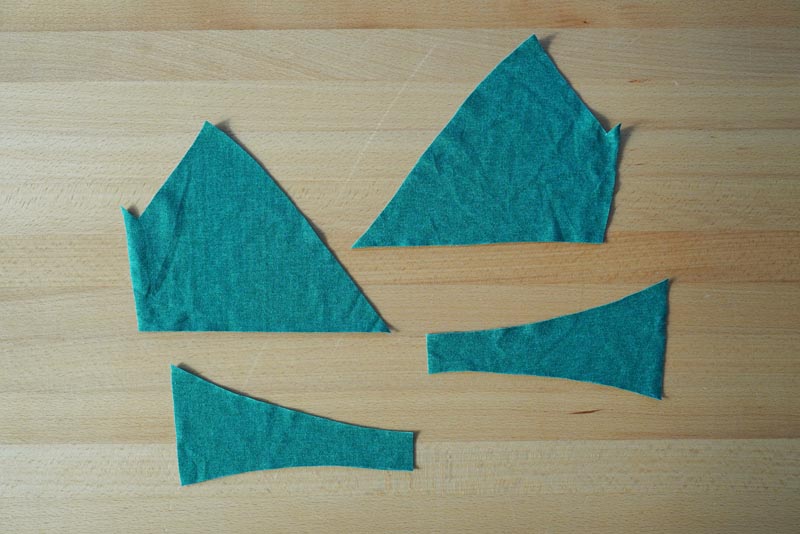
Pattern layout
Prepare:
- Front piece (2x)
- Back piece (2x)
Seam allowances are 1 cm / 0.4” wide (side seams & center of the back piece)
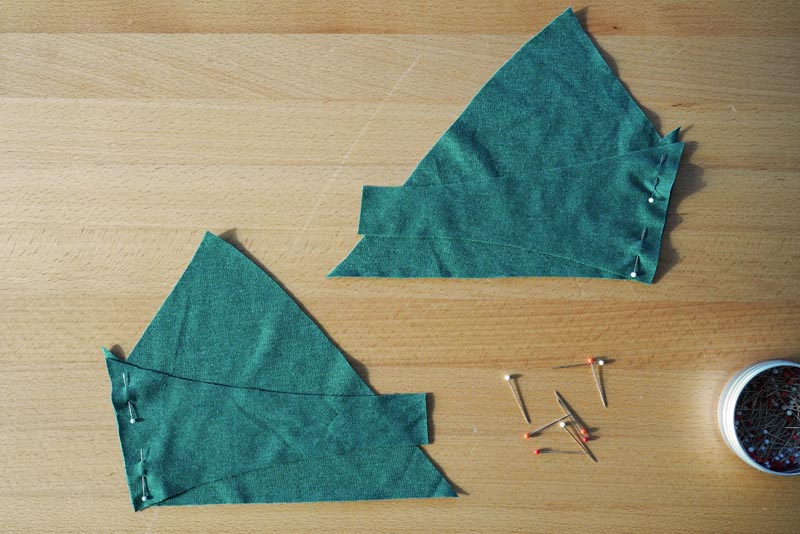
Side seams
Lay the front piece over the back piece (face side to face side) and pin the side seam. Sew the side seam (use elastic stitch). Work on the other side in the same way.
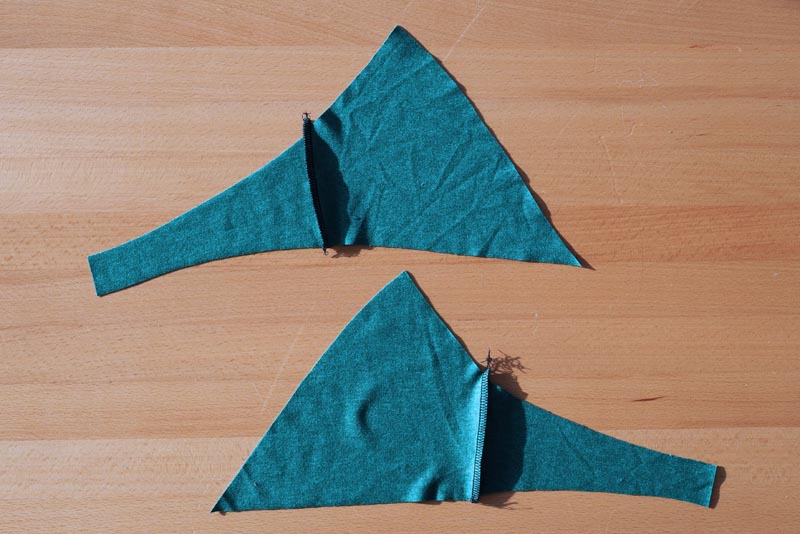
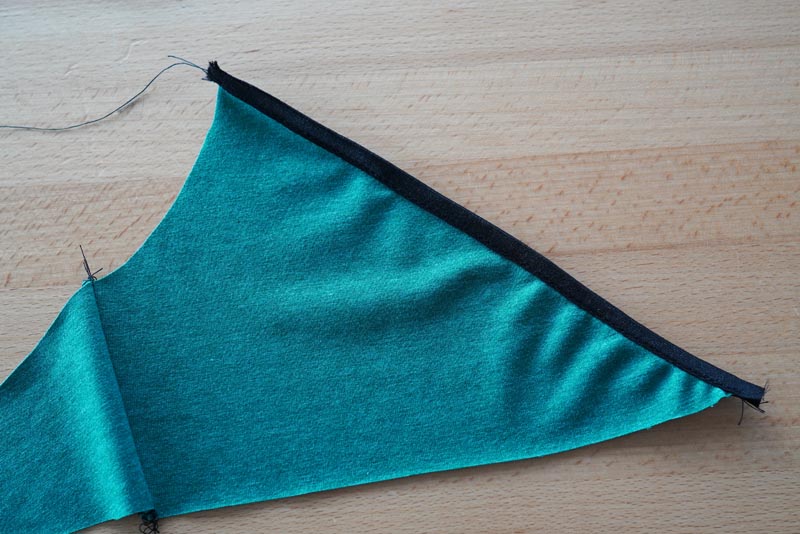
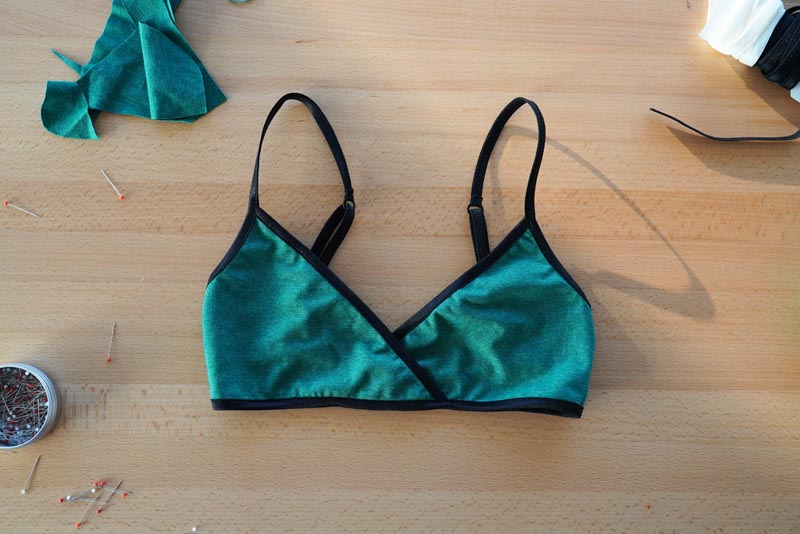
Hems - Cups (top part)
Hem upper edges of both cups. Stretch the band slightly when sewing.
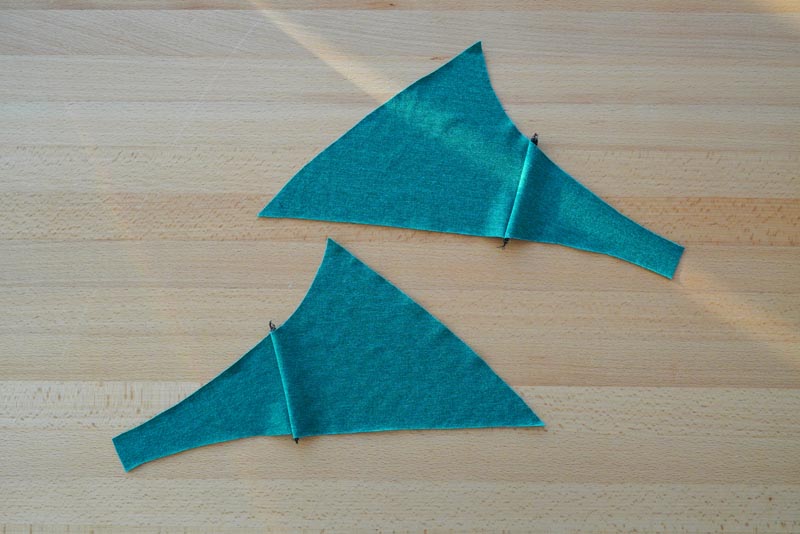
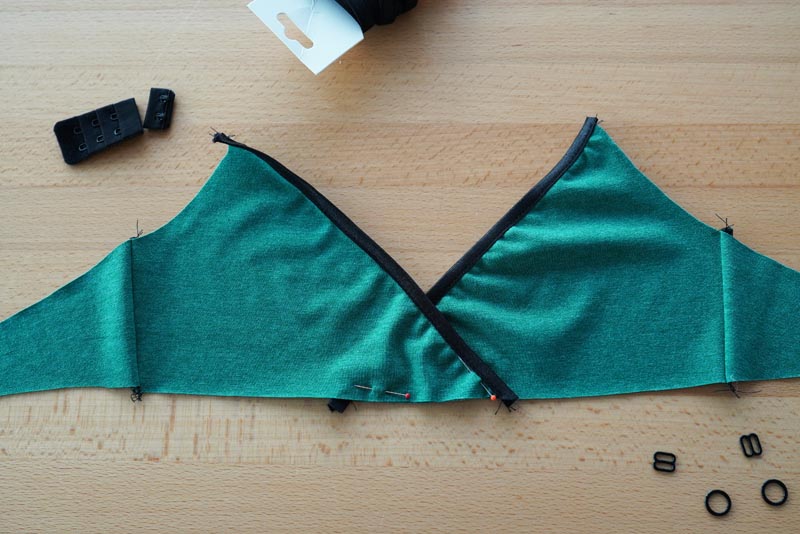
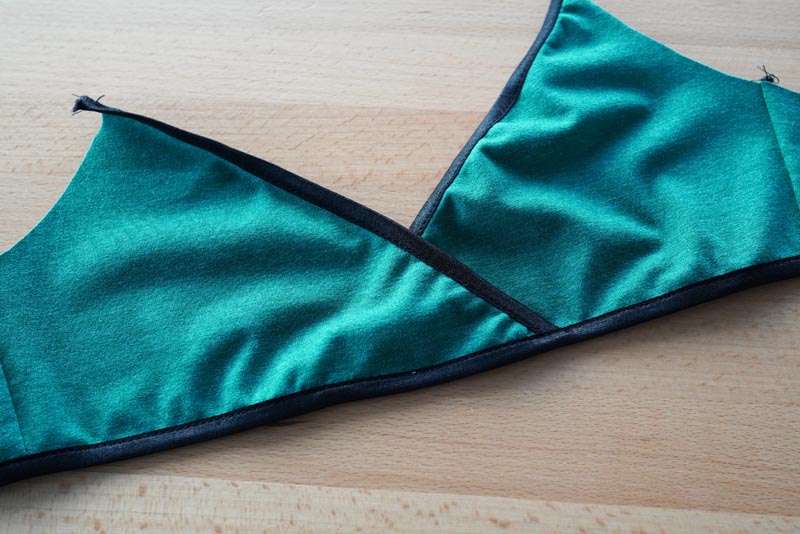
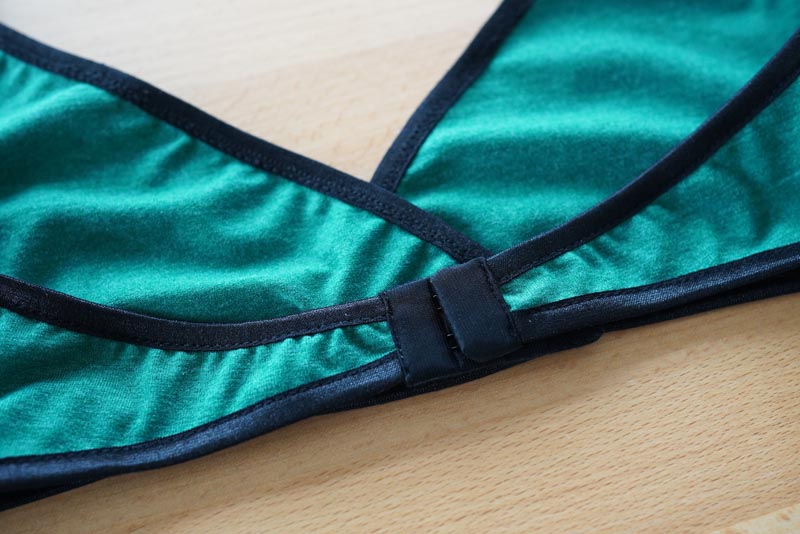
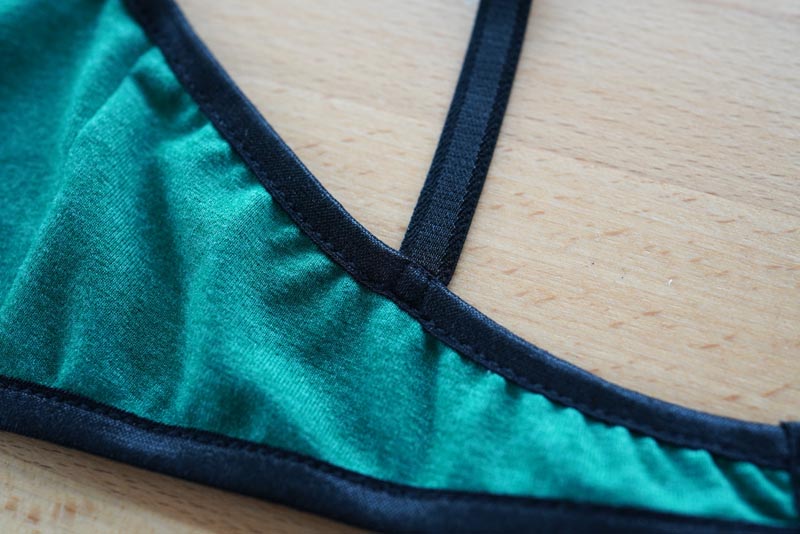
Place one of the cups on top of the other so that they overlap by about 6 cm (measured at the bottom edge of the cups). Pin/baste the overlap.
Now I recommend putting the bra on your body and assessing the distance between the cups. Some women have their breasts close together, others further apart. If your breasts are further apart, reduce the size of the overlap, if they are closer together, overlap the cups a bit more.

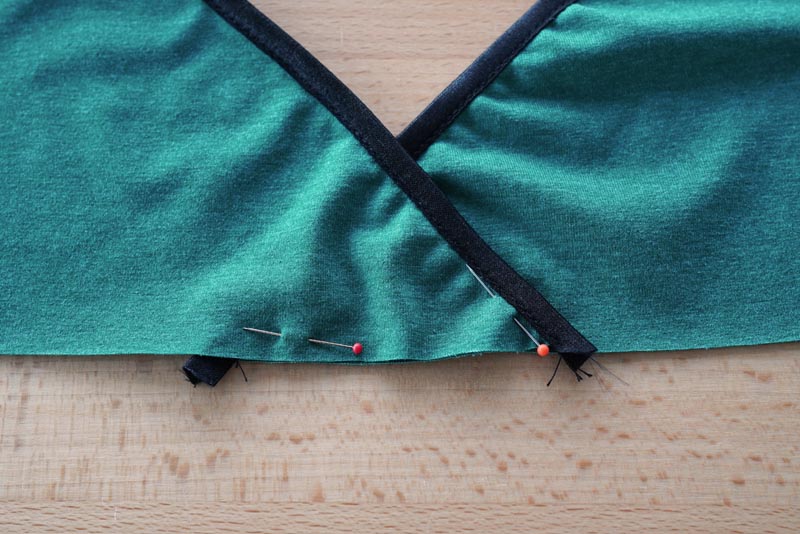
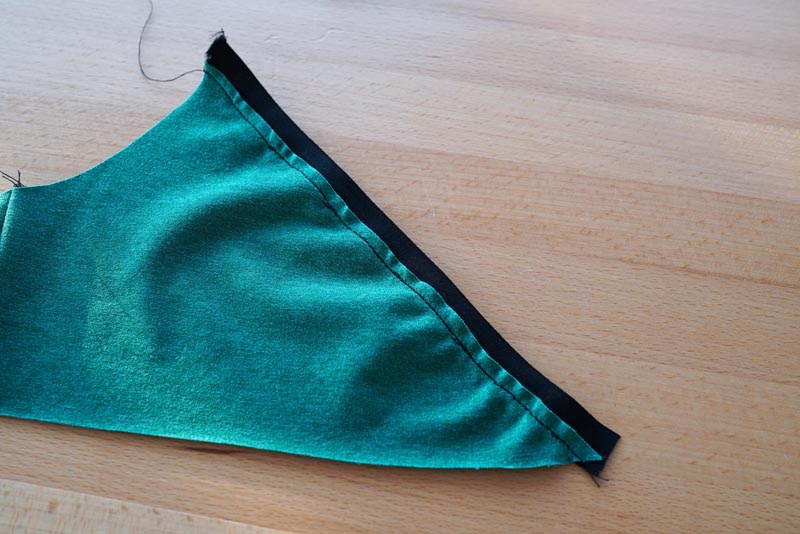
Hems - Cups (bottom)
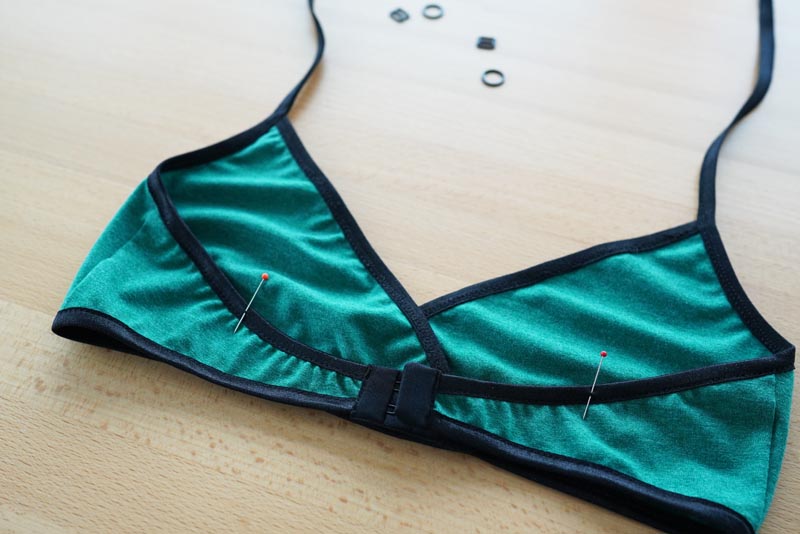
Now is the time to sew the bottom hem. Sew the bottom hem of your bra (this will also connect the two cups).
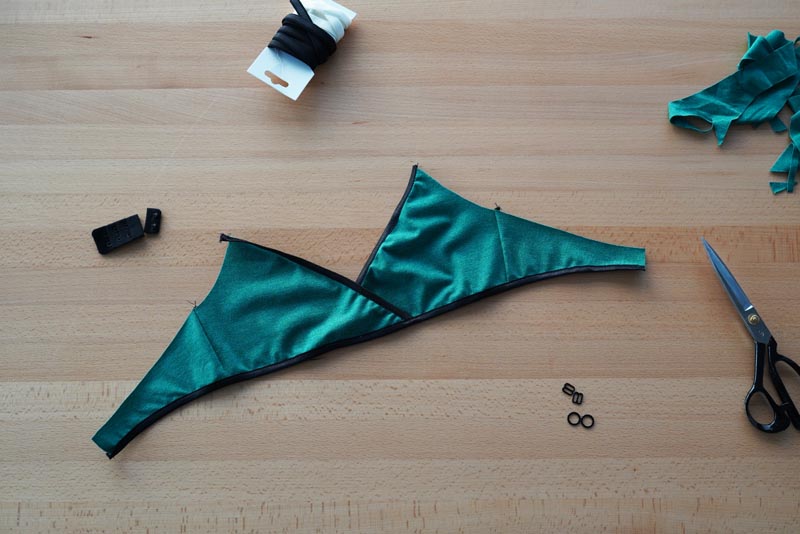
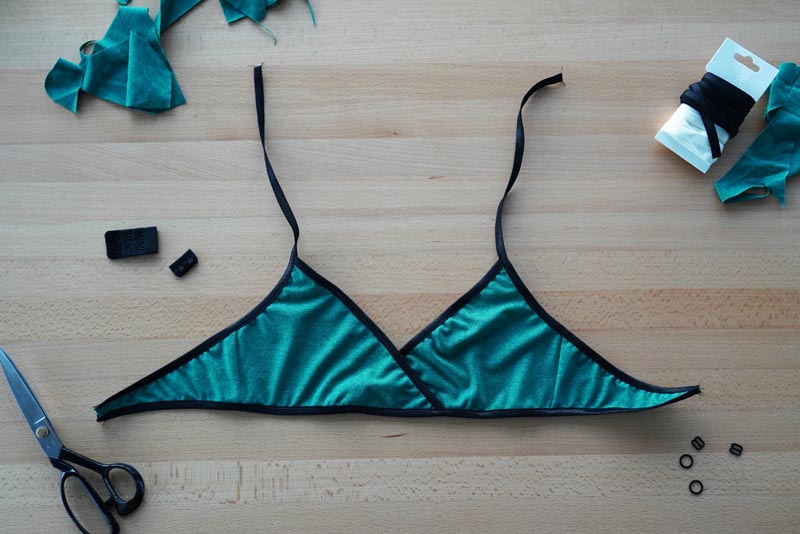
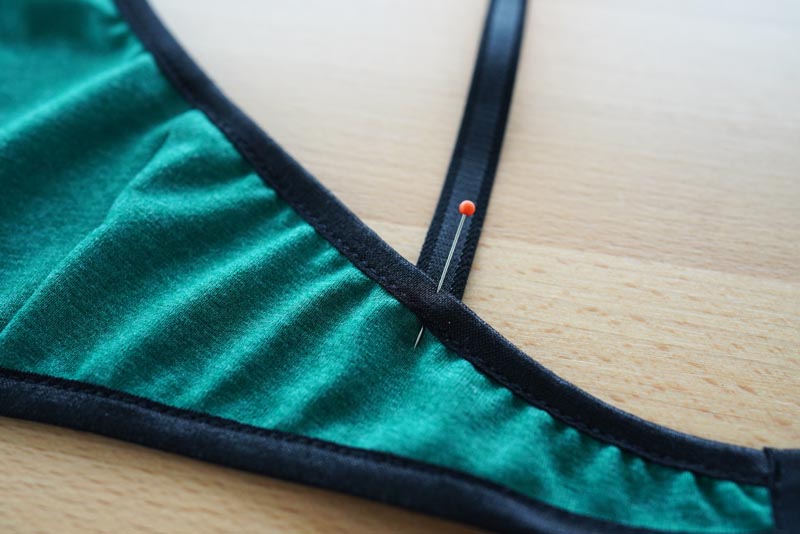
Hems & straps
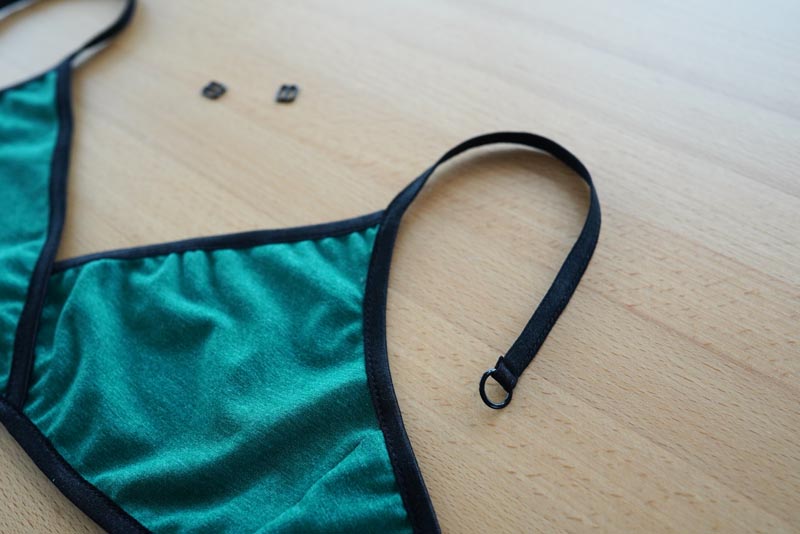
When sewing the last part of the hem, prepare the corners of the cups for sewing the shoulder straps in the following way. Start hemming at the edge of the back piece (where the hook & eye closure will be) and work towards the top of the cup. Don’t cut the end of the hem too close to the bra - leave about 25 cm / 10” (for sizes up to 90 cm / 35 1/2” underbust) to 35 cm / 14” (for sizes over 90 cm / 35 1/2” underbust) of the hem hanging freely from the top corner of the cup.
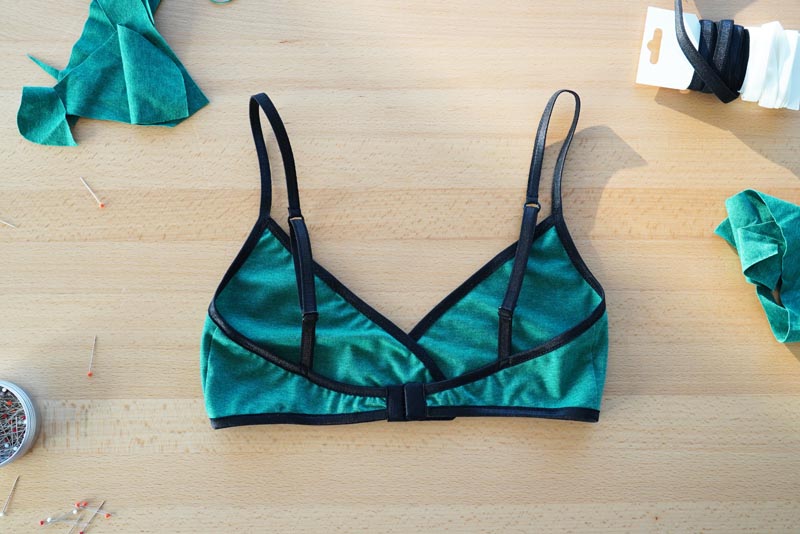
Clasp
Slide the bra clasp (the part with eyes) on the left back piece of the bra (the right side when you spread the bra on the table).
Slide the other part of the bra clasp (with hooks) onto the second back piece.
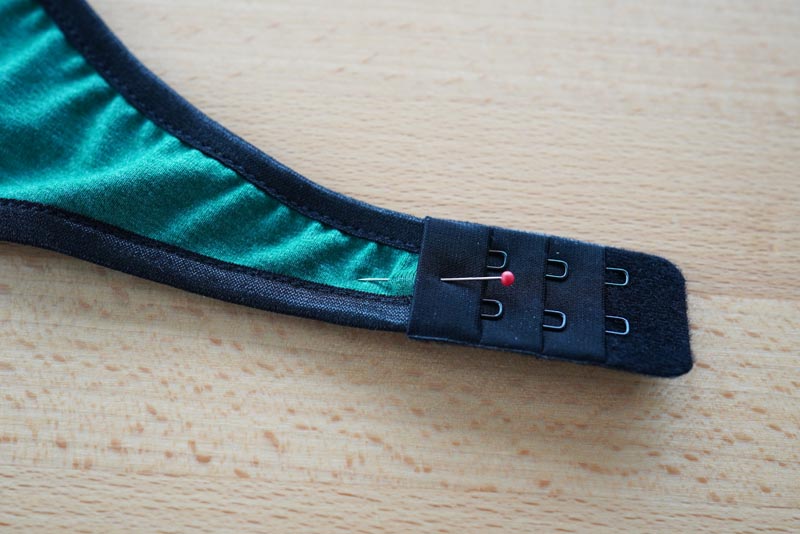
Sew both parts of the clasp firmly to the bra.
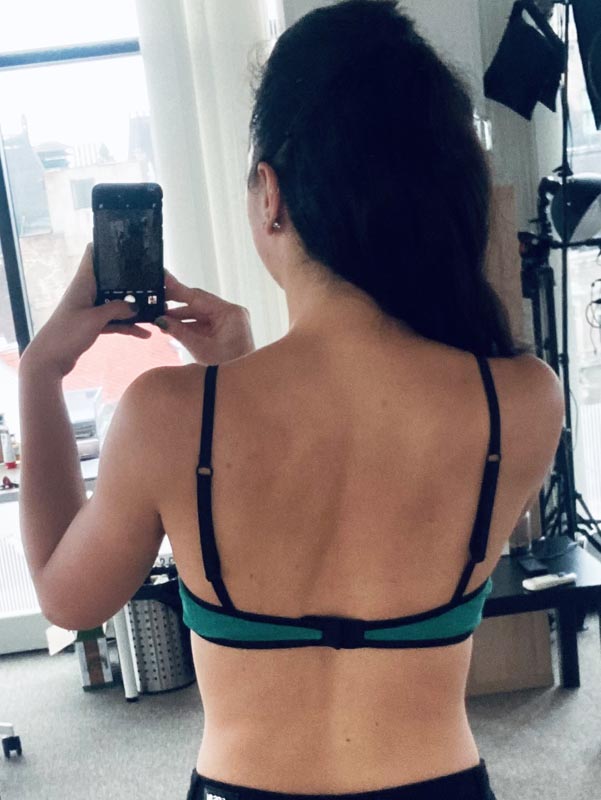
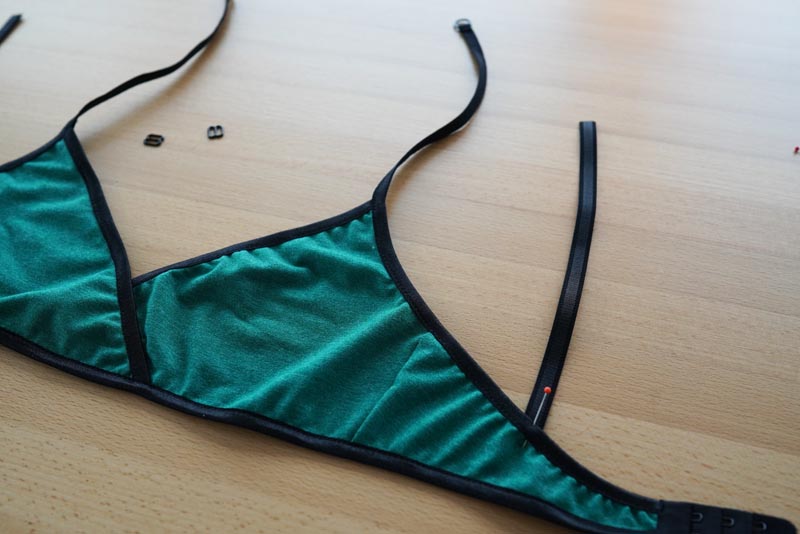
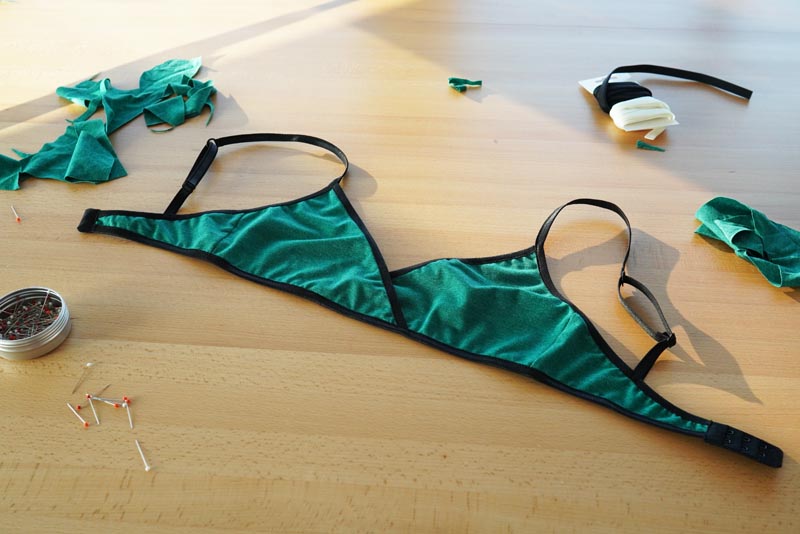
Shoulder straps
Now find the midpoints of the two back pieces and mark them as shown below. You can also determine the ideal placement of the straps by looking for a bra that fits you well.
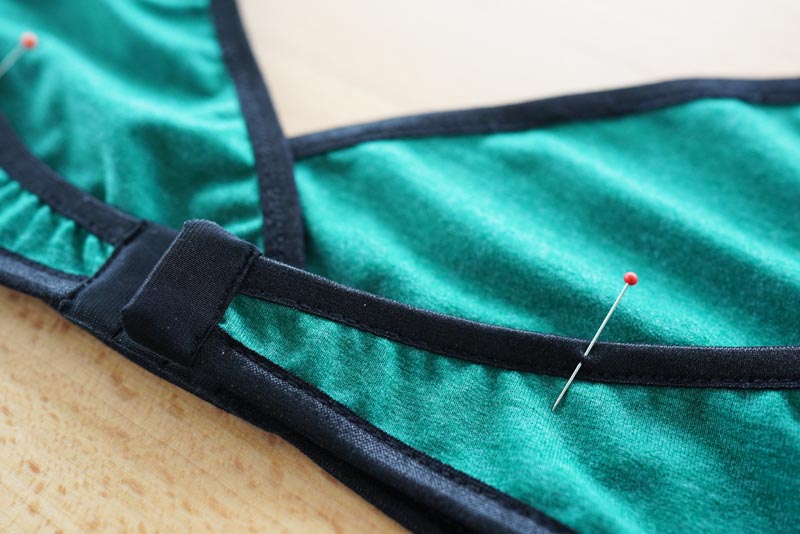
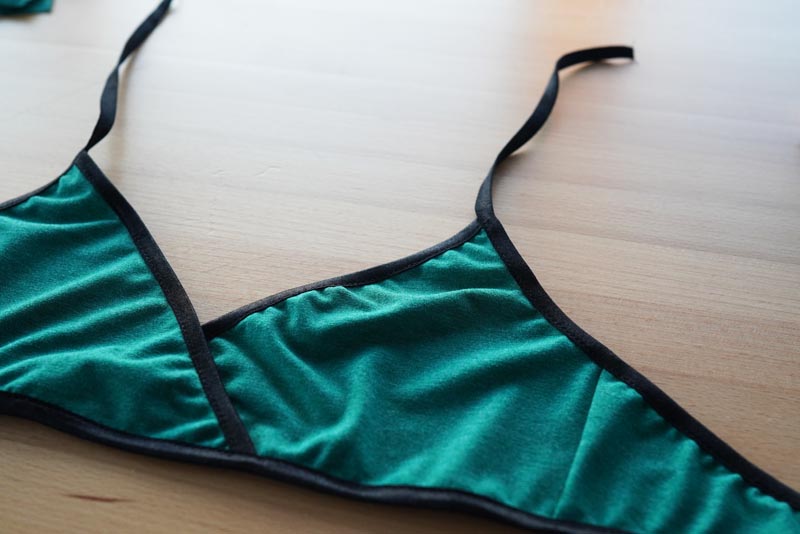
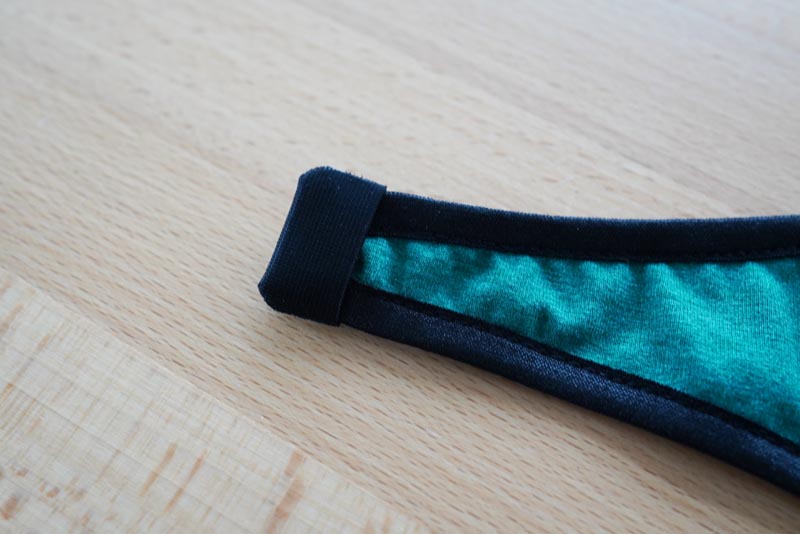
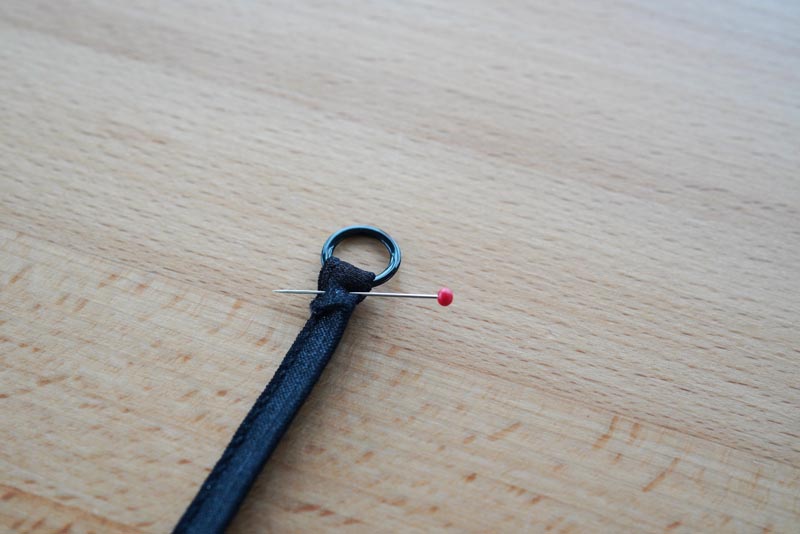
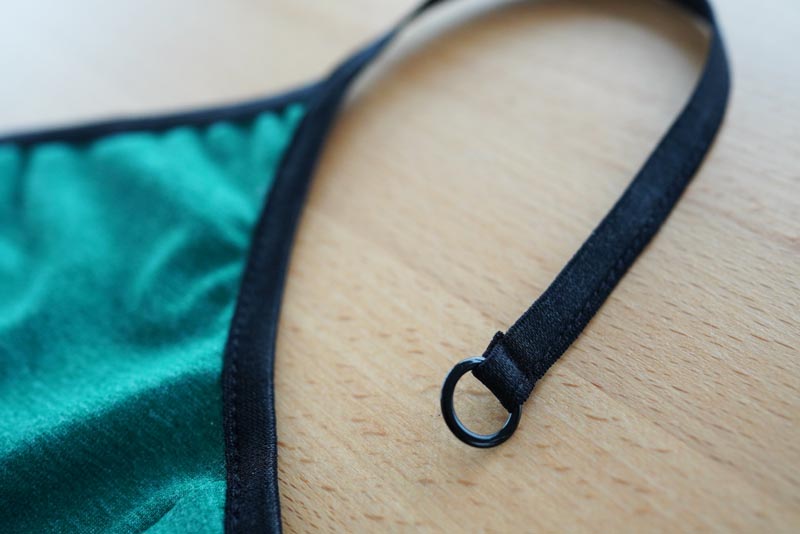
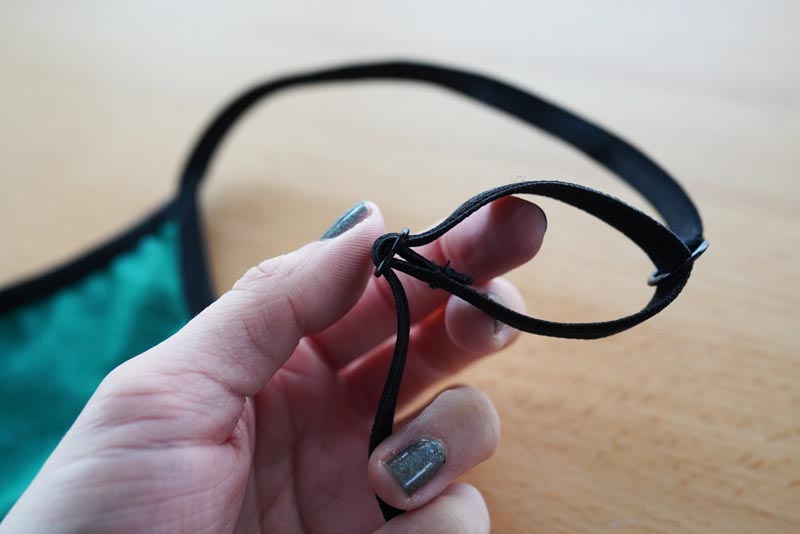
Thread the hems (which hang from the cups) through the strap rings. Fold the edges of the hems about 1.5 cm / 3/4" and topstitch them to attach the strap rings.
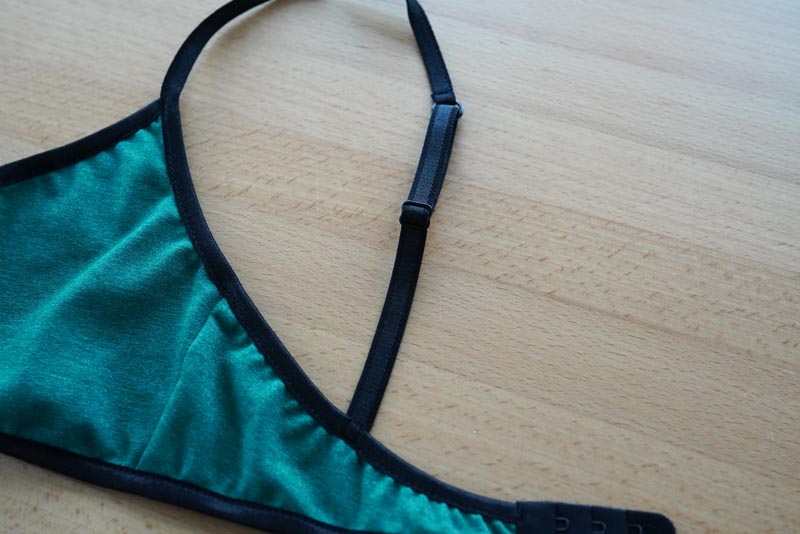
Pin the shoulder straps band to the back pieces. I used 25 cm / 10” long pieces (size 65). I recommend measuring the appropriate length on a bra that fits you. Don't forget that the strap will be threaded through to the shortener/slider twice.
Sew the straps to the bra and thread them through their shorteners/sliders
(watch this video: https://youtu.be/BNz319pkC6g)
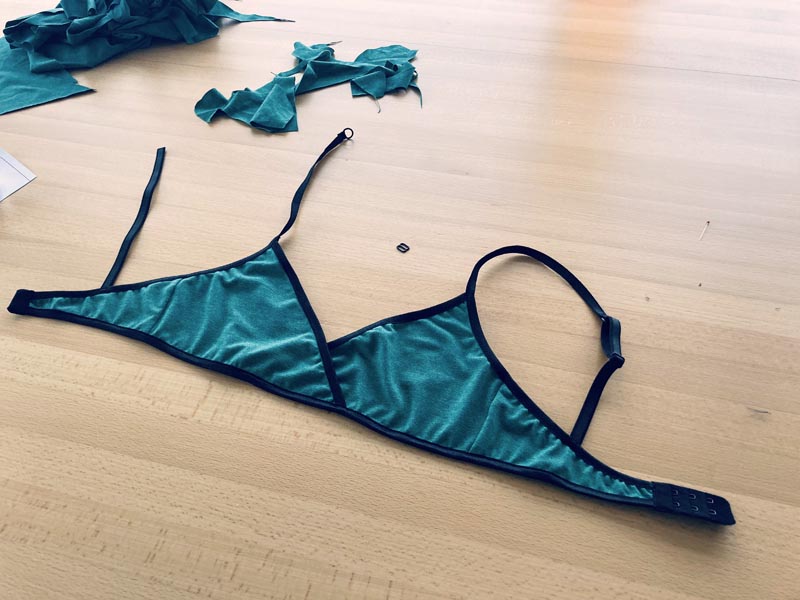
Aaaand it’s done! Your new bra is ready!
The pattern
Don't forget to share your joy with others!
Do you like this article? If so, share it with your friends and tell me about it in the comments section below. I will be glad for any feedback! ♥
PS: Did you know that there are other FREE PATTERNS available on my blog?