


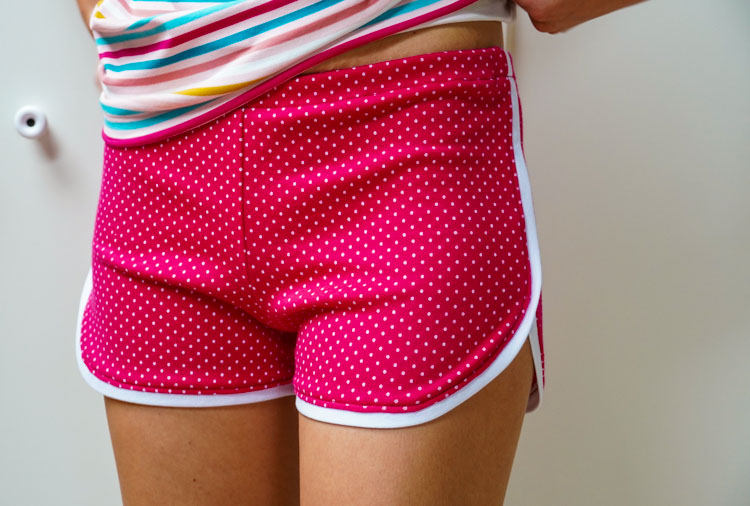
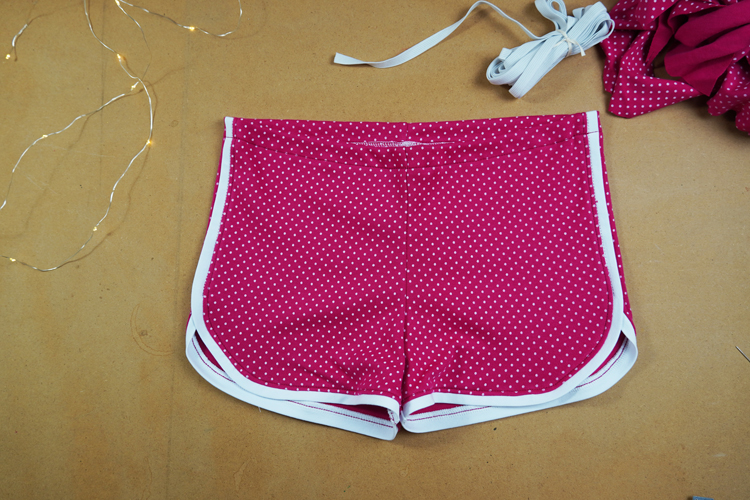
I’ve already introduced my new pattern for women’s shorts ROSES and sewing instructions for the version with facing. Today, we will look at how to sew these shorts with classic hems.
The pattern
You can get the pattern for women's short shorts ROSES here:
This pattern is also available as part of women's leisure set ROSES:
Recommended material
I recommend using single or double knit of medium thickness (about 200 g/m2). You can also use thinner uncombed laid-in knit (with elastane!), sports knit, premium functional knit, etc. You also need about 2.5 – 3 cm (1 - 1 1/4") wide elastic waistband.
My shorts are made from knit I bought at Dumlatek.cz, this one: Cotton knit – Light pink.
Facing can be made from the same fabric as the rest of the shorts, but you can also use lining fabric or different (thin) fabric. I used thin lining fabric (which is not elastic) and it worked out fine.
Sewing instructions
Suggestions
I recommend reading this article (if you are going to use a regular sewing machine):
Sewing elastic fabrics on a regular sewing machine – 4 steps to success
If you are interested in how to sew a version of shorts with facing, take a look at this article:

Pattern layout
Prepare:
- 2x back piece
- 2x front piece
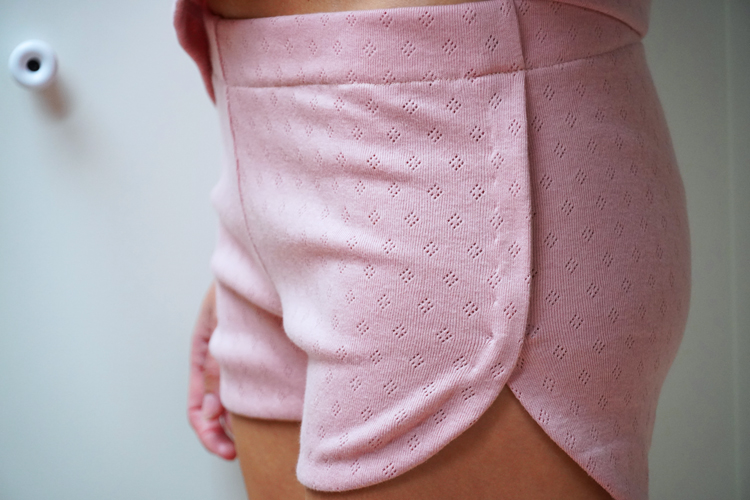
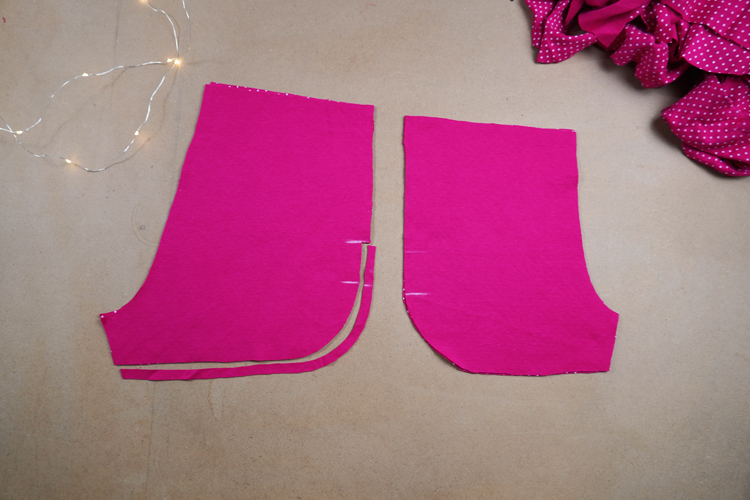
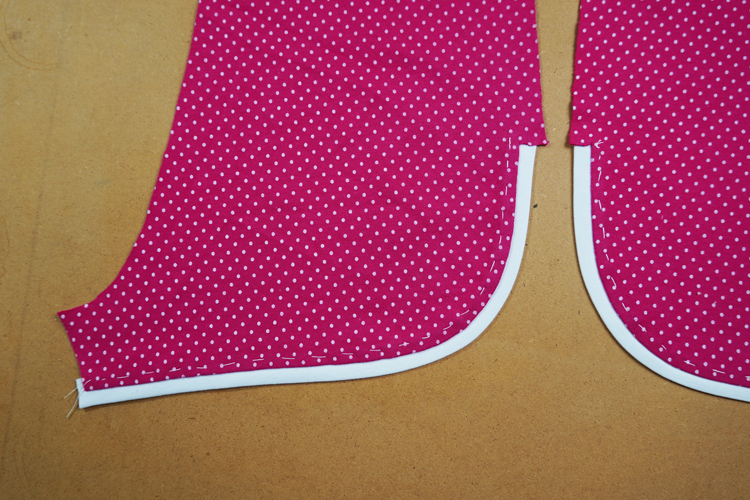
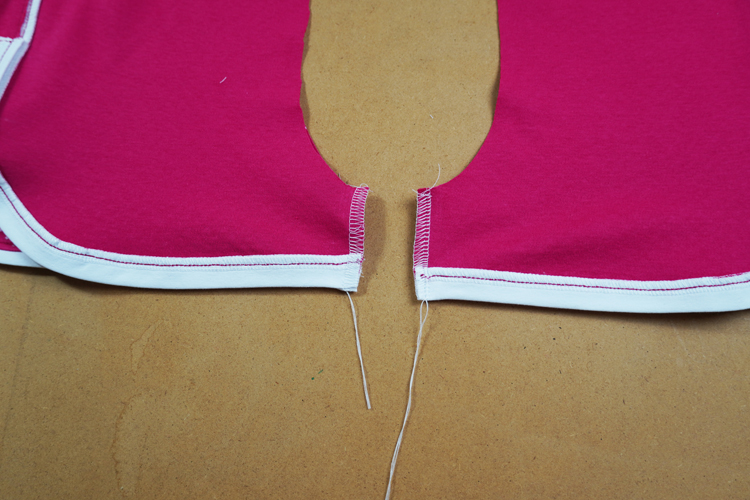
Take the front pieces and cut off the seam allowances for the side seams and bottom edges. Then take the back pieces and cut off the seam allowances of the bottom edges and partially (up to the mark) seam allowances of the side seams.
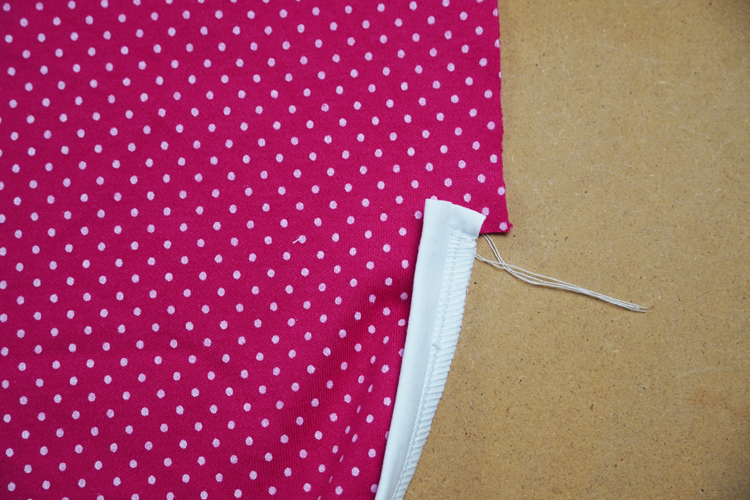
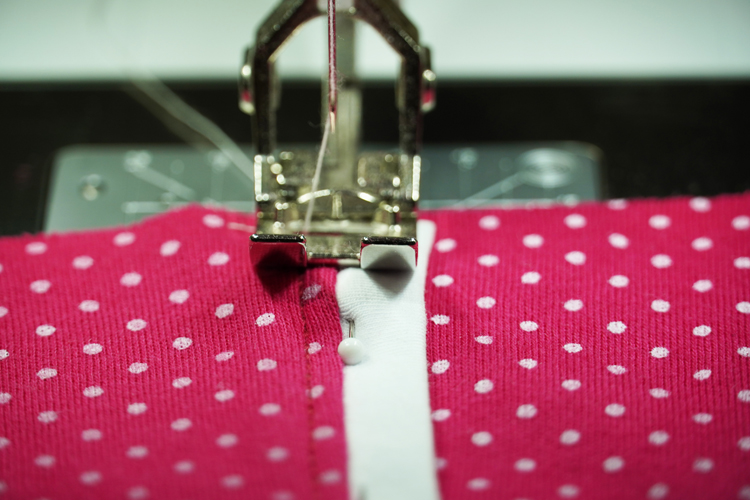
Sew the hems to the back pieces (to edges where seam allowances used to be). Use a 3.5 cm (1 3/8") wide knit strip folded in half (lengthwise). Don’t stretch the knit strip when sewing it.
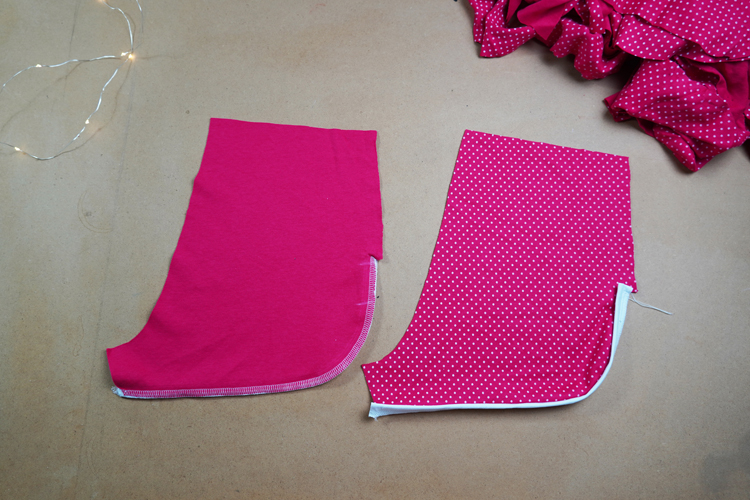
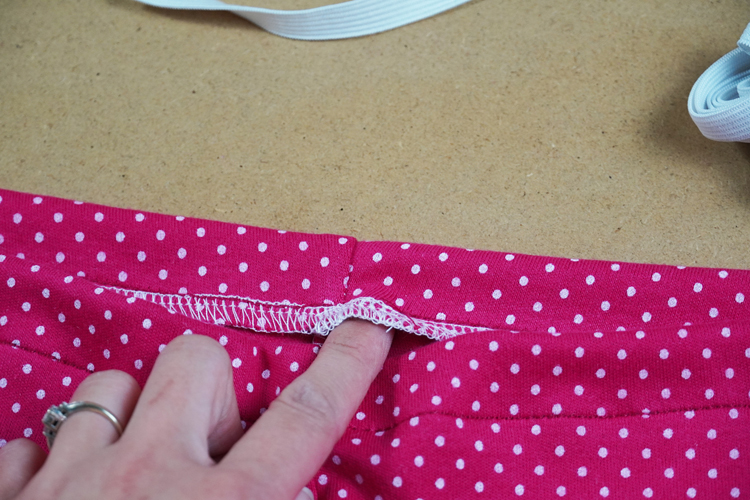
Pull the free ends of the thread chain under the loops (if you are using your overlock).
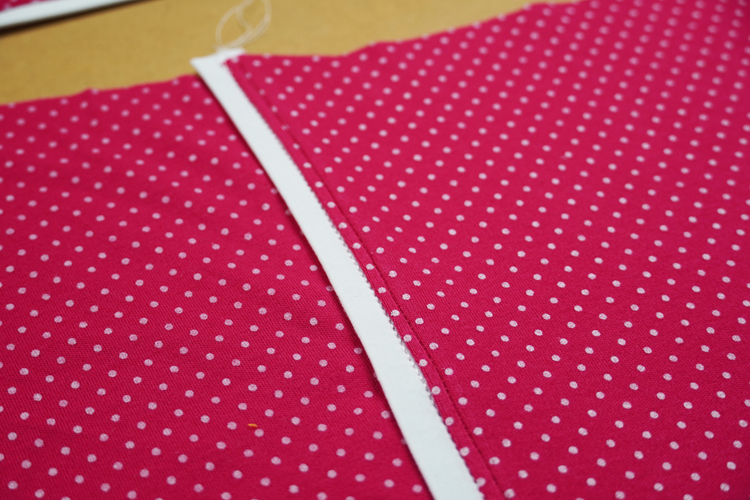
Cut the back pieces a little bit so you can straighten the hems.
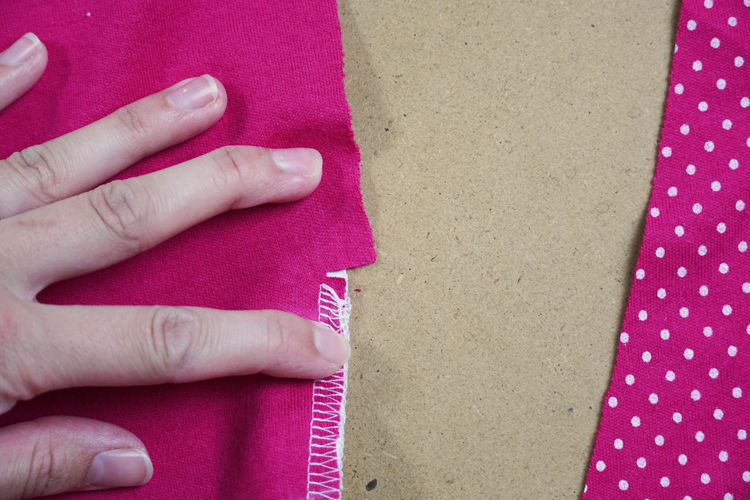
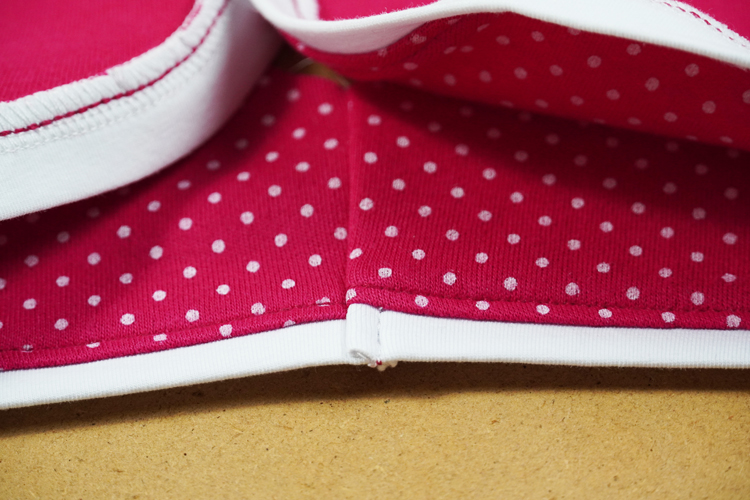
Iron the hems and baste (temporarily stitch) the seam allowances to the reverse side to keep the hems in this position.
Hem both front pieces (bottom edges and side seams) and baste the seam allowances as before.
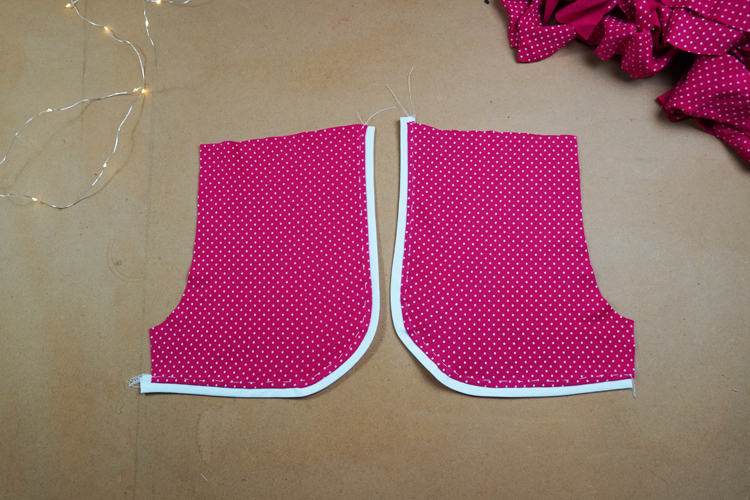

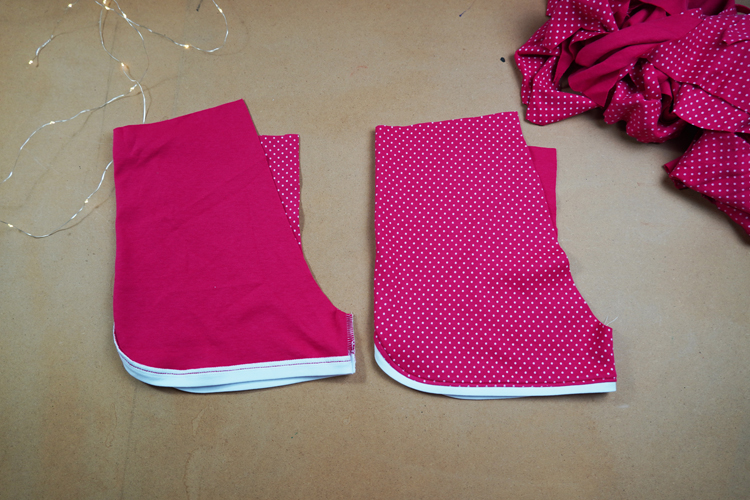
Topstitch the edges (on the back and front parts) to fix the hems in place.
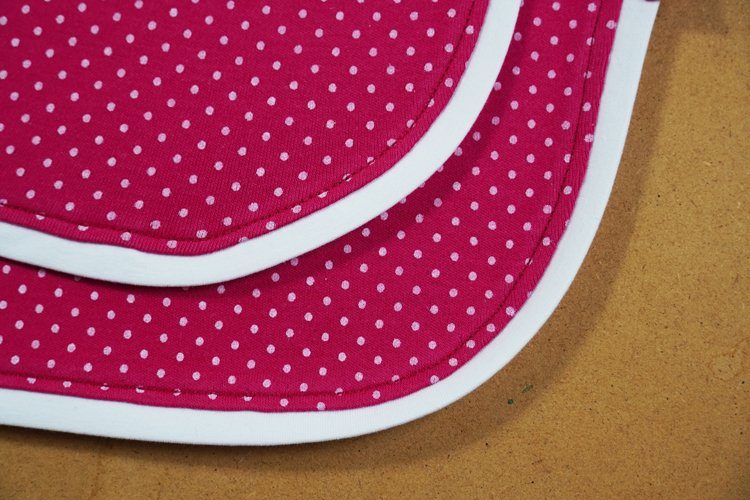
On the back pieces - where the hem turns into a side seam - topstitch like this:
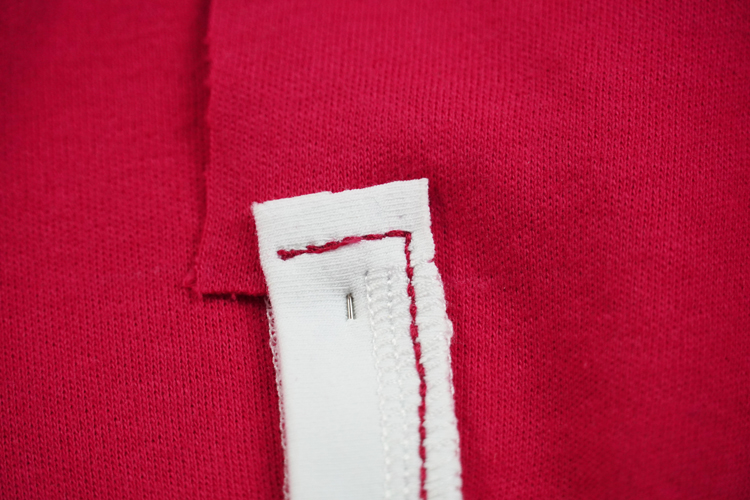
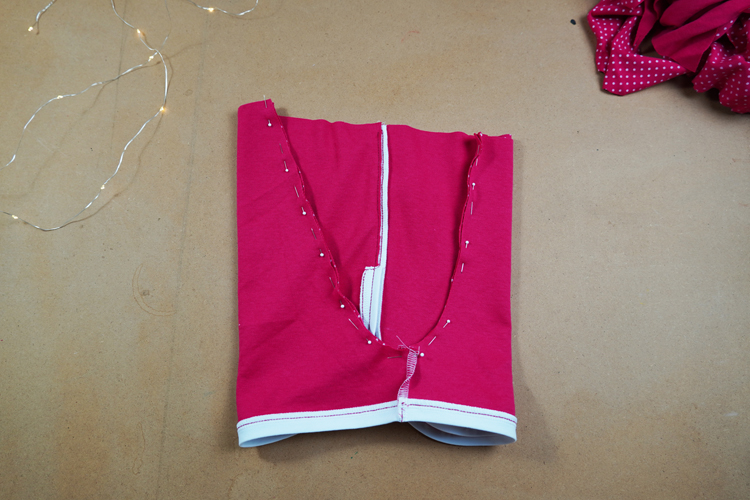
Mark side seams of front and back pieces in the area where they cross each other (these points are indicated in the paper pattern).
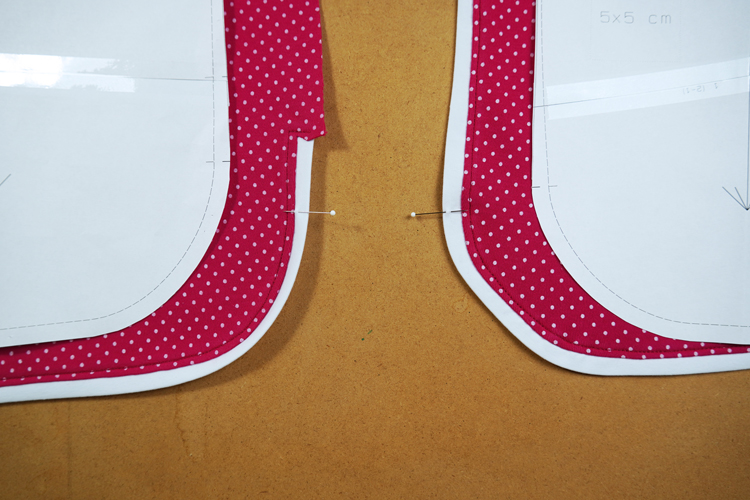
Slide the front piece over the edge of the back piece. Use your marks to align the pieces correctly.

Pin the side seam.
The cutting edge of the back piece should be aligned with the edge of the hem of the front piece (reverse side view).
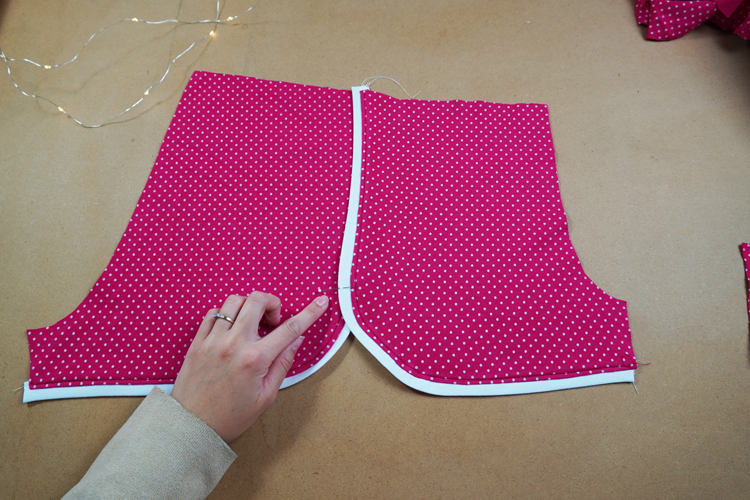
Sew the side seam - sew on the face side of the shorts, exactly along the line where the hem connects with the front piece. I recommend using a thread in the color of your hem.
Finished side seam:

Cut off the excess seam allowance.
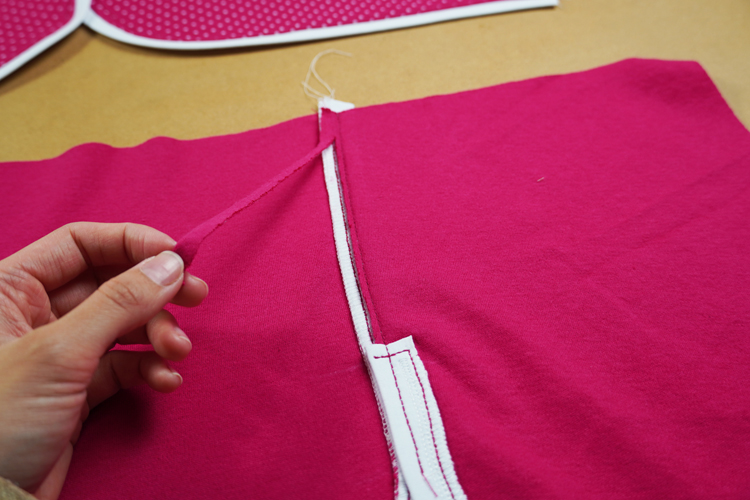
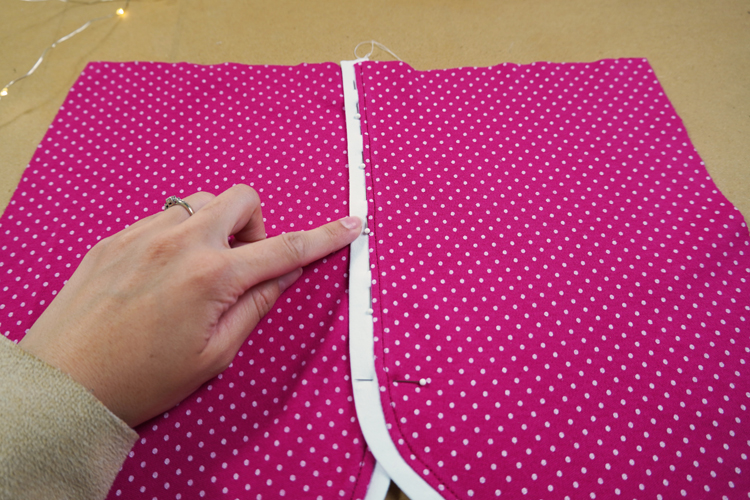
Sew the other side seam in the same way and fold both legs (reverse sides out) so you can pin the instep seams.

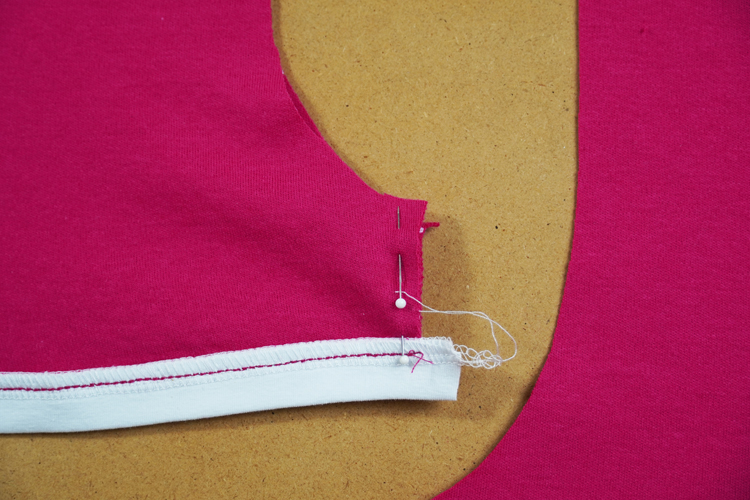
Sew the instep seams. Pull free ends of the threads chain under the loops (if you are using your overlock machine).
Topstitch the hem to attach the seam allowances and flatten the bottom end of the instep seam.
Turn one of the legs face side out...
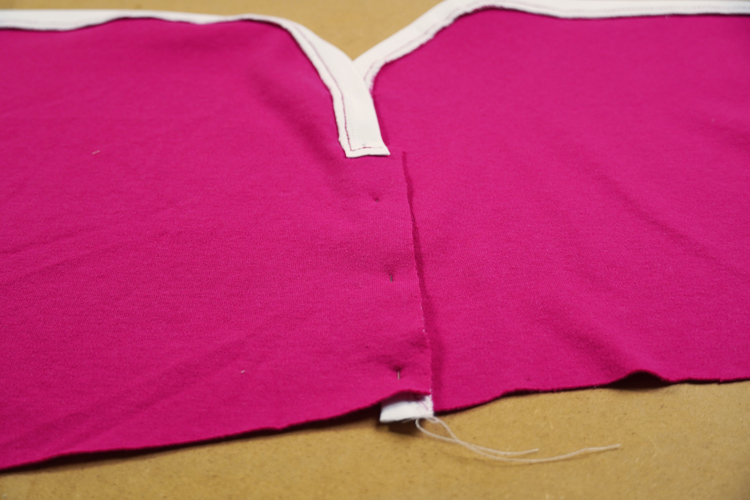
...and insert it into the other leg (so that the pieces are face side to face side). Pin both (front & back) crotch seams.
Fold the seam allowances of the two instep seams in opposite directions to make the connection flat.
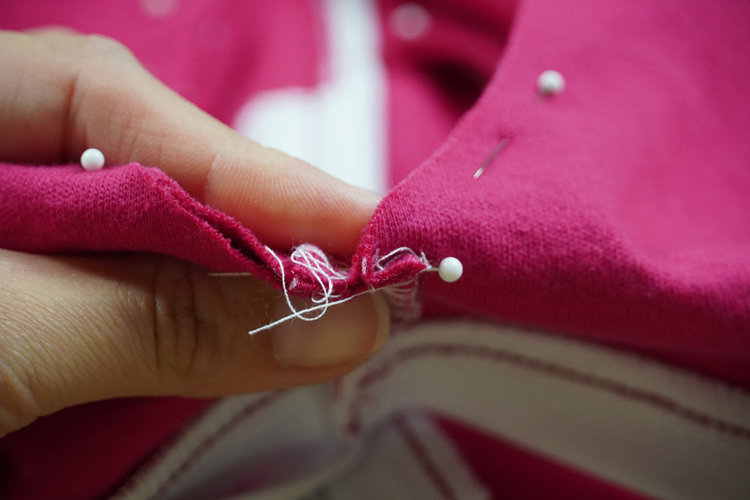
Sew front and back crotch seam in one go.
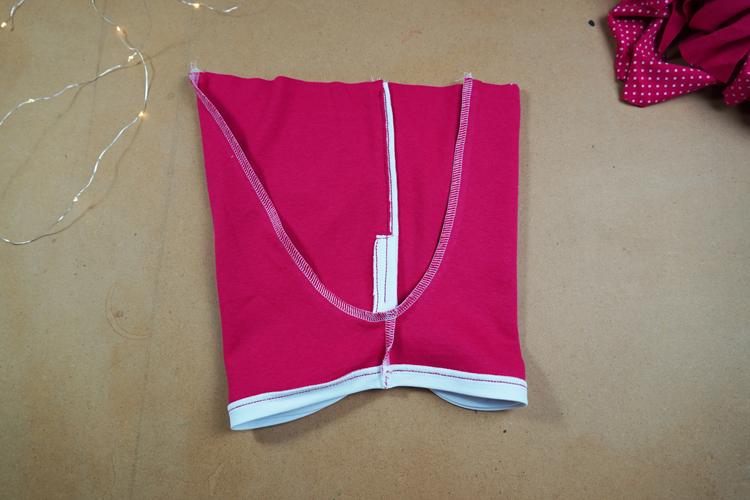
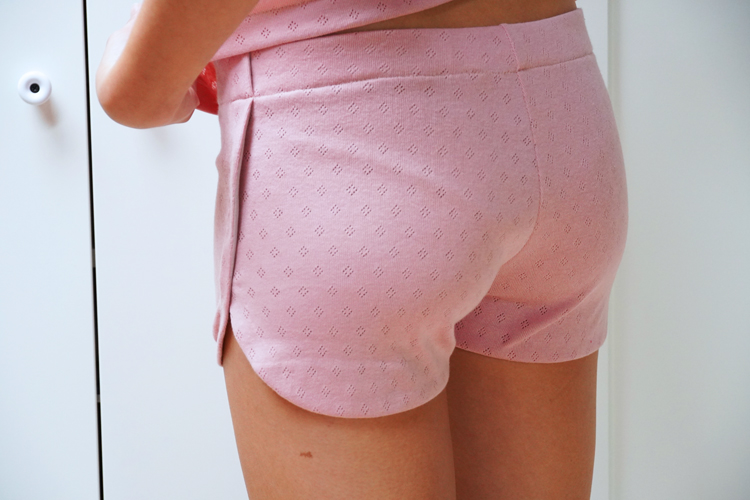
Turn the shorts face side out and clean the waistline.
Fold the waistline to the inside of the shorts and pin it. The size of the folded part depends on the width of your elastic band...
...fold the top 3.5 cm (1 3/8") if you are using a 2.5 cm (1") wide waistband and 4 cm (1 5/8") for 3 cm (1 1/4") wide band.
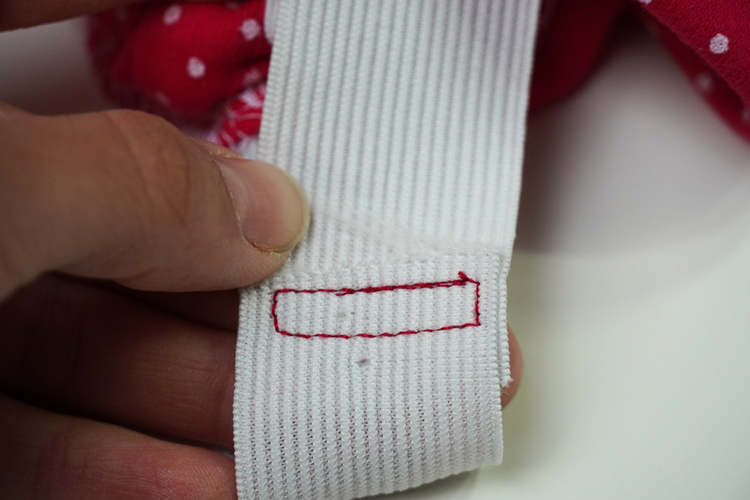
Topstitch the waistband - use some kind of an elastic stitch and sew 3 cm below the fold if you folded the waistline by 3.5 cm (1 1/4") or 3.5 cm (1 3/8") below if you folded it by 4 cm (1 5/8").
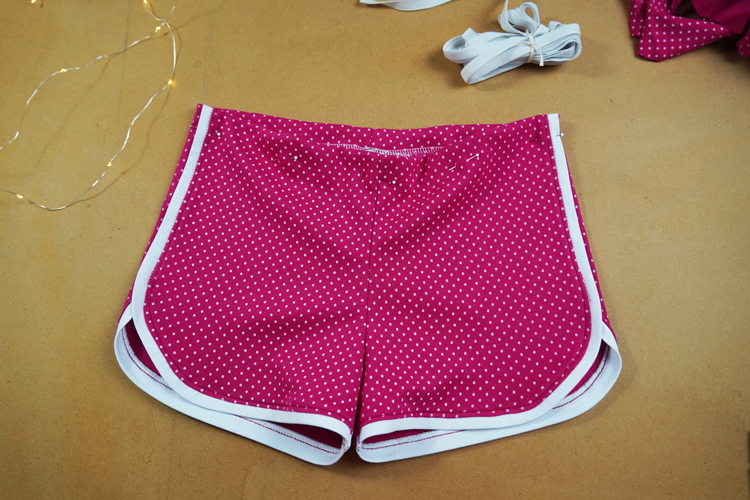
Don’t forget to leave a small opening so you can insert the waistband later. I usually leave this opening somewhere near the back crotch seam. Put the shorts on and determine the correct length of the waistband by winding it around yourself. Make it so that it is neither loose nor too tight. Cut the waistband and insert it through the gap.
Sew ends of the waistband flat. Be careful not to twist the waistband when inserting and sewing it You can now close the gap in the waist circumference.
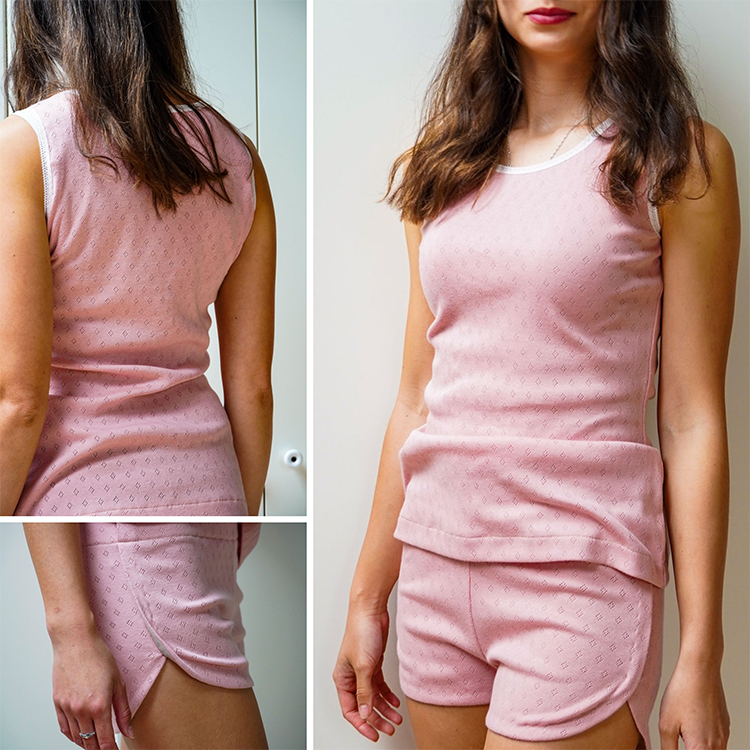
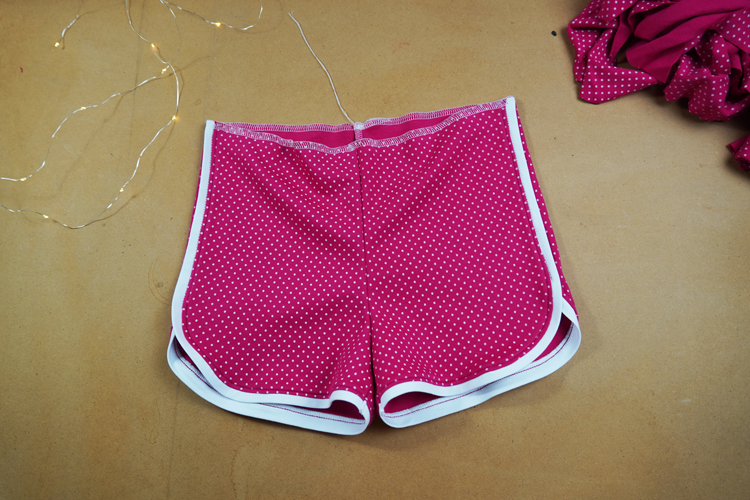
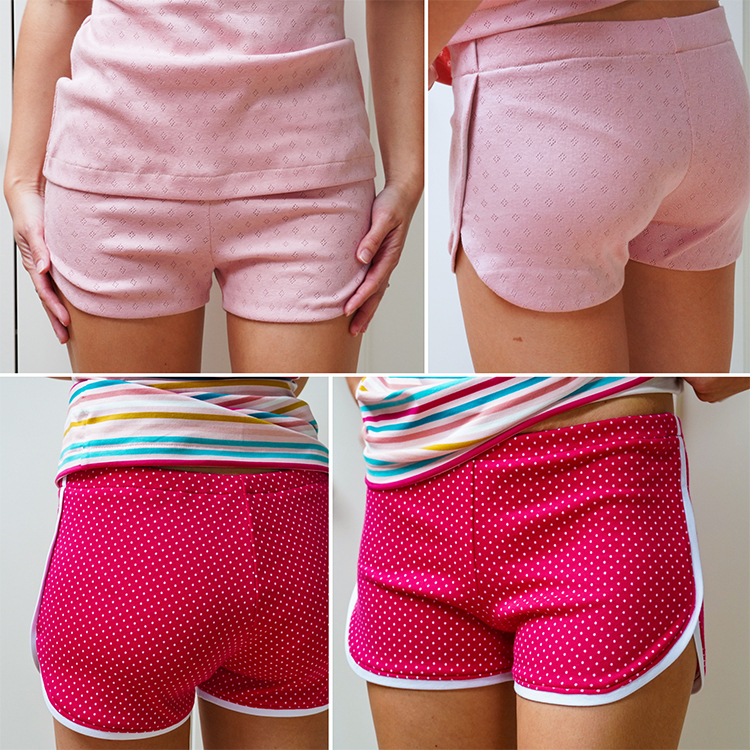
Aaaand that's it - your shorts are ready! :)
What do you think of this pattern? Are you going to try it?
You can take a closer look here:
This pattern is also available as part of women's leisure set ROSES:
Have a lovely day, Petra
Don't forget to share your joy with others!
Do you like this article? If so, share it with your friends and tell me about it in the comments section below. I will be glad for any feedback! ♥
PS: Did you know that there are FREE PATTERNS available on my blog?